Vertical offset build

Quick advice:
- direct cooking on charcoal or wood, 8-10 inches is perfect
- on the inside of your door to the cooking chamber, add a diverter, maybe 1" flat bar set at 45*-60* so that moisture/condensation that builds up on the inside is diverted into the bottom drip pan rather than run out the door seam.
This cooker looks GREAT!

Excellent idea! I was going to add a stiffening rib to the top and bottom of the door. I never thought about making do double duty as a diverter. Thanks Fisk!
 
Nice work!

I don't see how a vertical smoker can be beat when it comes to cooking space vs. the foot print it takes up on a patio!
 
Very impressive, great to have those resources available to you and more importantly the skill set to go with it! Nice job.
 
Very nice build! And fast.
I'd suggest you add tabs above each rack location so you can pull grates out most of the way and they will stay suspended there and not fall. If that makes sense.
With that nice shop, I'm surprised you didn't brake more of your corners instead of welding. Of course you'd have to change the math.
If you are going to move it around alot. You will probably want larger wheels.
Are you making an ash pan and slide/pull out coal box?
 
Just as impressed with day two as I was with day one. Starting to make me wonder why there is a waiting list to get smokers??? <kidding>
 
Very impressive build! I agree with the comment about tabs or a rail system for your meat shelves. You're gonna want something that allows you to pull your shelves out without them "tipping." I think most uprights have channels that the shelves fit into to prevent this from happening. Are you planning on putting a gasket around the door for a tighter seal? Can't wait to see the finished product!
 
Day 3!

Day three: rough framing is done, on to finish carpentry. I didn't get to building the grates, but had a productive day otherwise. A lot of little projects got done. It's amazing how much time they take up. Simple stuff like mounting the tabs for the handles take a while to do right. Make sure they're centered, square in both directions, etc. I broke a tap in one of the four holes for the main door latch clamp, and that took a bit to extract. I flap-disked anywhere there was a piece of spatter or anything close to a sharp edge. Good thing for a respirator, as I could taste what's in the last picture of this post :wink: I'm happy with the progress though.

Firebox door on
Firebox door on, grill lid set in place. I was able to fully weld the lid and manage the distortion so it sits perfectly flat. However, the metal closest to the cook chamber warped slightly. A few "taps" with a small sledge and there's a 1/16" gap at the left font corner. Nothing a little gasket wont fix!


Inside
Rails completely welded, tuning plates in, drain installed. Tomorrow, I'll put those little stops that were suggested so the shelves don't flop out. I want to make one shelf so I can get the measurement right.


Damper detail
Detail of the dampers. I drilled and tapped the firebox door for 3/8"-16. The dampers are held in place by stainless bolts with a jam nut on the back. There's a 3/4" compression spring on each one to hold the dampers tight to the door for a better seal and to keep them where they're set.


Day 3 end
End of the day. 1/2" NPT coupler cut in half to make two fittings for the Tel-Tru thermometers. Can just barely see the handle for the 3/4" ball valve for a drain on the bottom. There's enough room for a 5 gallon bucket underneath, or maybe I'll put an adapter on it to run an old garden hose over the hill into the ravine for clean-outs. I put a little tab on the back to keep the grill lid from flopping over the backside. There's a matching one on the side of the lid so only tabs will get beat up from hitting each other instead of the lid.


Dinner
A reward for the end of day of "work" I was really hungry when I got home and didn't want to wait for charcoal, so this ribeye got propane, but it tasted excellent!

Tomorrow the anti-tilt tabs, handle to push it around by, firebox lid latch, and front shelf get installed. Then a quick abrasive pressure wash and paint in the afternoon. While it's curing, I'll finish up the grates.

Total investment:

7 hours messing around with the details and a 2 hours of shopping, unloading a truck of insulation (not for this project)

$34.26 to the hardware store for bolts, nuts, springs, pipe fittings, and a 3/4" ball valve.

Heres a youtube link for the plasma table in action:
[ame]https://youtu.be/6kd_Ep4x5bI[/ame]

One bending the door:
[ame]https://youtu.be/QbEGQhg4CjE[/ame]
 
It's home

It's done and home! I seasoned it today and kept a fire going all day just to start learning it. Here's some pics:

sunrise
Sunrise on Friday behind the shop, the last day of the build.


all put together
All painted and assembled. We painted it with Potbelly Black. It's a woodstove/grill paint that's rated to 1000 degrees. It's a bit funny to work with, very high solids. They recommend a very thin coat, as the thicker it is, the easier it will flake off. Before paint, I abrasive blasted it. I wanted to make sure the surface was completely clean and scuff it a bit so the paint will adhere better.


not heavy for a forklift
It weighs in at 900 pounds. The only trailer I have without fenders or sides is a 24 footer. A bit overkill, but that's ok!


dont drop it
No forklift at home, but tractor does just as well! I didn't want to take the whole subframe off for the snowblower, but the loader clears it fine. I held my breath just a little backing up past the edge of the trailer. Should I have clamped it down? Be extra smooth on the controls!


in place
In place on the patio. I wasn't sure how well the little 5" wheels on the casters would handle the grooves in the pavers, but it rolled surprisingly well. We have 4 foot wide eaves on a ranch style house, so I'll just roll it under cover when it's cooled off.


on the patio
Humming along nicely at 350 on the top and about 335 on the bottom. It took three small cans of off brand PAM for the inside and the grates. Playing with the dampers was really interesting. I found there was a certain setting of closing them off that it would run hotter than wide open. I'm theorizing there was a sweet spot where the velocity of the air was increased enough by the constriction that it was almost like a bellows. There will be a lot of learning for different environmental conditions, woods, and damper settings.


up to temp
350 was really easy to get. I brought it up to 400 for an hour to bake on the cooking spray, then backed it off and practiced maintaining 225-275. I put a removable heat shield under the grill lid to help protect the paint on the lid and get the heat/smoke to flow more efficiently into the cook chamber. It also makes a great place to preheat splits. Well seasoned oak plus a preheat gave almost no smoke on ignition. Tinkering with the fire and getting it to do what you want it to do is fun. It'll be even more fun with food on it tomorrow.


cheese
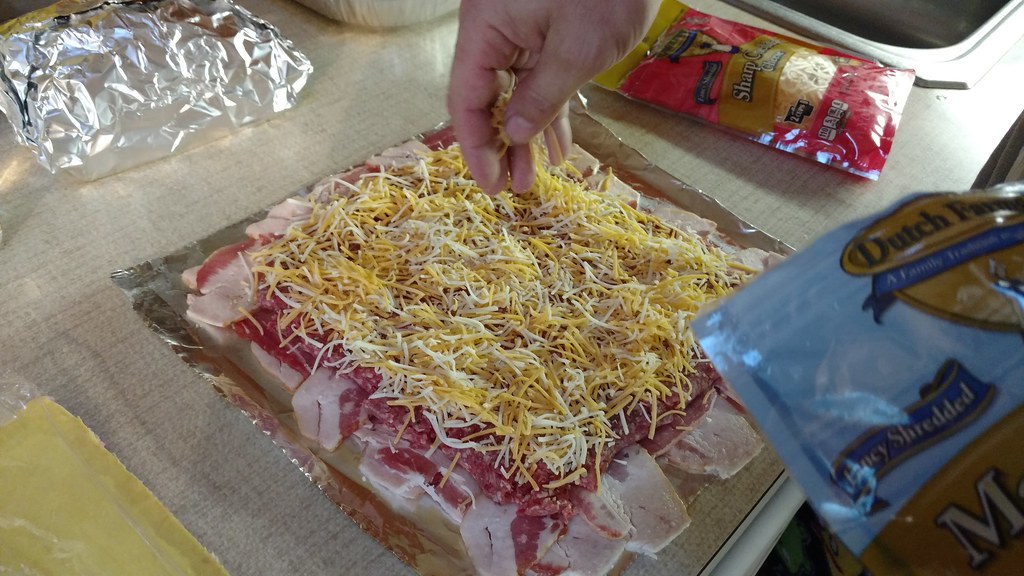
The first cook tomorrow, a bacon cheeseburger fatty for lunch. My first fatty ever! Then two racks of St. Louis ribs for dinner.

Thanks again for all the great ideas and knowledge. The build has been fun, now the real fun begins!
 
Back
Top