or, The Great Pumpkin,
or, The Big Orange Ice Cream Cone.
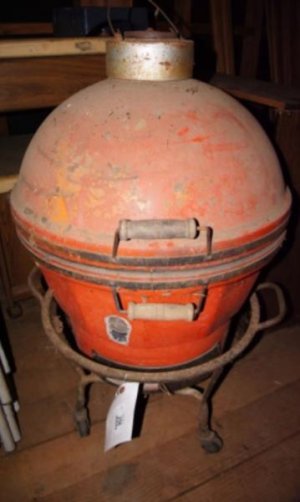
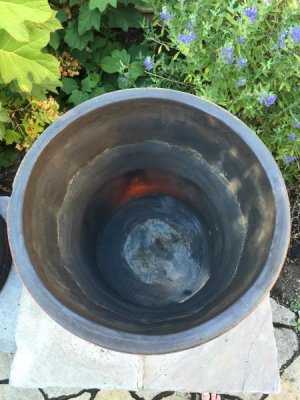
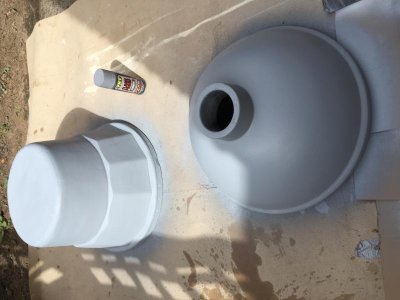
Found this beauty at an estate sale, a "Modern Style" Imperial kamado circa mid 1970s. This thing was absolutely filthy. Every metal part was covered in rust, the paint was flaking badly, and the grate smelled like mold. I'm pretty sure the fluffy clump I found in the bottom pot was a mouse nest.
The hinge band was pretty rusted. I started to wire brush the cart, but the rust was pretty caked on, and the wagon makes the grill sit too low to the ground for comfortable cooking. Instead of getting these parts sandblasted, I decided to replace them with better parts from Big Green Egg. I found a used nest on Craigslist, and bought a new spring assisted hinge band per Swamprb's recommendations (thanks!). It fit pretty well but was a bit of a pain to put on; the hinge gap is a bit smaller than the stock band in the back but it's secure and works well. It also requires longer carriage bolts which need to be bought separately, I think they were 5/16" - 18 - 3" carriage bolts.
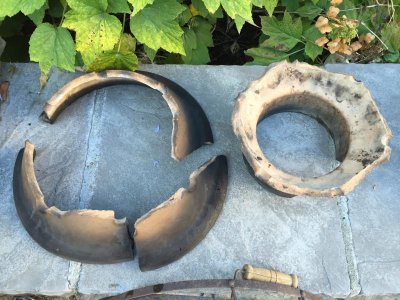
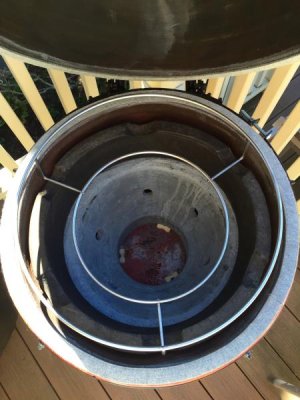
The firebox cracked into four pieces when I tried to take it out of the bottom. I used furnace mortar and furnace cement to tuckpoint the firebox back together, then cured it in the oven at 500 degrees when my wife wasn't looking. I also noticed that the fire ring did not sit flush on the firebox when I put it back in, it's a bit wider than the fire ring which had previously been mortared in place and the mortar built the firebox up a bit to meet the fire ring. I used 0.5" ceramic spacers under the firebox to bring it up to the fire ring and it sites flush now without a gap.
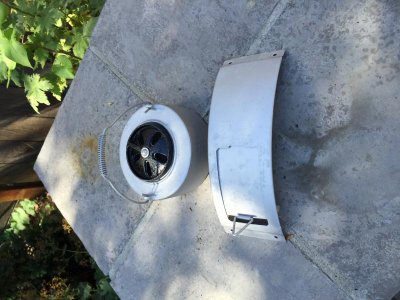
I used muriatic acid, aka hydrochloric acid (sold at Home Depot!) to take the rust and old paint off the exhaust cap and bottom draft door. Slides open easily now. I used a bead of high temp red RTV gasket silicone around the bottom door to seal it. I looked into getting a BGE stainless bottom draft door, but its a bit skinnier than the stock one, costs $45, and I was able to salvage and paint the old door such that I don't think rust will be a big issue.
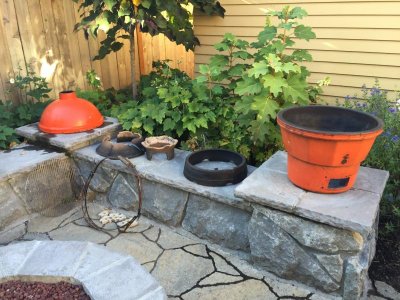
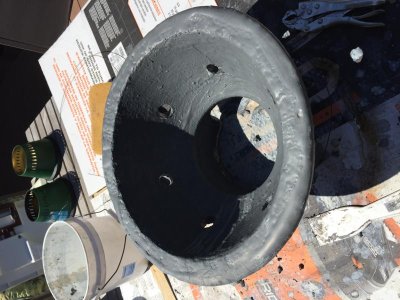
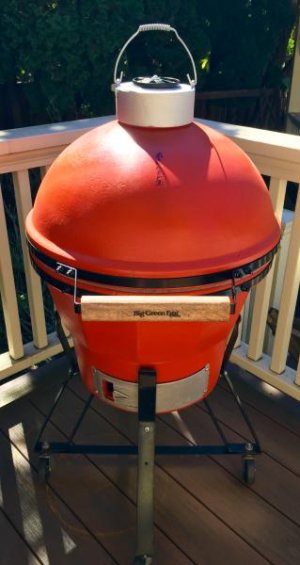
I washed the top and bottom, wire brushed and lightly sanded, and used high temp primer and engine enamel to paint. "Chevy red-orange" was the color, $2.40 a can on Amazon, takes at least two cans to paint well and it's good to have a third. My paint bubbled during my first cook because I couldn't wait the week to cure, so definitely do that. I'll be redoing mine. Then applied nomex gaskets to top and bottom and under the damper cap.
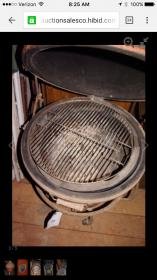
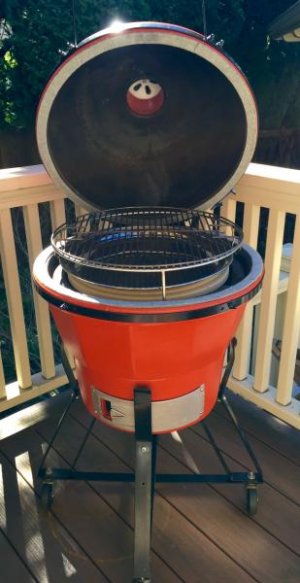
I also bought a regular Woo ring from ceramicgrillstore.com, which fit well and allowed me to add a 3/4" thick Broil King baking stone as a diffuser. A woo ring + baking stone was cheaper and more versatile than a plate setter.
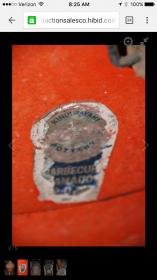
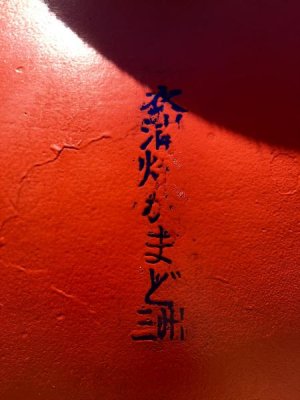
I'm not sure what the best way to preserve the hiragana is, I used crayon here but it obviously melted right off.
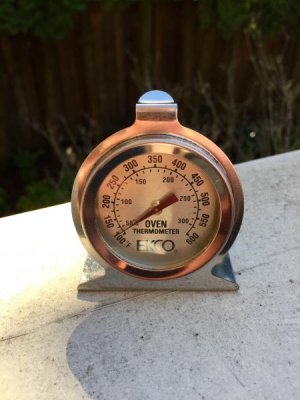
I also found a really old dirty oven thermometer in the dust of the bottom, spit shined it right up. And it works! Accurate to within 25 degrees (about what I would expect from a dial).
This was a fun project, cost $100 for the cooker and about $200 for the supplies above to restore.
or, The Big Orange Ice Cream Cone.
Found this beauty at an estate sale, a "Modern Style" Imperial kamado circa mid 1970s. This thing was absolutely filthy. Every metal part was covered in rust, the paint was flaking badly, and the grate smelled like mold. I'm pretty sure the fluffy clump I found in the bottom pot was a mouse nest.
The hinge band was pretty rusted. I started to wire brush the cart, but the rust was pretty caked on, and the wagon makes the grill sit too low to the ground for comfortable cooking. Instead of getting these parts sandblasted, I decided to replace them with better parts from Big Green Egg. I found a used nest on Craigslist, and bought a new spring assisted hinge band per Swamprb's recommendations (thanks!). It fit pretty well but was a bit of a pain to put on; the hinge gap is a bit smaller than the stock band in the back but it's secure and works well. It also requires longer carriage bolts which need to be bought separately, I think they were 5/16" - 18 - 3" carriage bolts.
The firebox cracked into four pieces when I tried to take it out of the bottom. I used furnace mortar and furnace cement to tuckpoint the firebox back together, then cured it in the oven at 500 degrees when my wife wasn't looking. I also noticed that the fire ring did not sit flush on the firebox when I put it back in, it's a bit wider than the fire ring which had previously been mortared in place and the mortar built the firebox up a bit to meet the fire ring. I used 0.5" ceramic spacers under the firebox to bring it up to the fire ring and it sites flush now without a gap.
I used muriatic acid, aka hydrochloric acid (sold at Home Depot!) to take the rust and old paint off the exhaust cap and bottom draft door. Slides open easily now. I used a bead of high temp red RTV gasket silicone around the bottom door to seal it. I looked into getting a BGE stainless bottom draft door, but its a bit skinnier than the stock one, costs $45, and I was able to salvage and paint the old door such that I don't think rust will be a big issue.
I washed the top and bottom, wire brushed and lightly sanded, and used high temp primer and engine enamel to paint. "Chevy red-orange" was the color, $2.40 a can on Amazon, takes at least two cans to paint well and it's good to have a third. My paint bubbled during my first cook because I couldn't wait the week to cure, so definitely do that. I'll be redoing mine. Then applied nomex gaskets to top and bottom and under the damper cap.
I also bought a regular Woo ring from ceramicgrillstore.com, which fit well and allowed me to add a 3/4" thick Broil King baking stone as a diffuser. A woo ring + baking stone was cheaper and more versatile than a plate setter.
I'm not sure what the best way to preserve the hiragana is, I used crayon here but it obviously melted right off.
I also found a really old dirty oven thermometer in the dust of the bottom, spit shined it right up. And it works! Accurate to within 25 degrees (about what I would expect from a dial).
This was a fun project, cost $100 for the cooker and about $200 for the supplies above to restore.
Attachments
-
 IMG_7628.jpg24.3 KB · Views: 281
 -
 IMG_7629.jpg7.8 KB · Views: 270
 -
 IMG_7630.jpg9.8 KB · Views: 272
 -
 IMG_7740.jpg95 KB · Views: 273
 -
 IMG_7741.jpg51.9 KB · Views: 272
 -
 IMG_7742.jpg91.6 KB · Views: 270
 -
 IMG_7788.jpg70.8 KB · Views: 272
 -
 IMG_7787.jpg73 KB · Views: 271
 -
 IMG_7807.jpg44.1 KB · Views: 272
 -
 IMG_7848.jpg27.9 KB · Views: 272
 -
 IMG_7845.jpg31.3 KB · Views: 272
 -
 IMG_7849.jpg36.2 KB · Views: 272
 -
 IMG_7851.jpg43.6 KB · Views: 276
 -
 IMG_7852.jpg35.9 KB · Views: 275


