TheRowdy
MemberGot rid of the matchlight.
Thanks to many on the forum for sharing their builds. I spent some time gathering the necessary parts, and building my own finally. I basically used Norco's method except I added a third row of bolts for a diffuser/water bowl down right by the top of the charcoal basket, and also I figured I could hook on those bolts with some U-bolts hooked in the charcoal basket later -- then the smoker could be used as a grill if I want, but I haven't put the U-bolts on yet to try it.
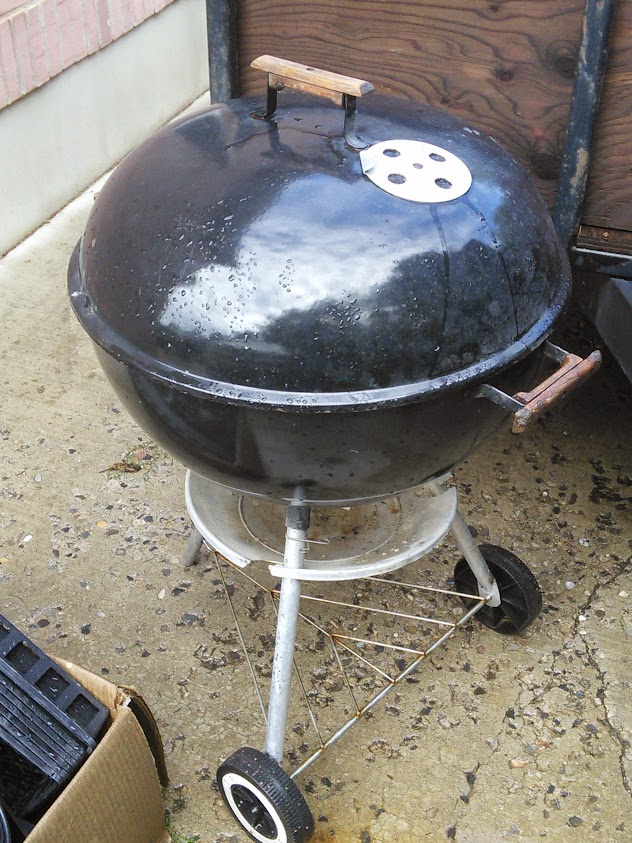
First, I got $20 used donor Weber grill. I'm going as cheap as possible, so using the grill, dome, charcoal grate, and handles (I chiseled the handles off, but haven't mounted them yet).
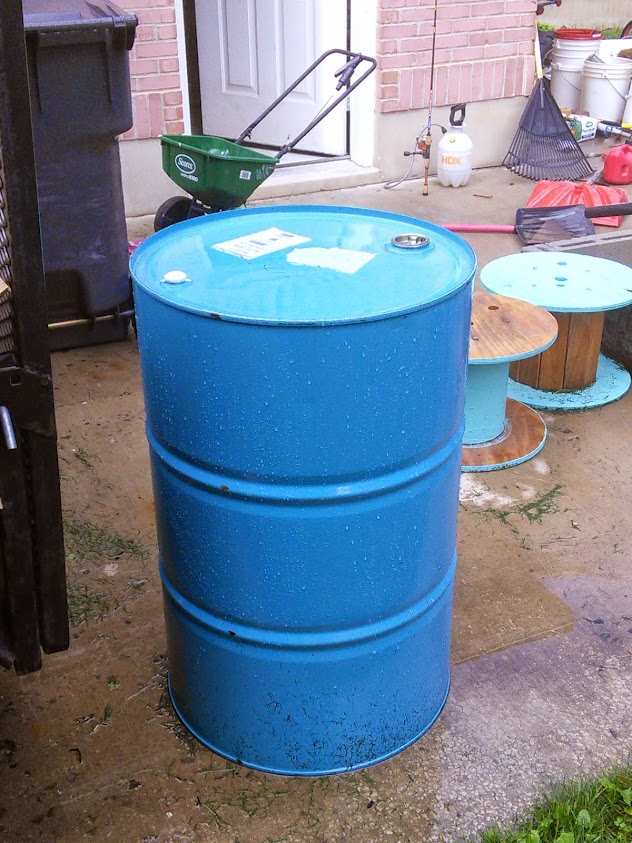
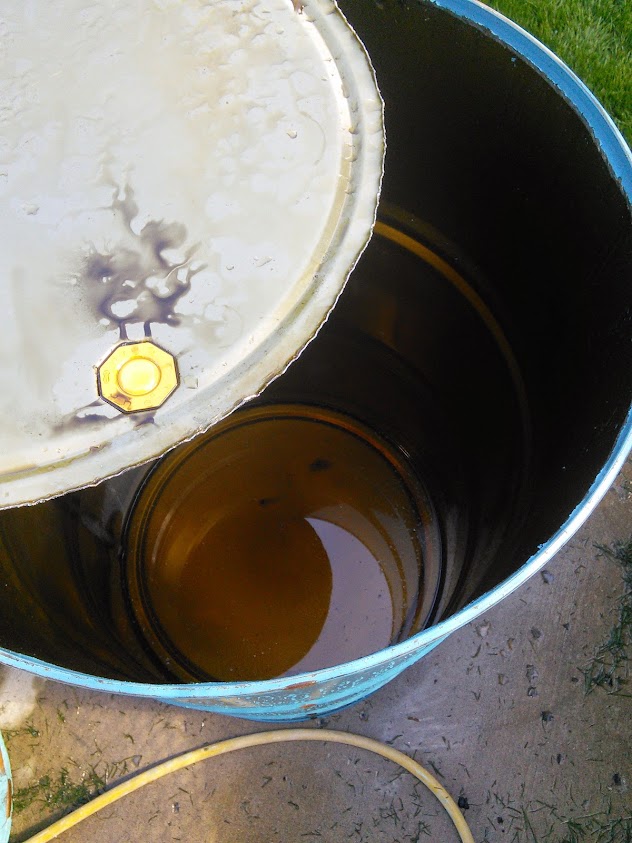
I then found a drum (3 actually) that fit the dome perfectly. It was food grade, with agave syrup in them.
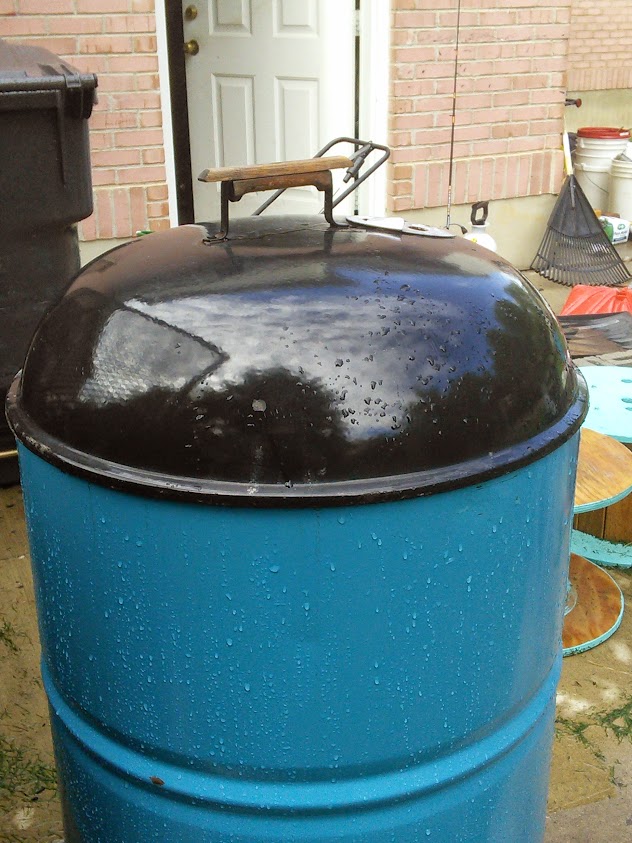
Lid fit perfectly:
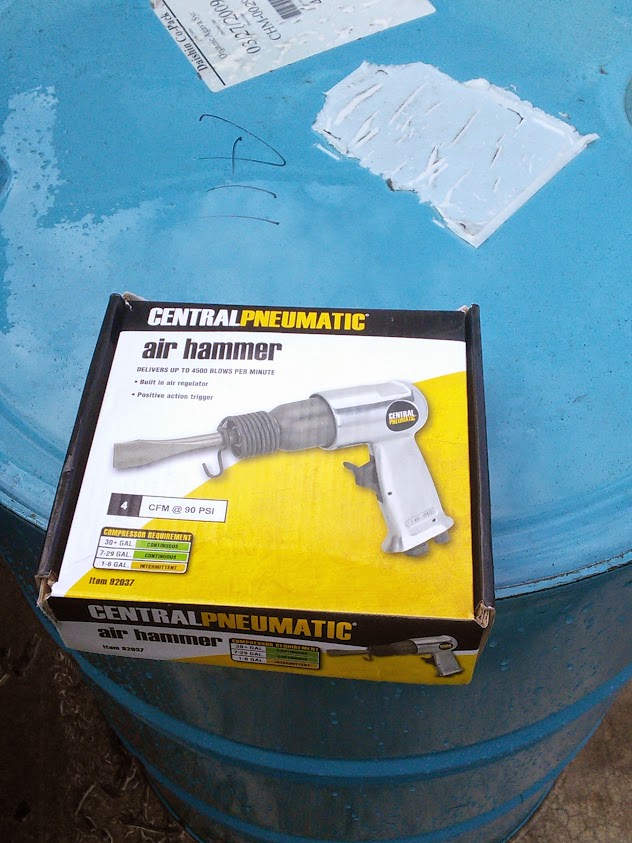
Then I chiseled the lid off with an air chisel I bought at Harbor Freight: $8
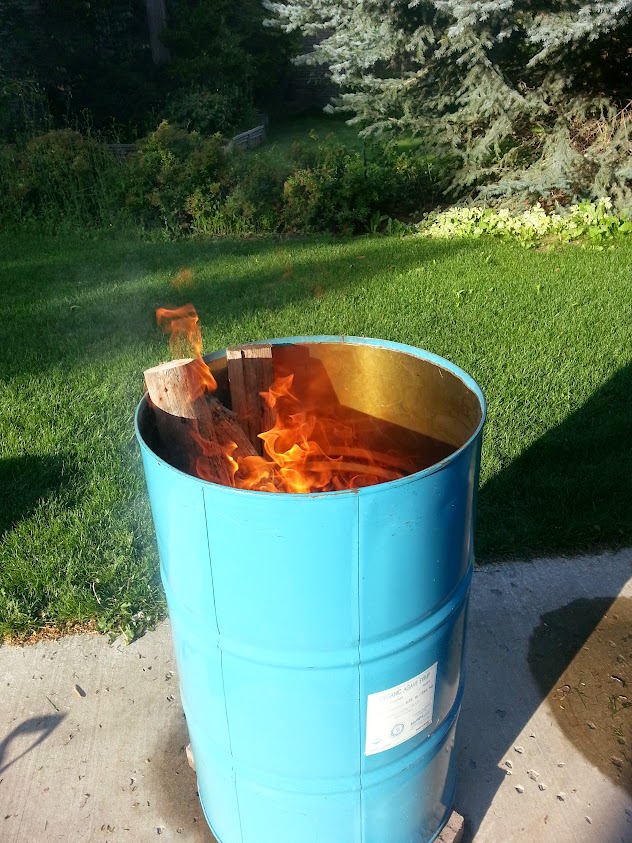
Then I drilled out the intake holes and burned it out:

The paint came off pretty good and the liner too, especially at the top. On the bottom it was more of a bear -- and I looked like a coal miner when I got it down to bare metal. The inside of my nose (even with a mask on) was black. (no pictures -- you're welcome!)
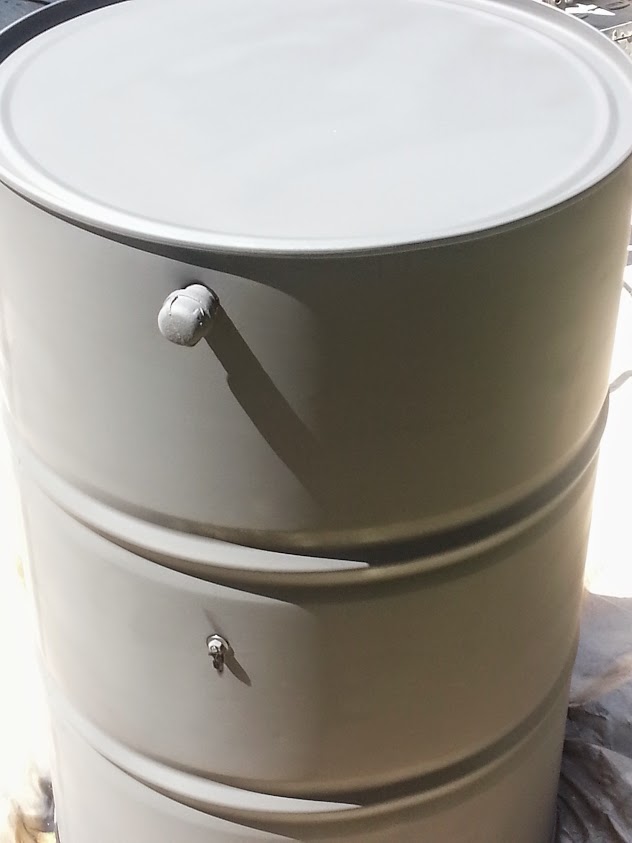
Once I got it to bare metal, I wanted to stop the rusting, knowing I couldn't get to welding and final assembly for awhile. So I coated the inside with cooking spray and painted the base coat on the outside. Turned out this was a mistake for two reasons. 1. It made the welding a little harder -- but mostly because I didn't know what I was doing; and 2. The oil came out through the hardware holes and are messing up the paint job.
A while later, I got the charcoal basket complete, and the intake nipples welded in, and started the seasoning. You can see the paint problems a bit in that picture:

Here's a picture of the inside after seasoning overnight. It looks good except for the bottom which didn't bake on. I assume because it was shielded from the heat by the ash catcher. Hopefully you brethren have some ideas there?

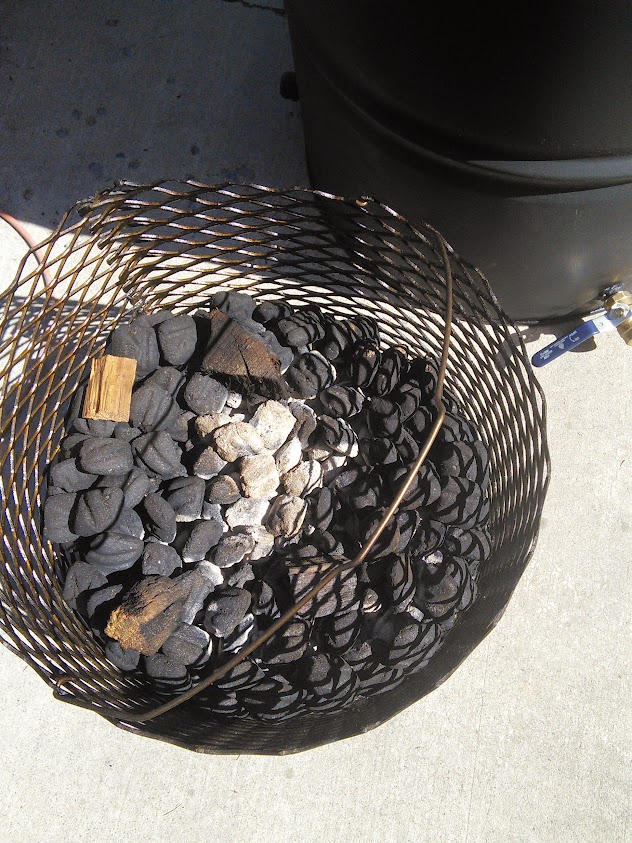
So here's the charcoal basket from the side. I got the #9 expanded metal as a scrap for $5, and used the large grate from the donor grill -- just to save money, not because I needed anything bigger") The ash catcher is a 16" cheap pizza pan I found at walmart for $4.
The ash catcher is a 16" cheap pizza pan I found at walmart for $4.
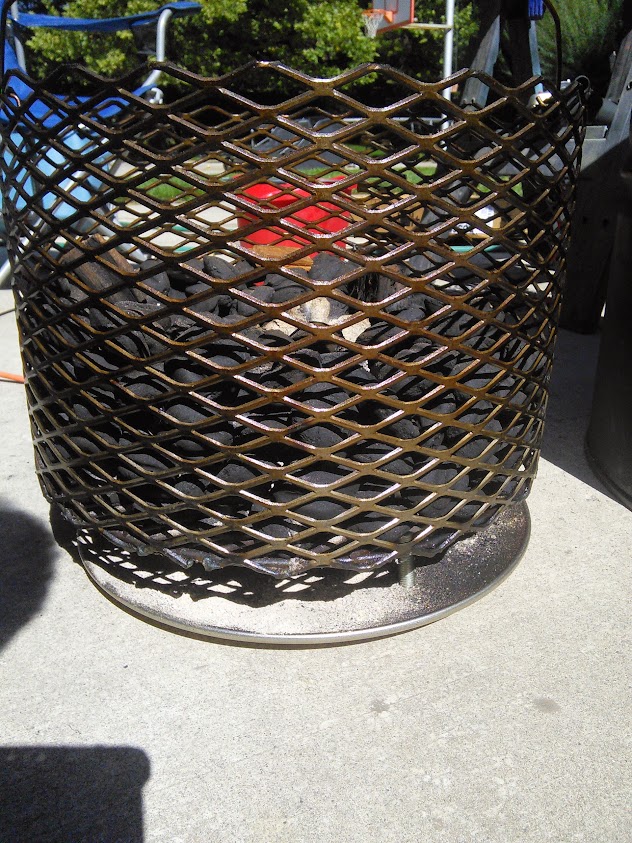
The charcoal in there is what's leftover from the seasoning the night before (ran for about 8 hours, 2 of which were full boar, open all the way) I started with a 20 lb bag of Kingsford blue, and 4-5 fist size pieces of hickory chunk. The handle is just ripped off a 5 gallon bucket.
Here's a top view:
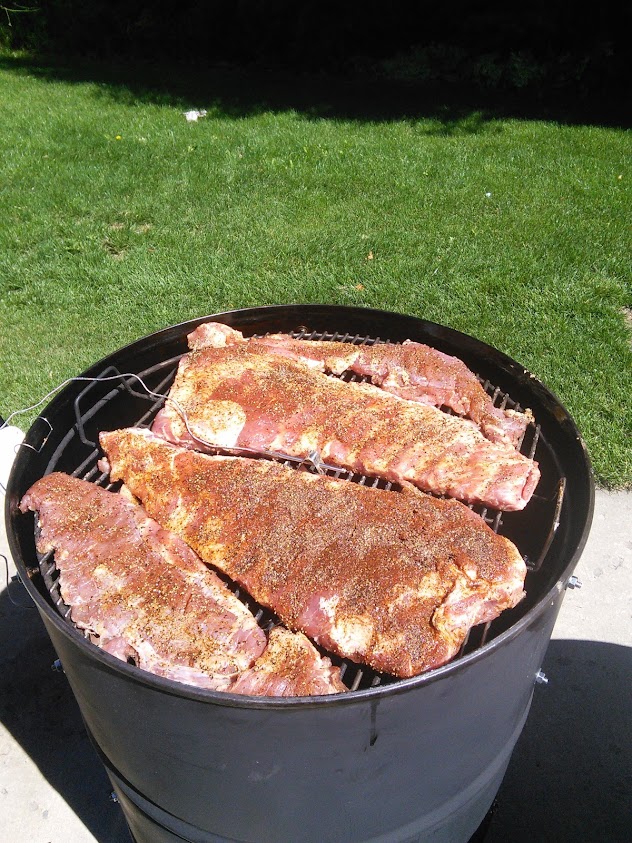
Yesterday, she ran for her first cook. I was in a hurry, so I didn't learn to trim the ribs properly from full spare to St. Louis (had only done St. Louis cut before). And I just did a simple cracked pepper and salt rub with a little paprika. I should have used more paprika, and some garlic and onion powder, and a little less pepper (it was VERY strong) But they came out good, were cooked properly. However, I think they would've been a bit better with a water pan. We'll find out next time!
Two spares, and some cut off ends -- (not properly done)
I foiled them after about 3 1/2 hours -- they were looking a little dry (why I think the water pan would help) and they ended up having PLENTY of smoke on them, so it was probably good to foil them anyway. With my Masterbuilt electric, I never foiled, and never thought they were too smoky either though. Not sure if it's just the water, or the smoke quality -- probably a little of both.
Here's what they looked like when I pulled them:
And a sliced view:
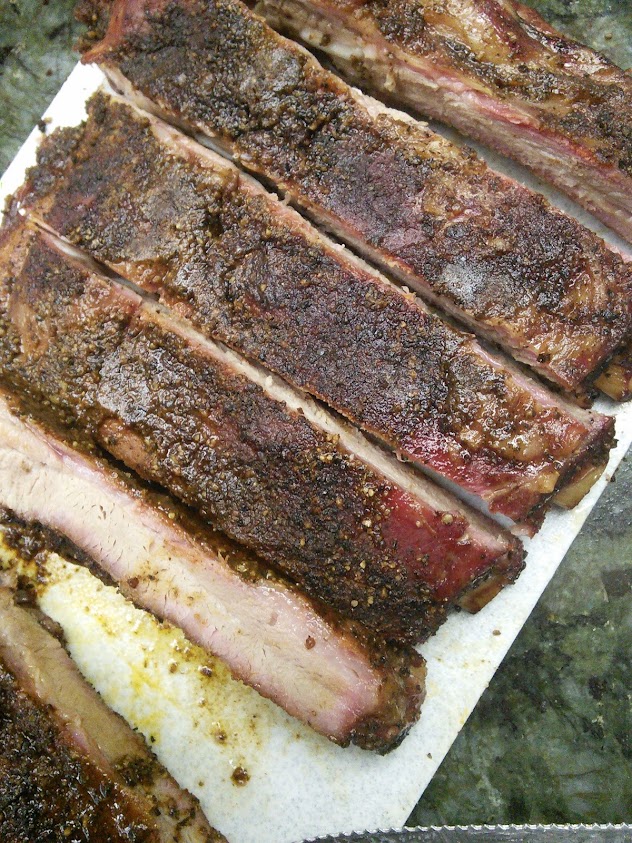
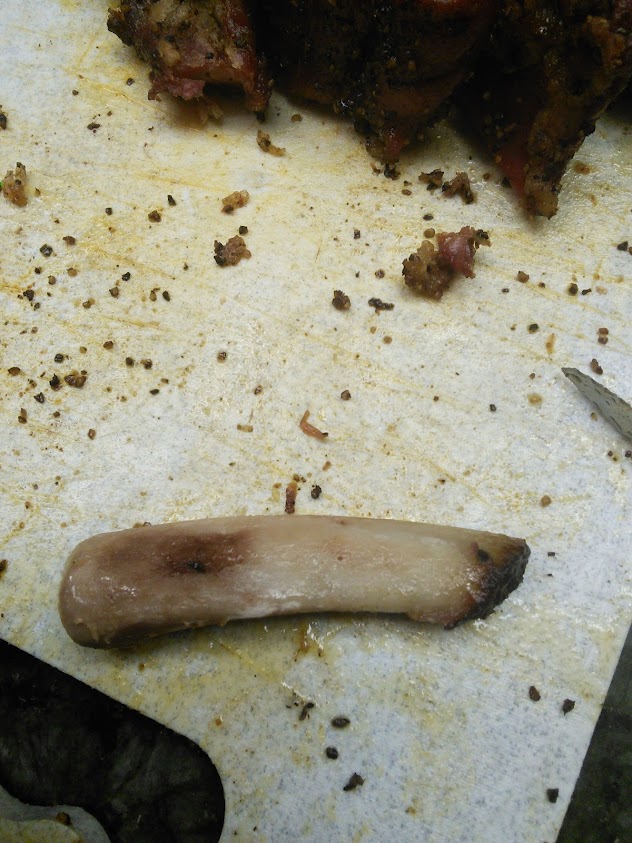
And proof that, most of them, were cooked correctly, the bone is clean!
Thanks everyone! I plan on having a bunch more fun with the UDS! It was fun to build, and made good food. I've also got some friends, neighbors, and relatives pretty jealous
I should add the the smoker performed awesomely. Maintained reliable temps, though the temps changed with the food in -- probably due to the way the air flowed.
First, I got $20 used donor Weber grill. I'm going as cheap as possible, so using the grill, dome, charcoal grate, and handles (I chiseled the handles off, but haven't mounted them yet).
I then found a drum (3 actually) that fit the dome perfectly. It was food grade, with agave syrup in them.
Lid fit perfectly:
Then I chiseled the lid off with an air chisel I bought at Harbor Freight: $8
Then I drilled out the intake holes and burned it out:
The paint came off pretty good and the liner too, especially at the top. On the bottom it was more of a bear -- and I looked like a coal miner when I got it down to bare metal. The inside of my nose (even with a mask on) was black. (no pictures -- you're welcome!)
Once I got it to bare metal, I wanted to stop the rusting, knowing I couldn't get to welding and final assembly for awhile. So I coated the inside with cooking spray and painted the base coat on the outside. Turned out this was a mistake for two reasons. 1. It made the welding a little harder -- but mostly because I didn't know what I was doing; and 2. The oil came out through the hardware holes and are messing up the paint job.
A while later, I got the charcoal basket complete, and the intake nipples welded in, and started the seasoning. You can see the paint problems a bit in that picture:
Here's a picture of the inside after seasoning overnight. It looks good except for the bottom which didn't bake on. I assume because it was shielded from the heat by the ash catcher. Hopefully you brethren have some ideas there?
So here's the charcoal basket from the side. I got the #9 expanded metal as a scrap for $5, and used the large grate from the donor grill -- just to save money, not because I needed anything bigger
The ash catcher is a 16" cheap pizza pan I found at walmart for $4.
The charcoal in there is what's leftover from the seasoning the night before (ran for about 8 hours, 2 of which were full boar, open all the way) I started with a 20 lb bag of Kingsford blue, and 4-5 fist size pieces of hickory chunk. The handle is just ripped off a 5 gallon bucket.
Here's a top view:
Yesterday, she ran for her first cook. I was in a hurry, so I didn't learn to trim the ribs properly from full spare to St. Louis (had only done St. Louis cut before). And I just did a simple cracked pepper and salt rub with a little paprika. I should have used more paprika, and some garlic and onion powder, and a little less pepper (it was VERY strong) But they came out good, were cooked properly. However, I think they would've been a bit better with a water pan. We'll find out next time!
Two spares, and some cut off ends -- (not properly done)
I foiled them after about 3 1/2 hours -- they were looking a little dry (why I think the water pan would help) and they ended up having PLENTY of smoke on them, so it was probably good to foil them anyway. With my Masterbuilt electric, I never foiled, and never thought they were too smoky either though. Not sure if it's just the water, or the smoke quality -- probably a little of both.
Here's what they looked like when I pulled them:
And a sliced view:
And proof that, most of them, were cooked correctly, the bone is clean!
Thanks everyone! I plan on having a bunch more fun with the UDS! It was fun to build, and made good food. I've also got some friends, neighbors, and relatives pretty jealous
I should add the the smoker performed awesomely. Maintained reliable temps, though the temps changed with the food in -- probably due to the way the air flowed.