WilliamD
Full Fledged Farker
- Joined
- Jan 19, 2017
- Location
- Leiceste...
This is for Curator who wanted to know how I did my Mods on the WSM....
The first Mod I performed is of course the upper gasket mod. This is of course used to seal the top lid from losing smoke and leaking air. I did not have a need to do do the lower one nor my door yet. I did not use the self adhesive type and it was still quick and easy. All you need is an extremely sharp pair of scissors to cut the gasket.
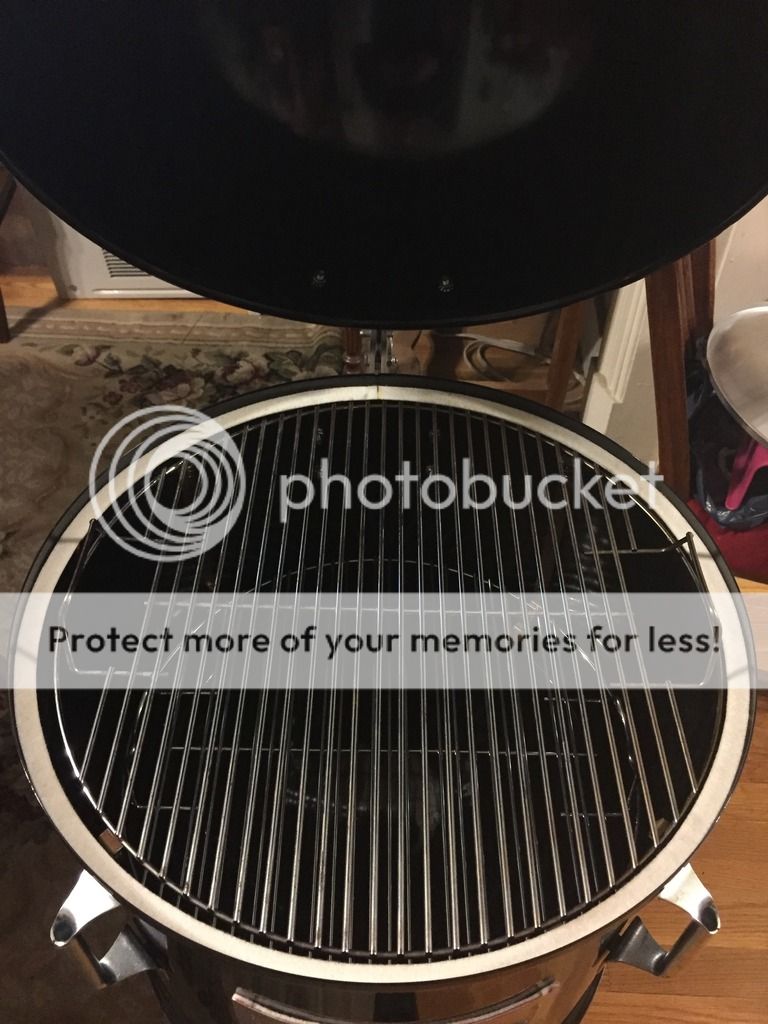
The next mod I performed is the lid hinge mod. This is great because you have a place for your lid, 1 pin removed and the lid can be removed and placed on your lower section to form a "smokey Joe". For this you will need the kit, and I recommend blue painters tape, high heat grill paint, a cheap watercolor type paint brush, a 1/8 drill bit and a step down drill bit. Lay painters tape on the area of the lid and kettle that the hinge will be placed. tape hinge in place. Start pilot hole with the 1/8 drill bit. Remove taped hinge. Switch to step down bit and drill hole size according to directions. Remove all painters tape. Touch up with the spray paint and brush to avoid rusting and then just attach the hinge..>>>The painters tape and step down bit will result in a chip free and very clean drilled hole!

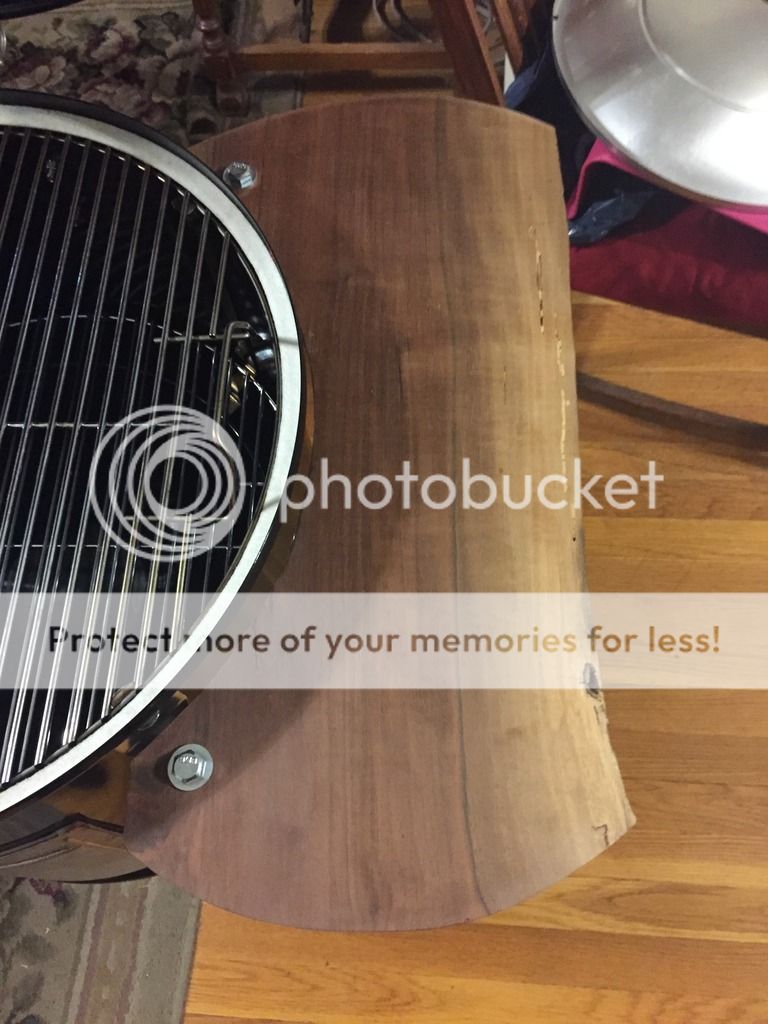
This is the handle mod. Just standard generic garage door pull down handles from home depot. Make sure they are 6 inch centers. Installs in existing holes/hardware. This mod makes it easy to carry the center section and also to place a side table on the WSM!!

This is the side table mod. This probably took the longest at about 20 minutes. What you will need is a 10x20 inch piece of wood, (2) 3/8 x 6 inch bolts with 4 washers and 2 nuts. a jigsaw, 3/8 inch drill bit, and a pencil. I used a scrap rough cut piece of 10x20 walnut I had. I used the lid as a template to form the arc. Make sure apex of arc is at 3 5/8 inches. This will allow for clearance to attach to the handles, give clearance around the drum and clear the lip of drum. I also used the lid as a template to round the edges. Draw the lines, cut with jigsaw and sand. have someone hold in place and come up from underneath the handles with a pencil to mark holes for the bolts. Drill with the 3/8 bit, place bolt washer, table washer and nut. Tighten and then just slide the bolts into your installed handles. It's easier than it looks. Finish with your own stain and screw in a couple cup hooks to hold utensils!!!!

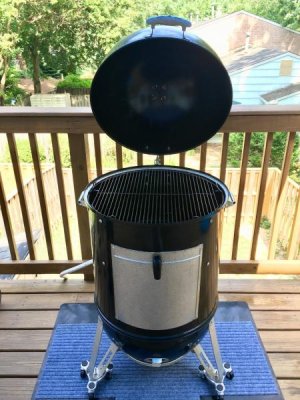
Finally the finished product. Every mod was easy and literally took less than 20 minutes each. I placed the ThermoWorks Smoke monitor on the table so you can get a sense of scale for the table....Happy Modding!

The first Mod I performed is of course the upper gasket mod. This is of course used to seal the top lid from losing smoke and leaking air. I did not have a need to do do the lower one nor my door yet. I did not use the self adhesive type and it was still quick and easy. All you need is an extremely sharp pair of scissors to cut the gasket.

The next mod I performed is the lid hinge mod. This is great because you have a place for your lid, 1 pin removed and the lid can be removed and placed on your lower section to form a "smokey Joe". For this you will need the kit, and I recommend blue painters tape, high heat grill paint, a cheap watercolor type paint brush, a 1/8 drill bit and a step down drill bit. Lay painters tape on the area of the lid and kettle that the hinge will be placed. tape hinge in place. Start pilot hole with the 1/8 drill bit. Remove taped hinge. Switch to step down bit and drill hole size according to directions. Remove all painters tape. Touch up with the spray paint and brush to avoid rusting and then just attach the hinge..>>>The painters tape and step down bit will result in a chip free and very clean drilled hole!

This is the handle mod. Just standard generic garage door pull down handles from home depot. Make sure they are 6 inch centers. Installs in existing holes/hardware. This mod makes it easy to carry the center section and also to place a side table on the WSM!!

This is the side table mod. This probably took the longest at about 20 minutes. What you will need is a 10x20 inch piece of wood, (2) 3/8 x 6 inch bolts with 4 washers and 2 nuts. a jigsaw, 3/8 inch drill bit, and a pencil. I used a scrap rough cut piece of 10x20 walnut I had. I used the lid as a template to form the arc. Make sure apex of arc is at 3 5/8 inches. This will allow for clearance to attach to the handles, give clearance around the drum and clear the lip of drum. I also used the lid as a template to round the edges. Draw the lines, cut with jigsaw and sand. have someone hold in place and come up from underneath the handles with a pencil to mark holes for the bolts. Drill with the 3/8 bit, place bolt washer, table washer and nut. Tighten and then just slide the bolts into your installed handles. It's easier than it looks. Finish with your own stain and screw in a couple cup hooks to hold utensils!!!!


Finally the finished product. Every mod was easy and literally took less than 20 minutes each. I placed the ThermoWorks Smoke monitor on the table so you can get a sense of scale for the table....Happy Modding!

Last edited:


") I also bought a cheap cover with draw string to use over my Weber cover. Hoping it will make the Weber cover last longer as it sits out year round.
I also bought a cheap cover with draw string to use over my Weber cover. Hoping it will make the Weber cover last longer as it sits out year round.