B
BigKev
Guest
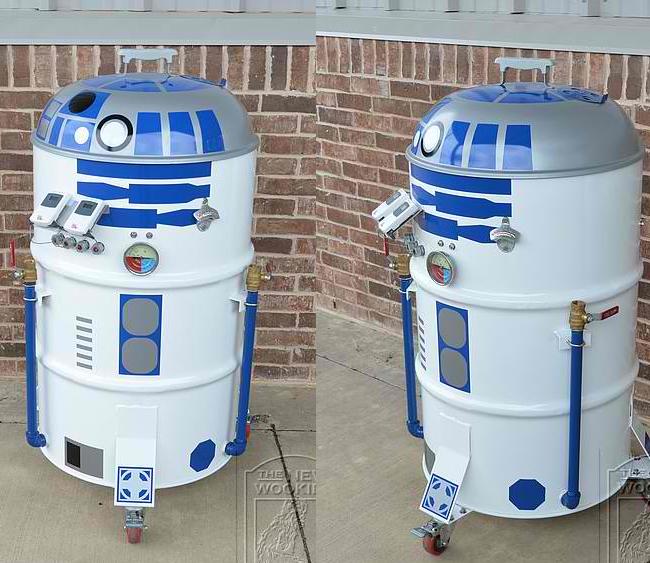
Process of building my version of a R2-D2 themed USD (aka a R2-BQ).
The process started with getting a clean bare drum from a recycler near Los Angeles. These is "almost" a straight sided drum and was ran through a blast furnace and media blasted. I drilled the marked the location of the air intake holes in the bottom and then drilled them out to 1".
Then I reburned the drum to remove the rust inhibitor that the recycler sprays their drums with. I set the drum on top of my fire pit so I would not kill the grass in the yard, and then put the screen from the fire pit on top to catch and flying embers.
I picked up a used 22.5" OTS from CL to use as parts for the project. I plan on using the bottom of the OTS for the "head" of R2. It is larger and has the correct dome shape. But this required me to cut he leg holders off the bottom of the kettle with a cut off wheel, and then grind down the spot welds with a grinder.
With the "head" prepped, I need to create a "docking ring" with the drum as the head was the exact same width as the drum lip. So it would not sit over the lip, or snap over the outside or inside of the drum lip. So I cut the flange off of the OTS lid, and then inverted that and welded it to the top of the drum. I made sure to remove the porcelain from the flange and also grind down the top of the drum to insure a good welding are. I then tack welded the flange in place. I like later seal the seam completely with some Silicon RTV.
I am leaving the One Touch controls in the kettle to give me an exhaust dampener for the UDS when done. Pictures below follow more to come as I get further into the project.