roksmith
is one Smokin' Farker
PID controllers are awesome.. I've been using one to control my pellet smoker for almost a year now...NOTHING is more accurate ")
No, the 5 Amps is the rating for the Load. If you want to look at it from the aspect that it is an SCR and is therefore switching, then fine, but the switch is still the load. FWIW I'm a Journey Industrial Maintenance Electrician, so I'm probably more familiar with PID's / SCR's and such than the average joe. We literally have 100's of them in our plant.
Small Plant!
Small Plant!
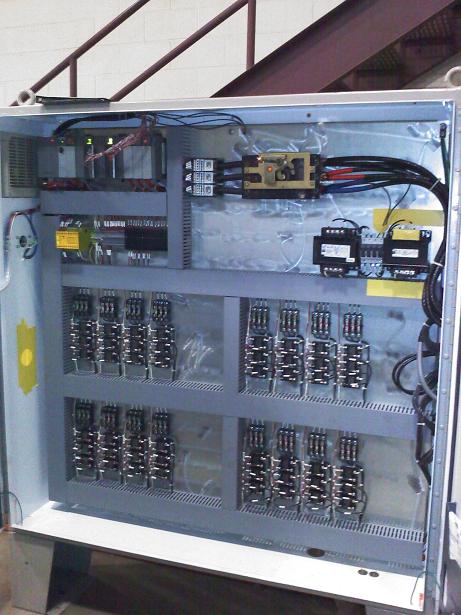
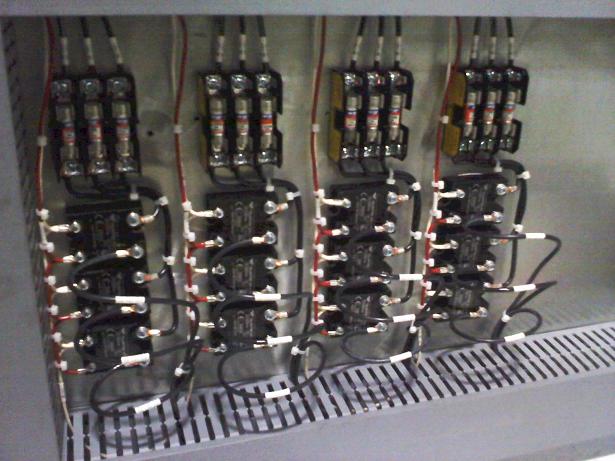
Um, I think you are gonna need some heatsinks in there...
Thanks for Righteousdog for the info he provided. I basically built the same setup he has, right down to the same fan and PID. I still need to wire in my fan with some better wire, but basically it was pretty simple.
i run my ball valve at about 25%. have no problems with flying ash. my intakes are below the fuel grate so it's not blowing directly at it. i would trial your unit before worrying about speed control.I have a question for righteousdog, however. I have my fan blowing through my ball valve assembly. Do you choke down the intake at all?? Seems to me like that 10.6 cfm blower has plenty of kick. I am worried about ash flying everywhere.
my power/fan cable is a multiconductor (y split terminated with DC coaxial connectors) and the thermo-cable all come out thru the case grommet. "breakout style" no "jacks on the box"I made a power cable jack to reduce the wires coming out, and it barely fits inside. I think putting the 5A SSR would be a stretch with the extra wires, etc. I just hope my contactor relay lasts for a while.
Smokindave
Do you have a pic of the fan discharge showing the adapter you came up with. I'm thinking I my simply make a plate to fasten to the fan and use a EMT connector on each end of conduit.
Nice job:thumb:


thx
details:
the button head drill-tap is the hardest part. as noted, if you didn't care about removing the fan from the adapter for whatever reason, you could just jb weld or 2 part epoxy it on. not to open another can of worms, but remember whatever sealant you use is "in contact" with the air into your food...and then there's the galvanized EMT to deal with...oh crap i guess i better scrap this...
:roll:
top view. i'm about as good (and patient) with caulk as i am painting. since it's only a $12 fan and my time i was more concerned with function over form for the prototype. the EMT slides into a 1" set screw connector which threads into my gate valve on the UDS for removal as noted and shown in previous post.
the concept behind NOT having a flapper is this: you choke your intake down below where you would normally run, essentially starving the draft somewhat. the blower will makeup this difference doing what a closed loop PID should do and modulating the fan (draft). undoubtedly, this will take some dialing in based on your smokers attributes, PID settings, and ambient conditions.
That's great! You ought to see my home built cheese smoker with a computer fan driving the smoke.
Great thread. I'm also following the HeaterMeter development over on the Webber forum. Since I'm not an engineer or electronics saavy person, a home build isn't likely for me. Though I have a solder gun.
I like the idea of customizing and building exactly what I want, however. Also going with heavy duty components
So does limit me to off the shelf units like Guru / Stoker?
http://tvwbb.com/eve/forums/a/tpc/f/9270072103/m/5341028906
You've seen this?
I have a full shop so I can build / modify a lot. I just have no programming experience. I've built electronic things before but only with a manual with step-by-step instructions. So this intimidates me
To sum, your system is a similar concept without the remote info / internet?