First Post and review of the OJ Bronco barrel smoker

PorkedtheotherWhiteMeat

Found some matches.
Joined
Jul 18, 2019
Location
DFW, Texas
Name or Nickame
Porker
Introduction

Hello all! I love brisket, burnt ends, and lots of thick, crunchy bark. The last brisket I cooked took 20 hours (no crutch) and it was glorious. So that is where I stand on those 'issues' :)

I am also a Mechanical Engineer by profession so my posts tend to be detailed and lengthy, but concise.

I also like this forum and was pointed here by a friend of mine who also does a lot of BBQ and smoking. In fact I can blame him for resurrecting my smoking ways because he told me about a 'kobei' brisket for sale at the local grocery store. Not cheap but beautiful marbling. With some guidance from him it turned out great, although it took a lot of work since I was using a COS (Brinkmann) and thus it required vigilance and many, many refuelings.

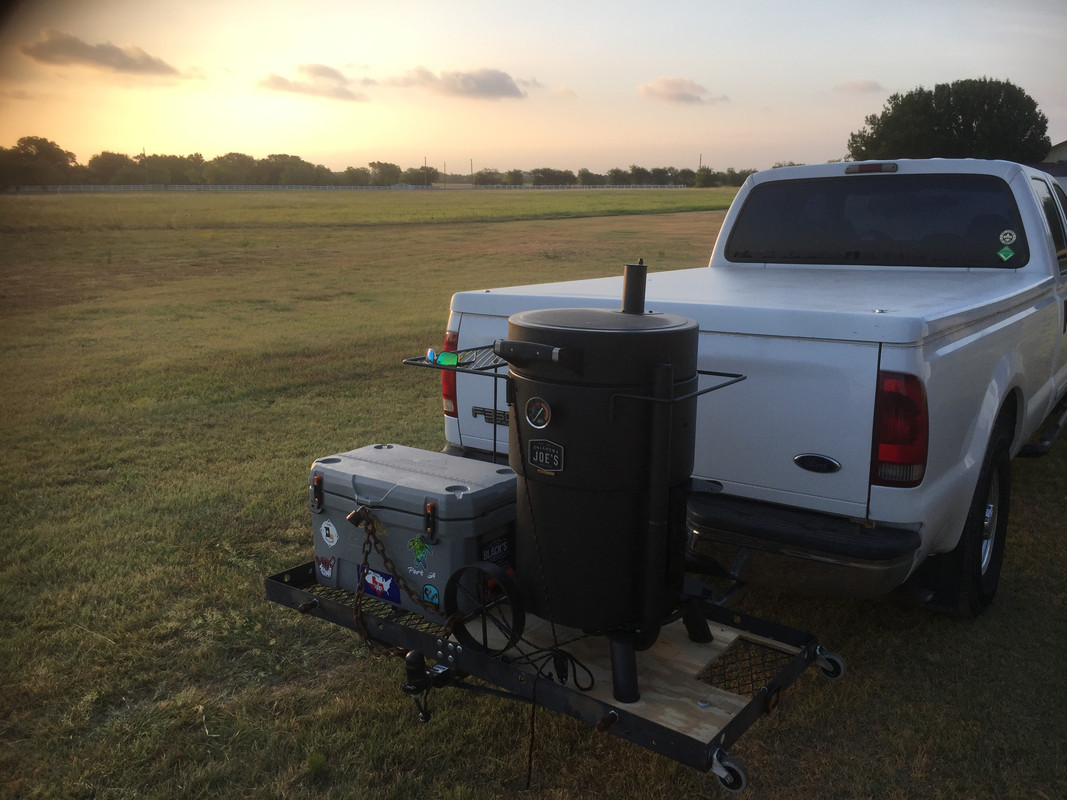
Oklahoma Joe's Bronco (OJBr?) barrel smoker

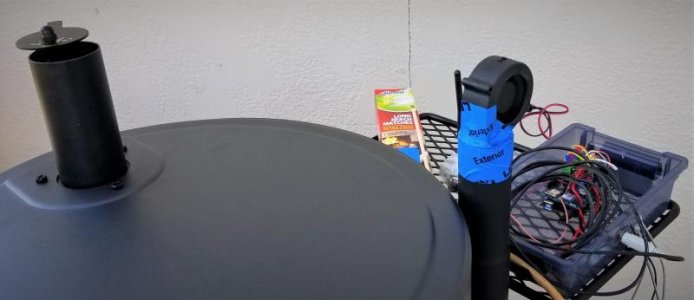
I tried modifying the Brinkmann with fire brick, wrapped the fire box with a welding blanket, and even built a Minion style labyrinth basket (welded steel). I also built a smoker controller using an Arduino and a small blower fan which works very well. But still I had fuel capacity problems and could not run the 8-10 hour unattended smoke burn that I was striving for; the goal is to be able to start a brisket and let it run overnight. I had ideas for more mods, some of them radical, but decided instead to take a different approach.

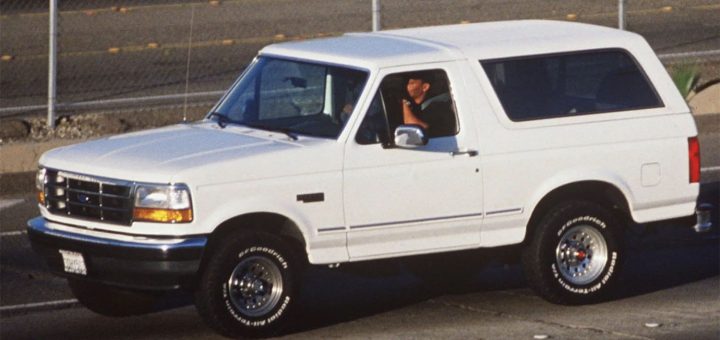
Enter the Oklahoma Joe's Bronco smoker barrel. I think OJBr works for the acronym since OJB is already taken by the Bandera vertical smoker. I do not think there is an 'official' acronym (?) for this smoker since it is pretty new to the market.

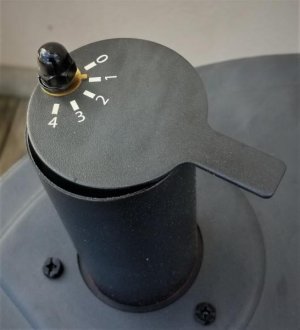
In addition to perusing Craigslist etc for used smokers, I had been looking at the OJBr recently and really liked the design from an engineering and heat transfer standpoint. In particular I really like the bottom air entrance setup with the tall vertical stack; if I built a barrel smoker from scratch I would do exactly the same thing. So I decided to get an OJBr, especially when they went on sale at the local Walmart for $250; I despise paying full retail for anything as a matter of principle :)

So long story short, I brought it home, assembled it in about an hour with my pre-teen daughter's help, and ran my first test while seasoning the inside with spray-on coconut Pam. The basket BTW holds 10 lbs of Kingsford regular briquette (verified with a scale) with a slight heap but easily filled to that level.

With the Arduino temperature controller onboard, programmed with my simple on-off (not PID) controls, it ran for 18 HOURS STRAIGHT with no additional fuel while holding 230 deg F within +/- 3 degrees. It required very little intervention from me, just a few exit stack damper adjustments to control overshoot.

NOW THIS CAN WORK!

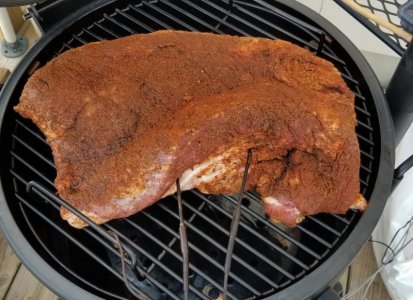
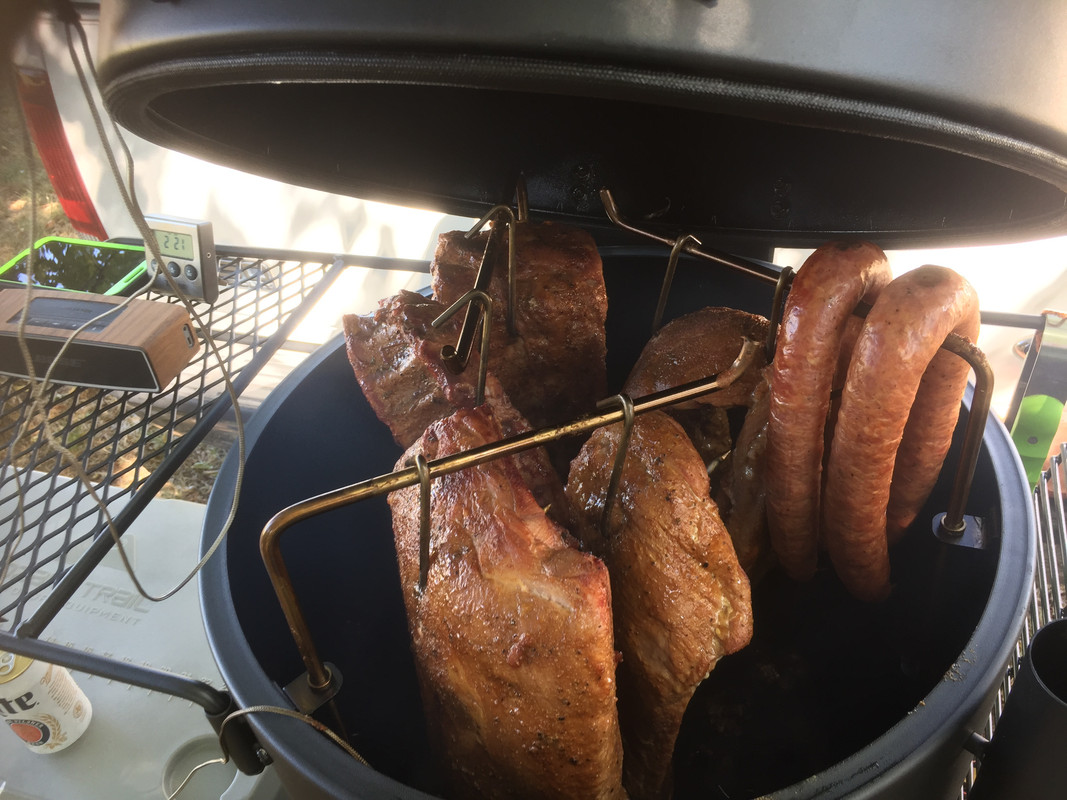
I just finished cooking a brisket on it yesterday and am very pleased with the results so between that and the long-burn performance it is a keeper. I'll still use the Brinkmann for grilling.

Additional information and pictures below...

Here is a decent video introduction to the smoker
https://www.youtube.com/watch?v=4GsYF15dVCI
 
Last edited:
Here is my Arduino smoker controller. It has three thermocouple inputs (one for control, two for meat temperature). It has a web interface so it can be monitored from any device on my LAN with a web browser (PC, Android, whatever). The blower attaches to the inlet stack using an *ahem* prototype adapter made by me.

attachment.php


To get an idea of grill size here is a 10 lb Costco prime full-packer brisket in place with the two meat temperature probes inserted. It's a close fit but it works; the OJBr has an 18" grill.

attachment.php


With my particular blower the smoker requires a lot of throttling to keep from overshooting the smoker set point. Here is where I had the exit stack damper set. BTW the number pointer thing on the damper has too much slop in it to work as an index. Whatever, it's not something I would use much anyway.

attachment.php


And here is the fire basket. For this burn I was using up the last of some RO lump (red bag) so I used that to start things off. The mix was about 1/3 lump, and 2/3 Kingsford regular briquette. I lit it on one edge so it would burn Minion style, and sprinkled mesquite chips on the top. Full disclosure, this only burned about 9 hours including the heat up time. I blame the shortfall on the use of lump instead of all briquette, I did not have enough briquette, and of course the presence of the brisket requires more heat. The next time I will go for a full 10 lb load of briquette like I did on my test burn.
attachment.php
 

Attachments

  • Smokerduino.jpg
    Smokerduino.jpg
    30.2 KB · Views: 830
  • brisket.jpg
    brisket.jpg
    93.5 KB · Views: 830
  • stack-setting.jpg
    stack-setting.jpg
    28.5 KB · Views: 1,086
  • fire basket.jpg
    fire basket.jpg
    73.6 KB · Views: 833
Last edited:
That is all for now. If anyone has questions about the OJBr I will be happy to answer them. IMO it is worth $300 and definitely worth $250. I'd buy it again.

Additional comments... As I think of them I will update this post.

- The temperature gauge on the front of the unit is large and easy to read from say 20 feet away or more. As far as accuracy it appears to be about right, say within 5 degrees F or so, but I did not use it to run the burn so I cannot say. Allowing for time and placement differences it was tracking with my calibrated thermocouple probe.

- There is a sort of bayonet cap on the bottom of the pit that is integrated into the inlet stack. It is there for cleaning out the barrel. It is not airtight so to control temperature runaway I sealed it up with a piece of aluminum foil. The idea of course with a fan controller is that oxygen ONLY enters through the fan and nowhere else.

- The unit I purchased came with the two halves of the barrel already bolted together. I had planned on sealing this during assembly but left it alone. During the test burn the oil I had seasoned the pit with leaked through this seam; to be fair I put a LOT of oil in that area to plug it up. After that from what I can tell during the brisket smoke it did not leak at all. So, seal it if you like, but I am not sure it is necessary.

- During assembly I sealed the connection points for the inlet and exit stacks with high-temp RTV. The flanges are very wide so this is easy to do.

- This one has one of the inlet pipes that does not fit correctly. There is a post here on the brethren where another purchaser was pretty upset with this. Personally I do not think it is a big deal and the joint can be easily sealed up with RTV, or lava lock gasket, or foil. However I called OJ and they are sending me a replacement stack for free, no shipping charge.

- I had SERIOUSLY considered purchasing an 18" WSM since it is in the same price range. However I like the barrel setup since I have some modifications in mind that will be easier to do with no side openings (like on the WSM).

- This smoker is stout for its price! Note that although it is much smaller than a Brinkmann COS it weighs about the same (136 lbs) so the overall thickness of steel is higher. It also takes up a LOT less deck space than a COS. The basket, rings, heat shield and grill are all up to the task and are all ceramic coated. The meat hooks and the hanging bars are all stainless steel. Overall the build quality is really good IMO for this price range. I would not try to build something comparable for less cost, at least not using new components. Time is money.

- Compared to the Brinkmann COS the OJBr warms up much faster from initial start up (cold pit, light the coals). It will be at 230F and stable in 15-20 minutes whereas the COS will take 30 min to an hour.

- With the OJBr I just let the Arduino handle the warm-up cycle; I just light the coals and start up the Arduino. It will overshoot the set point by 5-7 degrees at first (not a big deal IMO) but then settles down nicely and stays within a few degrees of the set point.


- When assembling the smoker I used red (high temperature) thread locker on all of the fasteners for insurance that they will remain tight for a long time. I am in the space science instruments R&D business (think missions to other planets) and we are very, very careful about making sure fasteners never come loose. Ever. No way no how. If something breaks after launch then it is game over since there is no way to repair it. But I digress...
 
Last edited:
Welcome to the forum, great fist post and congrats on the new cooker.
 
Very nice and detailed review. Happy to have you as part of the family and look forward to many more posts.
 
Nicely done. I've always liked that cooker since it first came out. Have you tried running it without the controller?

Your post reminds me of conversations I've had with my daughter. :heh: She just graduated from UNT with a degree in mechanical energy engineering and something mathematical. She's way too detailed!

Sent from my SM-G955U using Tapatalk
 
Nicely done. I've always liked that cooker since it first came out. Have you tried running it without the controller?

Thank you. No I have not run it without the controller, and I don't imagine I will, at least not until the weather gets much cooler.


Your post reminds me of conversations I've had with my daughter. :heh: She just graduated from UNT with a degree in mechanical energy engineering and something mathematical. She's way too detailed!

Sounds like she will make a great engineer. Congratulations to you and to her.
 
I might be overthinking it, but I saw this barrel at walmart, and was able to look at the hooks, and they were thinner, looked like a worse quality SS, they looked dull not shiny, and just looked as if food would stick on them really bad, also the points weren't sharp as compared to a pit barrel. Like I've also noticed how easy the PB hooks are to clean no matter how gunked up they get.


To me it's small details like that that tell me if a company cares.
 
Howdy! New guy here, first post. Long time outdoor cook. I like this post - I saw these things and thought it would be fun to have one, I've wanted to add a UDS toy to my collection and I find it funny when I see comments about how "expensive" this is when in fact it seems well in $ line , and maybe some comments about how folks should wait till they are dirt cheap before ya get one, because then and only then is it worth it? - to me it's worth it now as a cool smoke toy, and I paid $150 for it and I thought it was good at $299? Although I also have WSM and Naploean Bullets that are great for travel/camping(much lighter) - I thought it would be fun to "hang" and go UDS style on my last run down to the farm - it was very fun, hung six racks and some sausage and let it rip - it worked just fine and to me it is a lot of bang for the buck. I fed a bunch of people using this rig - the WSM and Napolean are much lighter for sure and can be lifted into the camper or back of truck - you have to have a hitch rack or trailer to haul this sucker - I just left it on the truck and smoked away! Smoke 'em if ya got 'em - adios
IMG-3262-2.jpg
IMG-3264-1.jpg
 
Last edited:
They are marked down to $184 at my local Walmart and I've been tempted to buy one but I don't need one at all. I have two PBC's. If they get any lower I may just cave to temptation.
 
I have no need for such a thing in my arsenal, but GOD DANG is that cool hitched up on the back of the truck like that.

Didn't they have something like that for the old Bubba Keg Kamado's too (a hitch mount)?
 
I like the air controller fan, I'll have to try that - with that said, in regard to your "nlet pipes that does not fit correctly." and OJ sending you another pipe. I asked OK Joe as well about replacement, - they sent that along and it is of an updated design - much cleaner the the collar fix they had before (see pic). I also went ahead and ordered another grate (porcelain coated?) and another side tray. Also got a Tel Tru gauge and now its
even more fun to play with. I tried something new (did I invent it?) Hanging Beer Butt Chicken? - So, with the extra intake pipe, maybe I get a controller fan and mount to the old pipe, then I can interchange whenever I want to go that way?
picture.php
picture.php


picture.php


picture.php
 
Back
Top