Yesterday's problem was getting the bullet hinges mounted in parallel, those things are hard to work with, but my son figure out how to get them to hold still long enough to get a tack on them.
Use magnets to set/hold the hinges in place till you tack weld them. Use a long level to adjust to level. Tapping/adjusting into place.
Today's challenges are
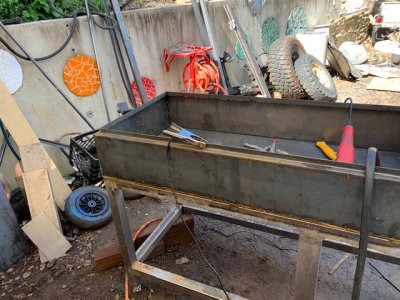
1) that the shear at the metal supply house has a bad habit of warping the pieces it cuts. The door for the smoker has a big curve in it. To big to leave alone - like 1/4" in the middle. So, I've got to figure out how to take the curve out before I struggle with the bullet hinges on the smoker. And the 10 gauge is thick enough (1/8") that I can't just lean on it and bend it back. And it need to be pretty damn straight.
Do you have a set of torches? You don't want to use a small tip, at least a #4 or rosebud tip. Lightly heat in circular direction. This will not only heat and shrink the metal. ( it is bent/stretched so it needs to shrink). Then hammer and dolly that thing back flat. This should take at least 3 tries. So don't expect it the first time. Lightly hammer from the center outward.
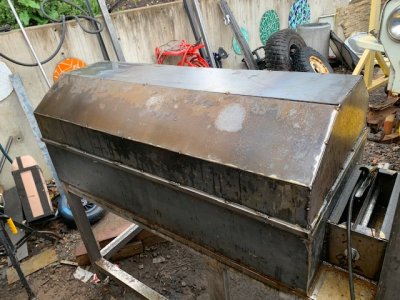
2) The lid has to close over the grill but inside the lifting mechanism. Before I fully understood the issue, I made the lid a little proud of the firebox frame, and now I'm regretting that (and see why the box tube on the bottom of the lid in the original I"m copying was so small) and I'm having to figure out how to mount the uprights of the lifting mechanism to the side of the firebox with enough room for the lid to clear and still not look too ridiculous - all while accommodating the draft box from the firebox into the smoker and it's damper mechanism - which now needs to be undone a little.
Are you attaching the lid to the cooking grate? Your hinges? So the lid open/closes no matter the position of the cooking grate.
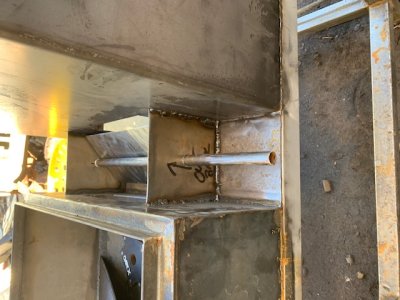
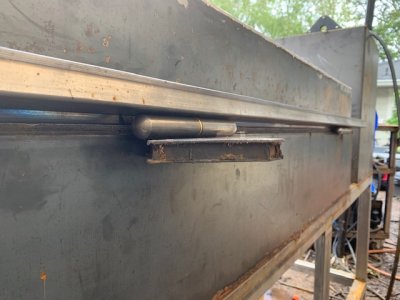
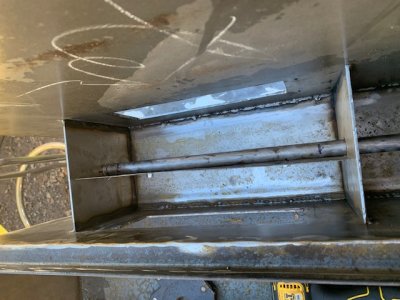
3) draft box between the fire box and smoker. Original design was 90% okay, but not 100%. So, have to un-make some stuff and figure out if I really need the top of the draft box removable so that in the future I can service the flue mechanism - because making it removable has caused all kinds of problems. Or if I can just weld it on. In addition, trying to figure out how to locate the damper in the box and make it have some turning resistance without locking it in permanently. Pictures show the original simple and I was just going to weld the top on, and the version with angle iron so I can screw the top down. But, the angle iron is getting in the way of the damper and the upright is going to sit right there as well.
Do you really need/want a flue/flapper? So much easier to make a sliding block off door with a handle you push/pull for your adjustment. Just a thought