JKCDN
Is lookin for wood to cook with.
I had a post a few months ago asking for advice on how to renovate a used Assassin 28 I picked up on Craigslist. I was given much great advice and in general; this site has been a university of BBQ for me.
So with that in mind, this post serves as my tiny contribution to the cause!
Some context:
I have zero experience with metalwork or paint. I can change a light bulb, hang a set of curtains if told to do so and that's about it.
First up are photos of the 28 when I bought it, I am the 4th or 5th owner according to the guy I bought it from. Rented a box truck (with a lift-gate) from Enterprise for $50 and .50 mile. Bought 2 set's of 10 foot tie downs and was able to transport the smoker about 40 miles by myself. Placed the smoker lengthwise against the cabin side, I was nervous as the truck only had wood runners and no metal tie downs but I went slow (VERY SLOW around corners) and no problems.
Front Door


Top of the charcoal chute:

Fire Box Door:

Overall some real mileage on this guy, many, many, many cooks.
I reached out to Jeff at Assassin Smokers and he spent a half hour answering questions and sold me replacement gaskets, clasps and bolts. I can't say enough about how helpful Jeff was.
The box that Jeff sent came with a drill bit that fit the bolts but I didn't see it until I was done. The gasket comes as a single piece (I used a box cutter and it worked great). I will say that you get about 2ft more than you need so measure carefully.
First Stage for me was to remove the bolts that hold the doors onto the body. Once I had the doors off, I removed the bolts that hold the door frame onto the sheet metal lining the inside.
*********Impact drill, I stripped 3 bolts before a friend walked by and laughed at me. Handed me his Makita battery powered impact drill and I didn't strip another bolt. I went slowly and made sure I had good contact on each bolt. Anytime I was off center or had grease in the bolt head, it was a problem. The toughest bolts to remove were along the bottom ridge of the fire box and the front door.*******
Second stage was to clean out the cooking chamber. A lot of hard grease, rust and carbon was removed with a grinder tool with a wire brush attachment. I tried to use steel wool and a brush but the grinder and attachment is a must have. It took me just over 2 hours to clean out the whole thing.
*********** I have never been dirtier in my whole life*******************
I would wear a painters coverall and a hat ( I was wearing glasses). I am telling you, it took almost as long to get the grease of me as it did to clean the damn thing.
Here is a photo of the bottom of the chamber after cleaning
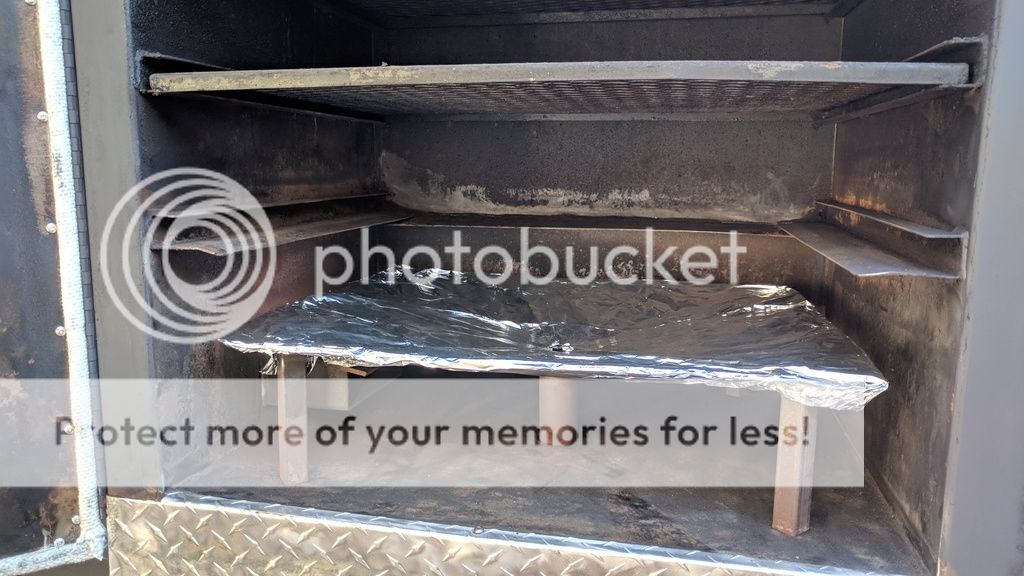
Here is the grease pan cleaned

Firebox cleaned

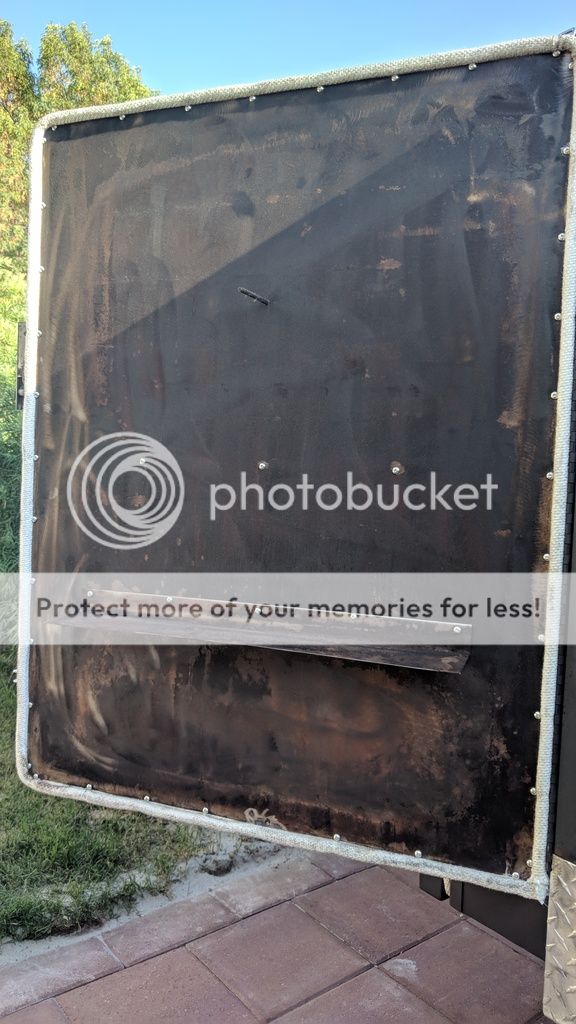
Front door cleaned
Third stage was painting, this had me the most worried, I have never painted a thing in my life. First thing I did was to remove the decals with a heat gun, then I wiped it with lacquer thiner which I got at home depot. Next, I sanded it lightly (was too lightly - this was my biggest mistake, some of the glue from the decal is still visible.) with 220 grit bricks I again got at HD. After sanding, I wiped it down again with lacquer thiner. I let it dry and started spraying a very light coat of Rustoleum high heat matte black.
****My garage is a mess now, I had a tarp down but this stuff got everywhere. Not sure how I could avoid it but it's a problem you need to know about*******
Once I had a thin and very ugly coat of paint on it, I left it for an hour and came back with slow overlapping strokes. It still looked horrible, but after 3 more coats, it started to look uniform. Overall, I went through 7 cans. I did some touch up the next morning when the sun was up. Overall, this step was the most nerve racking, it wasn't until the last few coats that it looked OK. It's a not a professional job by any means but it works for me and I can touch it up when I need to.
Final stage was to install the gaskets. I did this working with the smallest door laying flat on a table. Make sure to mark the door lining so you now which way the bolt holes line up. Each time I installed the gasket, I started with a corner that was away from view. I inserted the gasket and drilled a bolt to 70%. Then I inserted the gasket along the entire edge and around one corner. I tighten bolts along that corner until the edge and repeated inserting the gasket on the next edge. I cut the gasket only after getting to the end of the door (this was helpful because I didn't waste anything). Once I cut the gasket, I pushed the cut edges underneath the sheet metal (as best I could). I didn't put the gasket under tension before tightening the bolts, just made sure it was fully seated. Installing the gaskets was a little nerve racking for me but once I had the first door done, it was much easier. I installed the cook door gasket after re-attaching it to the body, the thermometer post held it in place (this was a one man job). I went slow and took my time, this also helped a lot. Putting the new clasps on was easy and so was adjusting them to close with just enough force to keep air in without over compressing the gasket.
Here are the photos cleaned, painted and new gaskets:


I had a problem installing the PitmasterIQ 110 I bought (it comes with new Assassin smokers, mine did not have one). This picture shows a coupler left behind by the previous owner but it's attached to a bushing reducer that is 3/4 inch.

I had to remove both pieces and replace the reducer with a 1.5 inch to 1inch. The hose barb sent with the IQ110 fit perfectly.

Couple of last things, I brushed off each rack and then sprayed heavily with canola spray. Ran the smoker with damper wide open at 300 for 5 hours. The Pitmaster kept the temps within 5 degree's until I opened the door. It took quite a while for it to recover (I will try turning off the open door detection next time).Total time from start to finish was approximately 25 hours.
I started the pit by loading the charcoal chute with royal oak lump, lit from the fire box grate for 60 seconds with a propane torch. I then turned on the pitmaster and set temp. Clamped closed the firebox door and the charcoal chute door. Left the damper wide open. This worked well, I through in a prime tri-tip from Costco and the damn thing was amazing!!
So with that in mind, this post serves as my tiny contribution to the cause!
Some context:
I have zero experience with metalwork or paint. I can change a light bulb, hang a set of curtains if told to do so and that's about it.
First up are photos of the 28 when I bought it, I am the 4th or 5th owner according to the guy I bought it from. Rented a box truck (with a lift-gate) from Enterprise for $50 and .50 mile. Bought 2 set's of 10 foot tie downs and was able to transport the smoker about 40 miles by myself. Placed the smoker lengthwise against the cabin side, I was nervous as the truck only had wood runners and no metal tie downs but I went slow (VERY SLOW around corners) and no problems.
Front Door
Top of the charcoal chute:
Fire Box Door:
Overall some real mileage on this guy, many, many, many cooks.
I reached out to Jeff at Assassin Smokers and he spent a half hour answering questions and sold me replacement gaskets, clasps and bolts. I can't say enough about how helpful Jeff was.
The box that Jeff sent came with a drill bit that fit the bolts but I didn't see it until I was done. The gasket comes as a single piece (I used a box cutter and it worked great). I will say that you get about 2ft more than you need so measure carefully.
First Stage for me was to remove the bolts that hold the doors onto the body. Once I had the doors off, I removed the bolts that hold the door frame onto the sheet metal lining the inside.
*********Impact drill, I stripped 3 bolts before a friend walked by and laughed at me. Handed me his Makita battery powered impact drill and I didn't strip another bolt. I went slowly and made sure I had good contact on each bolt. Anytime I was off center or had grease in the bolt head, it was a problem. The toughest bolts to remove were along the bottom ridge of the fire box and the front door.*******
Second stage was to clean out the cooking chamber. A lot of hard grease, rust and carbon was removed with a grinder tool with a wire brush attachment. I tried to use steel wool and a brush but the grinder and attachment is a must have. It took me just over 2 hours to clean out the whole thing.
*********** I have never been dirtier in my whole life*******************
I would wear a painters coverall and a hat ( I was wearing glasses). I am telling you, it took almost as long to get the grease of me as it did to clean the damn thing.
Here is a photo of the bottom of the chamber after cleaning
Here is the grease pan cleaned
Firebox cleaned
Front door cleaned
Third stage was painting, this had me the most worried, I have never painted a thing in my life. First thing I did was to remove the decals with a heat gun, then I wiped it with lacquer thiner which I got at home depot. Next, I sanded it lightly (was too lightly - this was my biggest mistake, some of the glue from the decal is still visible.) with 220 grit bricks I again got at HD. After sanding, I wiped it down again with lacquer thiner. I let it dry and started spraying a very light coat of Rustoleum high heat matte black.
****My garage is a mess now, I had a tarp down but this stuff got everywhere. Not sure how I could avoid it but it's a problem you need to know about*******
Once I had a thin and very ugly coat of paint on it, I left it for an hour and came back with slow overlapping strokes. It still looked horrible, but after 3 more coats, it started to look uniform. Overall, I went through 7 cans. I did some touch up the next morning when the sun was up. Overall, this step was the most nerve racking, it wasn't until the last few coats that it looked OK. It's a not a professional job by any means but it works for me and I can touch it up when I need to.
Final stage was to install the gaskets. I did this working with the smallest door laying flat on a table. Make sure to mark the door lining so you now which way the bolt holes line up. Each time I installed the gasket, I started with a corner that was away from view. I inserted the gasket and drilled a bolt to 70%. Then I inserted the gasket along the entire edge and around one corner. I tighten bolts along that corner until the edge and repeated inserting the gasket on the next edge. I cut the gasket only after getting to the end of the door (this was helpful because I didn't waste anything). Once I cut the gasket, I pushed the cut edges underneath the sheet metal (as best I could). I didn't put the gasket under tension before tightening the bolts, just made sure it was fully seated. Installing the gaskets was a little nerve racking for me but once I had the first door done, it was much easier. I installed the cook door gasket after re-attaching it to the body, the thermometer post held it in place (this was a one man job). I went slow and took my time, this also helped a lot. Putting the new clasps on was easy and so was adjusting them to close with just enough force to keep air in without over compressing the gasket.
Here are the photos cleaned, painted and new gaskets:
I had a problem installing the PitmasterIQ 110 I bought (it comes with new Assassin smokers, mine did not have one). This picture shows a coupler left behind by the previous owner but it's attached to a bushing reducer that is 3/4 inch.
I had to remove both pieces and replace the reducer with a 1.5 inch to 1inch. The hose barb sent with the IQ110 fit perfectly.
Couple of last things, I brushed off each rack and then sprayed heavily with canola spray. Ran the smoker with damper wide open at 300 for 5 hours. The Pitmaster kept the temps within 5 degree's until I opened the door. It took quite a while for it to recover (I will try turning off the open door detection next time).Total time from start to finish was approximately 25 hours.
I started the pit by loading the charcoal chute with royal oak lump, lit from the fire box grate for 60 seconds with a propane torch. I then turned on the pitmaster and set temp. Clamped closed the firebox door and the charcoal chute door. Left the damper wide open. This worked well, I through in a prime tri-tip from Costco and the damn thing was amazing!!


