I would be afraid the butterfly type intake on the very bottom mite have a tendency to get clogged and would have to be move every so often to clear its self. I did see someone on another forum that put wsm type intakes on the sides that could work.
Dave

By butterfly type intake are you referring to the pics I just posted? I only use sticks in my UDS and theyre burened in a short inner barrel shown below.

I've never had it clog
 
Last edited:
Exactly. As for the other option of putting a butterfly style intake on the bottom of the barrel, that is Plan B. It also makes it simple in that it not only serves as air intake, but a way for the grease to drip out!!!:biggrin: I could put a coffee can or something underneath the unit to catch the drippings. Actually. The more I talk about it, the more I like that idea!:idea:

Go price a 2" ball valve :shock:
 
By butterfly type intake are you referring to the pics I just posted?
Yeah, I was referring to the pic you posted with the square shaped spinner intake on the bottom of the barrel. Sorry for the confusion. Clogging could be a problem...so I guess I am back to laying the thick pipe in the bottom of her!:icon_blush:
 
Go price a 2" ball valve :shock:
That might just work!!! Provided it stays warm enough to prevent clogging. Probably only one way to find out. I suppose I could find another way to catch the grease, just trying to make it as simple as I can on this pass.
 
Yeah, I was referring to the pic you posted with the square shaped spinner intake on the bottom of the barrel. Sorry for the confusion. Clogging could be a problem...so I guess I am back to laying the thick pipe in the bottom of her!:icon_blush:


Clogging has never been a problem for me. The one thing I'd do different is use my "butterfly valve" approach in a removable lid so that the barrel can be lifted off all the internals (a.k.a., what Pat does).
 
That might just work!!! Provided it stays warm enough to prevent clogging. Probably only one way to find out. I suppose I could find another way to catch the grease, just trying to make it as simple as I can on this pass.

Grease dripping out the "butterfly valve" has never happened either. It would have to leak through the inner barrel and the intake air diffuse plate (the notched thing) below it. It aint gonna happen.
 
By butterfly type intake are you referring to the pics I just posted? I only use sticks in my UDS and theyre burened in a short inner barrel shown below.

I've never had it clog

That makes more since of it, did not notice the inner barrel. My bad. :icon_blush: I am guessing then you set a grate on the rods so the fire can get air underneath.
Dave
 
Sweet Drum fordman!

Love the wheel set up. I've been wrestling with how I wanted to do wheels on mine and that looks great.

What did you use for your probe hole?

Did you drill out the rivet on the Weber vent then replace? I also used an old Weber lid but didn't drill out the vent so you can still see the red paint in some spots on it. It's Ugly so that's okay...but I'd like to clean it up a bit if possible.

Well I drilled out the rivet and polished the vent and use a 1/4 x20 stainless bolt with a nylock nut. Yea I bought some more paine to touch up my red bracket so it will be all blue.


Probe hole was this but gromets would work as well like posted a page back.
3005725.jpg
 
Clogging has never been a problem for me. The one thing I'd do different is use my "butterfly valve" approach in a removable lid so that the barrel can be lifted off all the internals (a.k.a., what Pat does).
Yeah, using your setup the drippings wouldn't get down there I guess. What I was thinking was a removable bottom. Basically have the bottom removed and put a lid on down there with a ring clamp to seal it. I had planned on having a setup similar to Barbarian's where he has the bottom lid inverted on the ground, but with the ring down there around it ready to clamp down. I could set my charcoal basket directly on it (with 2" clearance below) if I had the kind of vent on the bottom like you had. After lighting I could simply set the drum on top of the lid and clamp it up to seal it. This way I could get the most room available for the food because the charcoal basket was the lowest I could possibly get it, and with the least amount of parts required to do so. In this set up however, drippings would get down on to the bottom of the cooker and drip out of the intake. I could put in a pan like you did, but was trying to avoid it for the simplicity sake.

Luckily, I have not built it yet so I can still decide on the approach!:biggrin: I still have to get my drum. Once it's here though then whatever seems best at the time is probably what I'll go with.
 
I apologize if I missed something in the 129 pages I read, but my question is about a single intake running to the center of the drum. Can anyone say if that takes care of the hot spots that others reported with a single intake? Also, I thought it seemed a bit odd that those with 3 or 4 intakes said they had more even temps yet they would have one or two of the intakes closed. How is that making the draft even resulting in fewer hotspots?

No biggie. Maybe nobody can answer, but thought I would ask. I would like to do a single intake (to keep it simple) running to the center.

Chris, I do the four intakes but close them down equally. I think the burn is more even that way. Did the pipe nipples inside about 4 inches long thinking the center oxygen would work the best but it didn't for my drums. Cut all the inside nipples back to 3/4 inch and the burn was even all the way around and more consistant. This is just how it works for the drums I have. Obviously, the single intake, or some capped intakes all work for them...that's real cool. Lots of ways to skin a cat...and they smoke low and slow real well also. :eek:
 
What about making this butterfly valve go one farther and make up some ash pushers out of 2" x 1/8" Angle Iron? that would serve to push the ash off as well as control the air flow?... kind of like a one touch weber?
 
Theres a thought. You would want a way to catch the grease though as a mix of ash and grease may not come out right. If all you had was ash though, that would definitely be a nice thing to have I think.

Geez, so many decisions when trying to make a real simple drum.:lol:
 
Now that the cook is done cleaning the big grate is a pain in the A**. How do you guys clean your cooking grates?
 
First Post - First Build - Thanks!

First off .. thanks all for all the hard work, tried and true research, and time invested in posting all these fantastic ideas for the UDS. Ideas and associated names are way too many to list but the ideas from BigMista, FordMan, N8Man, and especially the dimension / build post from NorcoRedNeck http://www.bbq-brethren.com/forum/showpost.php?p=662611&postcount=86 are a few that come to mind as I take time to thank all for their contributions to this post.

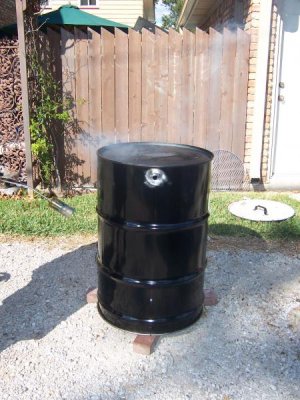
A buddy from work and I will build our first UDS's tommorrow (11/15) Nothing like a cool sunny Saturday, Work buddy, cold beer, and a home project using tools .. should be fun!

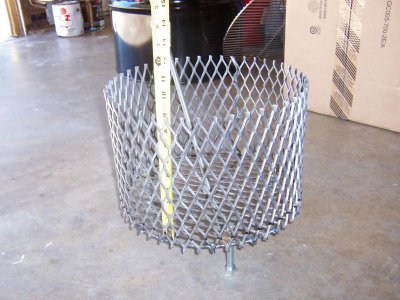
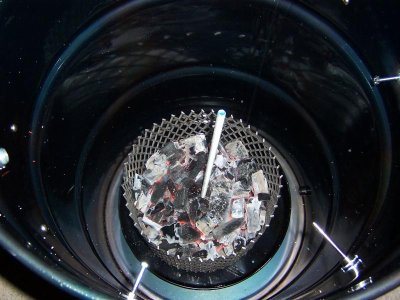
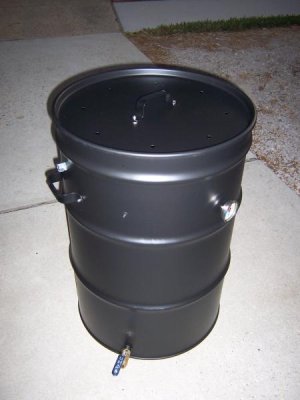
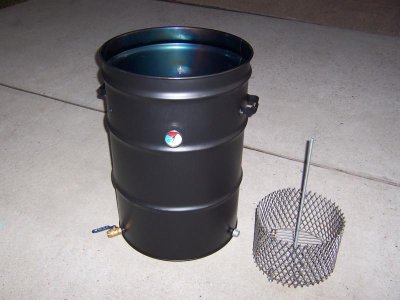
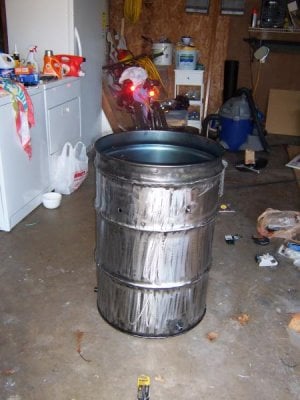
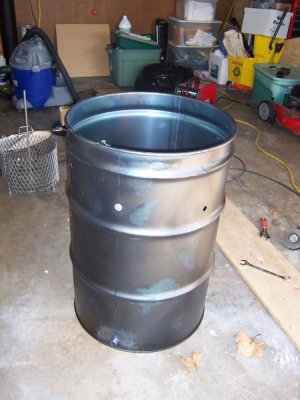
We wimped out; bought new unlined, open-top drums .. took the easier route. Did the firebox last weekend .. design posted by NorcoRedNeck; came out really nice .. very heavy duty.

attachment.php


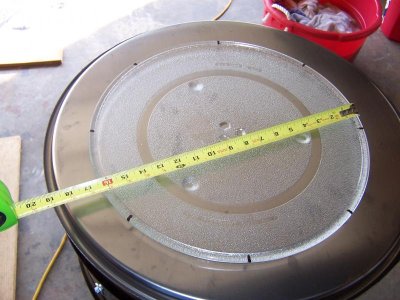
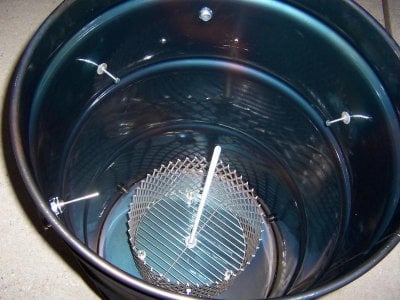
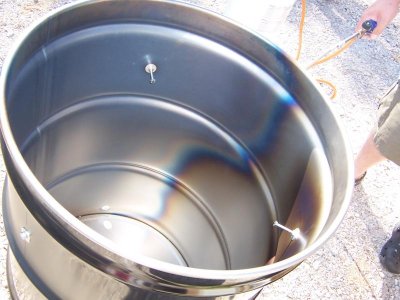
Also figured an easy template for the 1/2" vent holes in the top lid. I used the glass carousel plate from the wife's microwave. 16 1/2" diameter 8ea holes 6 1/2" apart for a perfect template.

attachment.php


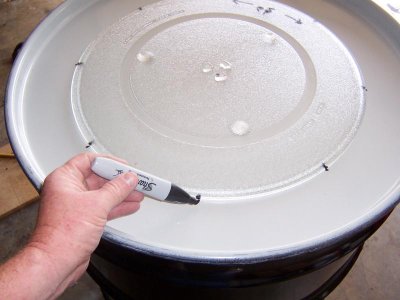
Used a sharpie to make marks, layed the plate centered / face side down onto the drum top.

attachment.php


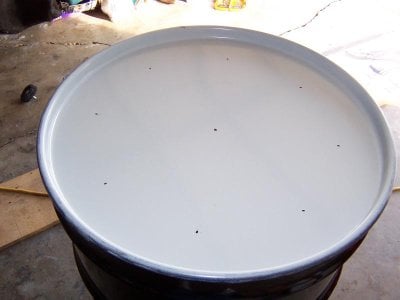
Transferred the 8 marks to the top .. voila .. 8 easy / perfectly spaced marks to drill the 1/2 vent holes. Cool thing about this is the marks are easily removed from the glass plate with a little soap and scrubber pad .. placed back in the microware before the wife realized what had happened. (Shhh .. dont tell!) :icon_blush:

attachment.php


Will post pics of the final product tomorrow evening .. wish me luck!
 

Attachments

  • Charcoal Box 2.jpg
    Charcoal Box 2.jpg
    75.9 KB · Views: 3,052
  • Top Template 1.jpg
    Top Template 1.jpg
    72.8 KB · Views: 3,051
  • Top Template 3.jpg
    Top Template 3.jpg
    51.9 KB · Views: 3,049
  • Top Template 4.jpg
    Top Template 4.jpg
    34.3 KB · Views: 3,046
Last edited:
Got away with it!

But won't she wonder what the marker lines are from? LOL

No .. she was out of the house .. away spending my money in the mall .. while I worked on the firebox. Cleaned up and returned to the microwave before she got home. Been a week .. hasn't noticed anything unsual .. I got one over on her!! :icon_shy
 
Last edited:
New Arrival - First Build Complete

As mentioned yesterday .. today was our build; A buddy from work and myself tackled our 2 drum project today and came up winners!

Photos of the job attached.

Summary; these were new open top drums, no liner. We burned them with a weed burner to remove outside paint and any undesireables from the drum factory. We burned them till they turned blue.

Currently both drums are in the seasoning stage overnight .. big plans for these two new arrivals.

Again, thanks for all the good ideas from the UDS user group.
 

Attachments

  • Seasoned.jpg
    Seasoned.jpg
    67.7 KB · Views: 1,517
  • Final 2.jpg
    Final 2.jpg
    28.9 KB · Views: 1,558
  • Final 1.jpg
    Final 1.jpg
    55.6 KB · Views: 1,744
  • Assembled.jpg
    Assembled.jpg
    99.6 KB · Views: 1,506
  • Ready For Fire.jpg
    Ready For Fire.jpg
    71.9 KB · Views: 1,514
  • Paint Prep.jpg
    Paint Prep.jpg
    42.3 KB · Views: 1,504
  • Burn Finished.jpg
    Burn Finished.jpg
    39.4 KB · Views: 1,503
  • Burnout 2.jpg
    Burnout 2.jpg
    61.6 KB · Views: 1,503
  • Burnout 1.jpg
    Burnout 1.jpg
    62.7 KB · Views: 1,503
  • Up to Temp.jpg
    Up to Temp.jpg
    33.4 KB · Views: 1,526
Just wondering how you all clean your grill grates they are big and a pain in the a** to move around in the kit sink.
 
Back
Top