• working on DNS.. links may break temporarily.

UDS Long Term Build, Have some questions.

BuffettFan

is Blowin Smoke!
Joined
Jul 10, 2018
Messages
1,793
Reaction score
31,791
Points
113
Age
61
Location
East Peoria Illinois
I've decided that I want to build an Ugly Drum Smoker.
I predict it will be something of a long term build for a couple of reasons.
First, I am in the middle of a major bathroom rebuild. Not a remodel, walls came down, all new plumbing and electrical, etc.
This will take first priority, but I will have some time in between and my job affords me the luxury of being able to spend some time on it at work.
Secondly, I am challenging myself to do the build with free, and or, repurposed materials.
Currently, other than the actual drum, which I have a line on, I believe I could build one with the materials I have accumulated so far.
What I have available for intakes are (2) 1" elbows, ball valves, and fittings. I have non-threaded 1" aluminum thick wall tubing that I can machine and thread to 1" NPT.
I also have the same in 3/4", but have (4) assemblies. I can use any, all or any combination.
For exhaust, I can choose form 2", 2 1/2", 3" or 3 1/3".
I'm leaning toward the 3 1/2" because I also have a damper for it, but an concerned that it might be too big of a diameter.
The goal of the UDS is to get long, constant unattended cooking temps, and a damper on the exhaust is a variable.
I have seen some builds with no stack, just 1" holes drilled around the diameter of the lid. I don't care for that idea for two reasons, aesthetics and rain. There's just something about smoke coming out of a stack. :wink:

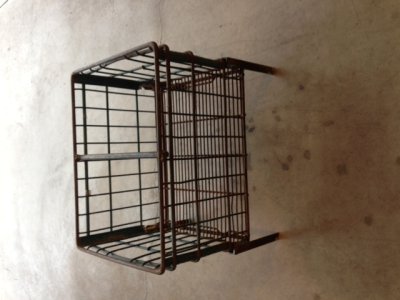
For the charcoal basket, I can certainly make one from expanded metal, but I saw one utubes vid using a 5 gallon bucket. I like the idea of that one and have a metal bucket available.
I have 3 HD casters, but they are non-swivel, so I may need to build a swivel plate for them.

I also have several 22.5" Weber grates.

The big question for now, what should my target intake and exhaust areas be? Planning on 90* elbows coming out of the lower sides of the drum with a section of pipe and the ball valves on top.
From what I've seen, 3 square inches of intake and 2 square inches of exhaust is fairly common.
Do any of the Brethren have some more wisdom they'd be willing to share?
Again, looking for long unattended burn times and before anyone suggests it, No I'm NOT buying a pellet grill! :laugh:
Thanks in advance!
 
The Mother of all UDS threads has some fantastic information, but it's huge. The 'advanced search' feature is helpful. Big Poppa Smokers has a build video that follows their kit, but it's very well done and can give you some confidence and possibly some tips on layout etc.

I don't see anything out of line with your game plan so far, after all it's cool to have a unique rig. My two drums are the basic of the basic... meaning no welding, intake vents which are controlled by plugs or small magnet squares, exhaust vents (like the style you want to avoid) which are also holes and plugs. I have increased the height of my charcoal basket (which is #9 expando) and can get 16 or 18 hours of burn time at 275°. The biggest advantage in my drum is that the designer, built 8 or 10 prototypes making small improvements along the way. I've cooked on them for 10 or 12 years without a hitch.

The big question for now, what should my target intake and exhaust areas be? Planning on 90* elbows coming out of the lower sides of the drum with a section of pipe and the ball valves on top.
From what I've seen, 3 square inches of intake and 2 square inches of exhaust is fairly common.
Do any of the Brethren have some more wisdom they'd be willing to share?

I think 90° elbows would be fine, and either ball valves or sliders on the risers. FWIW, my intakes are 3/4" diameter and I usually have half or three-quarters of one intake hole open, but have all of the lid vents open. I've never done the calculation of the number of square inches but I'll provide quantity and diameter if you want to look into that. One consideration on my drum, it's 43" tall not the standard 39" which MAY have an affect on convection or other things. In addition to the elbows, I would still have a plain hole (with a plug) down low so you can get a wiggle rod in there, I don't always need it but I want that option just in case.
 
For the charcoal basket, if your metal bucket is galvanized, and most are, don't use it. The smoke coming off burning galvanized metals can be toxic. Or so I believe, research it for yourself just to be sure.
 
Thanks for the info folks. :-D

Thirdeye, how many 3/4" intakes does your rig have? I assume the wiggle rod is to clean out ash during a cook?
I could easily replace one of the intakes with a coupler and plug for straight access.

Bruce, good point on the 5 gallon bucket. I don't think the one I have is galvanized. It is an old paint bucket, well red oxide primer actually, and is painted inside and out.
I don't think anyone would use galvanized on a paint bucket then paint the outside.
I'll remove some of the paint before I spend much time to be sure.
Then, I think a good burn out would leave a nice, clean starting point.
 
Last edited:
Thirdeye,
I just went to your site. Wow! Lots of great info on there! Now I have another cooking site added to my favorites!
 
Thanks for the info folks. :-D

Thirdeye, how many 3/4" intakes does your rig have? I assume the wiggle rod is to clean out ash during a cook?
I could easily replace one of the intakes with a coupler and plug for straight access.

There are 3 intake holes at 120° to each other. The vent holes in the lid are 1/2" diameter and there are 8 of them. The hole pattern is a circle 5" in from the edge of the lid. A wiggle rod for a drum is about 25" long with a 3" to 4" L on one end. You sneak it in a hole and under the charcoal basket, then gently rock it back and forth in 2 or 3 spots (not violently shake it).... it knocks ash off the coals to improve ariflow. I generally use mine after 6 or 7 hours of burn time, or if I want to doze off during an all night cook.

7797cc51.jpg


By plugs I was talking about these knock-out seals for electrical panels or boxes. A 4-pack is $1.50. The best tip for a good seal is to slightly undersize your hole, then use a step bit for the final fit.

accessories-26072-64_1000.jpg
 
Had some free time yesterday so I got some work done on the air intakes.
1" ID thick walled aluminum tubing has the same OD as iron pipe.
Cut the tubing to length, threaded, polished and assembled everything. The pipe fittings will get painted the same color as the drum. Might be a Chicago Bears themed drum. We'll see when the time comes.
scrounged around some more and found some handles. Ran them through the blaster and gave them a coat of metallic silver. Didn't get a pic of the after. Not sure if I'll put any handles on the drum or just use one for the lid. I also have some horse shoes, so I could do a PBC style handle.
I have sourced 2 drums, both free, but neither have the removable lid.
I think I'm going to hold out for one with the removable lid.
 
Last edited:
Looks like you're off to a great start! The intake setup on my drum is (3) 3/4" straight nipples and (1) 3/4" Riser on a ball valve. I've got a weber 22" lid on mine and just use the daisy wheel exhaust on that.

For my setup, I typically run 2 of the 3/4" nipples wide open and then will play around with the ball valve to get it dialed in. That will typically let me run around 280-300 depending on how hot of a fire I started with and how much time I have the lid open to get food in/out.

I think you're well on your way to success and it sounds like you have more than enough skill to pull this off! Can't wait to see the finished product
 
Thanks guys!
I've looked the bucket over carefully. The unpainted bottom and spots on the inside where there is no residual paint have a thin coat of surface rust. A few spots that I've cleaned off are shiny metal, no signs of galvanizing.
I'll do a bit more cleaning on it and post a couple of pics.
 
Looks like you have a solid plan but....

My homemade can has gone through several iterations. Started with (5) 3/4" nipples on the bottom. Went up to two 1" vertical black pipe extensions and elbows at the bottom. Then I bought two Gateways for comps... Love the speed and draw on these. So I put two 2" vertical pipes on my homemade can (like the GDS). I run a Weber lid on top (added 2nd daisy wheel). This did require some welding. All of these worked but I like the current version the best.

For a basket, I would use expanded metal. Add bolts, nuts and washers on the bottom to act as legs. Need the basket off the bottom.
 
Old steel milk crate for a basket. Just add 3/4" expanded metal on the inside.
 

Attachments

  • image.jpg
    image.jpg
    84.7 KB · Views: 330
Looks like you have a solid plan but....

My homemade can has gone through several iterations. Started with (5) 3/4" nipples on the bottom. Went up to two 1" vertical black pipe extensions and elbows at the bottom. Then I bought two Gateways for comps... Love the speed and draw on these. So I put two 2" vertical pipes on my homemade can (like the GDS). I run a Weber lid on top (added 2nd daisy wheel). This did require some welding. All of these worked but I like the current version the best.

For a basket, I would use expanded metal. Add bolts, nuts and washers on the bottom to act as legs. Need the basket off the bottom.

Thanks for the input!
You mentioned that you like the speed of your current setup.
I'm curious, how did the (2) 1" intakes do for holding temp long term?
Again, my current plan is (2) 1" ball valves and a third capped off per thirdeye's recommendation for the wigglestick.
If I can maintain ~250*-275* for 10 hours or so, I would be very happy.
I'm not opposed to the expanded metal fire basket, but the challenge of building the drum with all free/repurposed materials is part of my goal.
I've got the time to wait for the materials to find me and a couple other smokers, so I'm not going smokeless!

You should be fine for 250 to 275. I have been going 275 to 300 degrees more lately. I believe the key to UDS is starting with the right size fire so you aren't chasing temps. I use either Weber cubes or Tumbleweeds in the center of the unlit lump. Get a baseball or so size fire going and start closing it up.
 
Finally some more progress.
Again, one of the challenges I gave myself was to make this a nearly free cooker.
I had some scrap metal accumulated that I didn't have a plan for.
A buddy saw it and asked about it. Told him to take it and oh by the way, you wouldn't know where I could find a 55 gallon drum with a removable lid, would you?
It'll be here Monday.
I need to get to work on my fire basket!
 
The shiznit's getting real!
I think I have everything now for the build except for high temp paint and sealant including material to build possibly 3 styles of fire baskets.
Think I'm going with a 14" round expanded metal design.
Total budget to date $0.
Hopefully I'll get some time this weekend to get some work done on it.
 
Last edited:
Back
Top