First Smoke on OKJ Highlander

Rickybobby83

Well-known member
Joined
Nov 24, 2012
Messages
26
Reaction score
7
Points
0
Location
Clarkston,MI
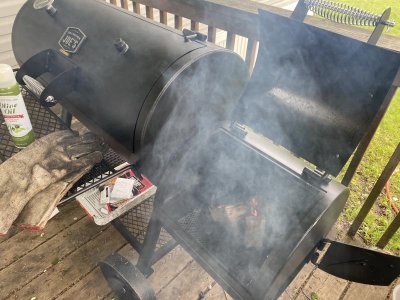
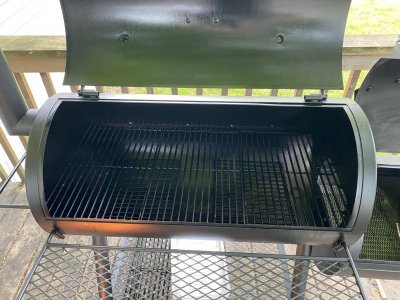
Messed around with my UDS for a while then gave to my brother in-law. So I got a OKJ Highlander. Learned quickly the difference between the UDS and a Stick Burner lol.

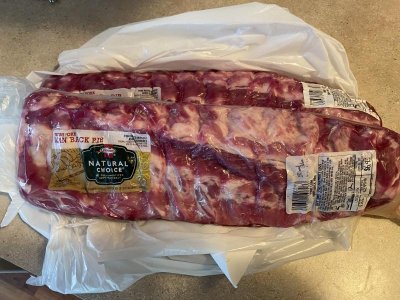
Normally dont like smoking on a set up thats not been seasoned but this freaking quarantine in MICHIGAN is driving me crazy, so I couldn’t let a good smoke go to waste.

Lessons learned so far:

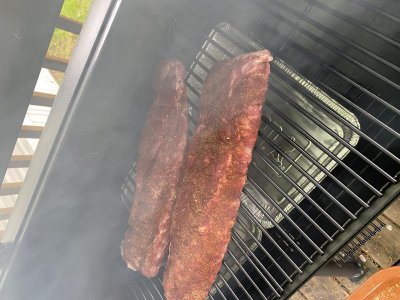
1. Airflow airflow airflow! Got a dirty cook but I got it figured out towards the end. Still edible.

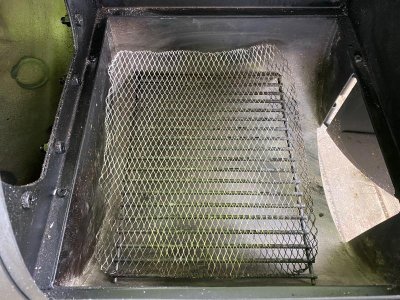
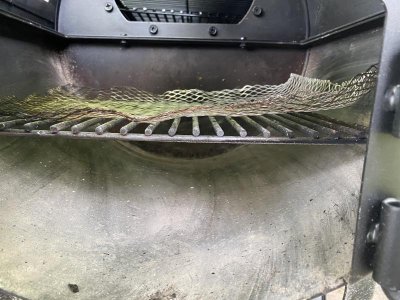
2. Burns more than the UDS. Was using lump and then wood chunks. Put a light weight expanded metal grate on top of the rack in the fire box. Bigger chunks work better. Got a buddy who has a wood biz in town so I’m picking up some apple wood and cherry Wood tomorrow. We shall see.

3. Got some leaks. Lot of differing opinions out there about sealing up the leaks, or using gasket etc. Once the fire got dialed in didnt notice much of an issue. I’m still on the fence with the gasket.

4. Fire baskets are apparently only recommended for charcoal. Not ideal for this offset.

5. A lot of touch and go. Gotta be patient and treat it like a craft. Got a long holiday weekend, or quarantine in front of me so I may as well use the time smokin. Plus it helps I work from home.

Any tips, ticks, and feedback would be welcome. Ive got much to learn.
 

Attachments

  • 1BE7F86F-F6D8-4C66-86C4-72A6F705ADB6.jpg
    1BE7F86F-F6D8-4C66-86C4-72A6F705ADB6.jpg
    77.8 KB · Views: 90
  • 019A9DA2-AAFA-4C61-A1C2-8B615115E832.jpg
    019A9DA2-AAFA-4C61-A1C2-8B615115E832.jpg
    90.8 KB · Views: 89
  • 16D1CCE5-55BC-4D0D-897C-0D20F3ECA32D.jpg
    16D1CCE5-55BC-4D0D-897C-0D20F3ECA32D.jpg
    76.2 KB · Views: 89
Nothing wrong with using a basket in an offset. Keeps your coals together. Lone Star Grills just started selling a very nice fire management basket for offset smokers. Basically a rocket stove/charcoal chimney cut in half and laid on its side. Does a nice job of concentrating heat under the wood splits while allowing airflow through the basket.

As far as gaps and leaks go, they're only a problem if you are having draft problems or trouble maintaining temperature. A cold windy day will be the real test.

Keep your exhaust and intake wide open. Open the firebox a little if you need to. It's all about getting a clean burn with offsets. A small HOT fire is what you want. If your splits are too large they'll smolder. A mix of lump and wood is cheating but easy to get burning clean with sufficient airflow. Using all wood you have to have your splits sized right.
 
its taken me a while to get a super clean fire on mine..fairly reliably done now, so if this helps: looks like similar to the basket I have. exhaust is wide open, and I usually keep the intake open fully and keep the door open.. not latched; after a chimney of coal, its all wood half splits; always fully ignited... always preheat splits, and let burn a minute or two before closing firebox lid; It then burns 250ish, very very pale to totally clear smoke... but does go through a fair bit of wood.
 
Congrats on the OJ. I learned on one, and boy did I learn.
I tried using gaskets because I thought it had to be air/leak tight. Not so. As long as you maintain a constant fire and temps in your "sweet spot", you are fine.
Control your temp by controlling the size of the fire. Simple, but it took another brethren to make me realize that.
I also had to keep my firebox door cracked to get adequate airflow. No shame in that. You do what you have to do.
Once you get this smoker mastered, you will be ready for one of those $2000+ models:becky:
 
I’ve found that the key to a clean fire is to preheat the splits so they instantly ignite. I use a grate above a metal deflector plate inside the firebox
 
Some more pics

Some pics now that I’ve cleaned it up. Better pic of the firebox. I appreciate the feedback. Will for sure make those changes tomorrow
 

Attachments

  • 380808F3-5EA3-4DEA-AD52-568716DC6A22.jpg
    380808F3-5EA3-4DEA-AD52-568716DC6A22.jpg
    86.1 KB · Views: 63
  • 142FD114-C020-4EF6-8883-2A8BA983E902.jpg
    142FD114-C020-4EF6-8883-2A8BA983E902.jpg
    122.5 KB · Views: 64
  • 9302BD33-CE60-4691-9650-C1BFED6558A8.jpg
    9302BD33-CE60-4691-9650-C1BFED6558A8.jpg
    81.2 KB · Views: 63
Learning is the best thing about this place. You are off to a great start.
 
You may need a larger gauge expanded metal. Those holes are a bit of small and may retain more ash than you want which could restrict airflow. Make sure to give it a couple of good taps with every new split to shake it out.
 
A lot of mods help but are not completely necessary. Get your fire up of f the bottom of the firebox , leave the door on the endo of the firebox open a bit and just maintain temps with the size splits you feed it and how often. Every one pit runs different. Mine likes a half a chimney of lump to get going then forearm size splits as needed and prewarmed on top of the firebox. Find out where your pit “likes” to run and learn to work with it instead of fighting it. If you can learn to manage temps with intake and exhaust wide open then you are on your way ����
 
Back
Top