
|
|
|||||||
| Q-talk *ON TOPIC ONLY* QUALITY ON TOPIC discussion of Backyard BBQ, grilling, equipment and outdoor cookin' . ** Other cooking techniques are welcomed for when your cookin' in the kitchen. Post your hints, tips, tricks & techniques, success, failures, but stay on topic and watch for that hijacking. |
 |
|
|
Thread Tools |
 03-16-2014, 02:37 AM
|
#1 |
|
Knows what a fatty is.
Join Date: 03-10-14
Location: Soenderborg, Denmark
|
Hey all,
Just wanted to share some pictures from my UDS build and share some of my experience with building this UDS. First step was to find a drum, foodgrade if possible. I found a drum, and as my first move was to remove the lid. I used a hammer and chisel, and got the lid off pretty easy. Here is my drum with the lid off: 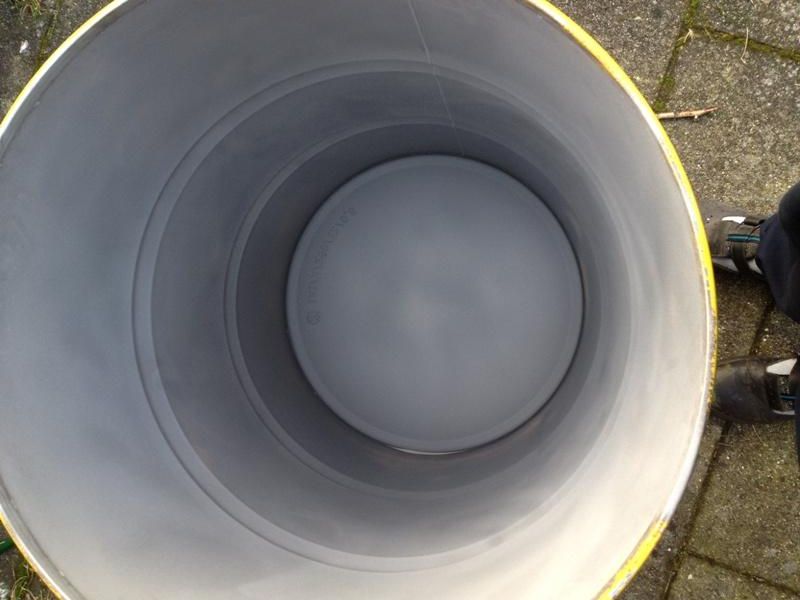 Becuase there was some brownish lining insdie the drum, I got the drum sandblasted on the inside, and there were no trace of the lining after that job. Next I wanted to remove the paint from the outside of the drum, and I used a gas torch, which worked very good. 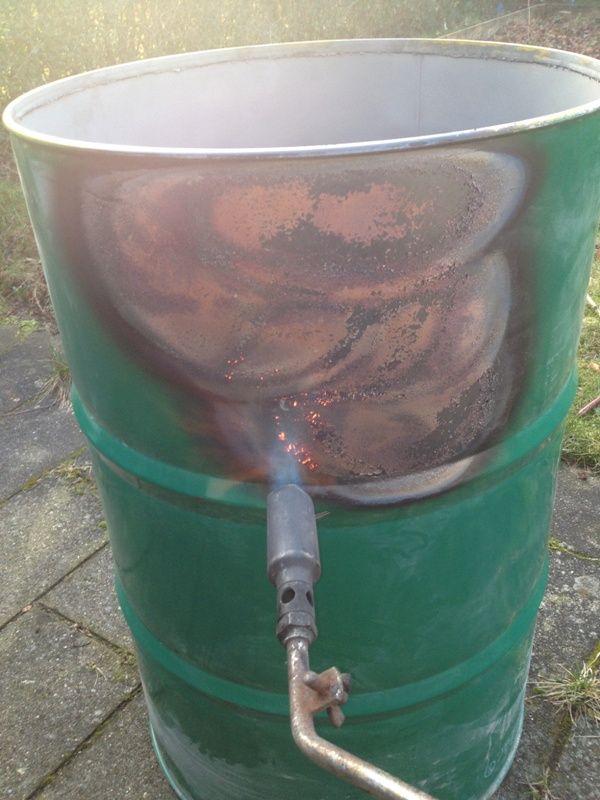 I could remove the paint with a piece of cloth, after the burn - came off very easy. I cleaned it afterwards very good, and got ready to drill some holes. I used these instructions, found on the web, which I think were very detailed and easy to find out: 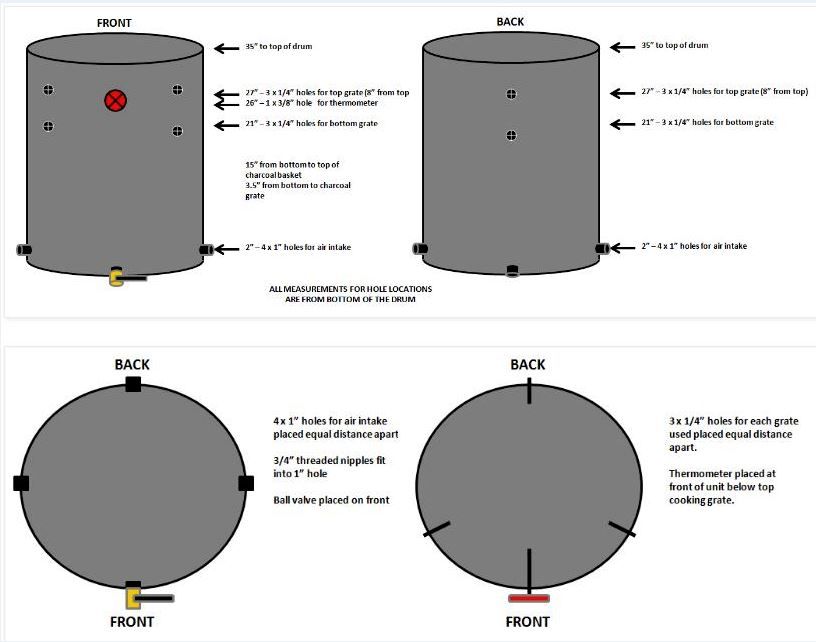 Also this plan shows where to place the grates, and airvents - this is for a drum using a kettle lid: 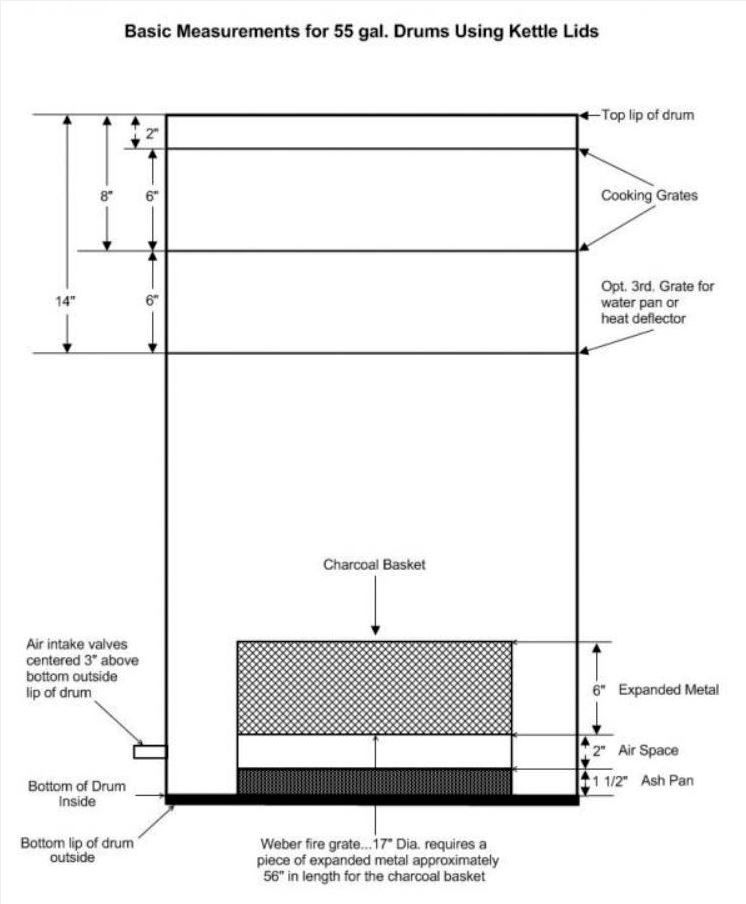 So I drilled some 1" holes for the airvents, so the 3/4" pipe nibbles would fit perfectly in these holes:  And the fit was great - The insertion of the pipe nibbles were very easy. Now was the time to build my charcoal basket. I used the charcoal grate from my donor Weber kettle grill, which I think were 16" in diameter. I got some stretch metal, 2 pieces of 12 x 24", and put them together with some bolts, nuts and washers. It took a little time, but I think I got it done pretty neat:  I used 6 hose clamps to fix the stretch metal to the charcoal grate. Get some very small ones, and it worked pretty good with fixing these parts together. Now I was ready for my seasoning burn. I oiled the inside of my drum with some vege oil, and for that a piece of cloth to rub the oil realy good on the inside. 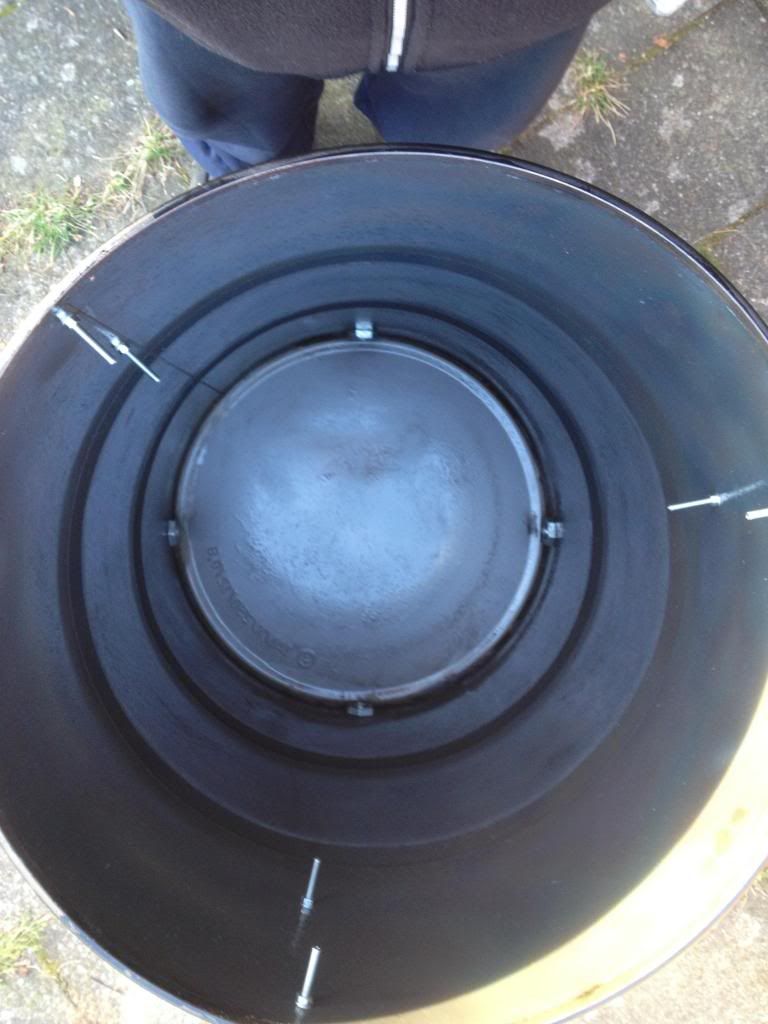 I mounted all my bolts (2 x 3) for the 2 grates, and all the pipe nibbles and the 2 ball valves, before the seasoning burn. Filled my basket with some coals, and started the burn. Grates also got some oil, and were put in the drum during the seasoning burn: 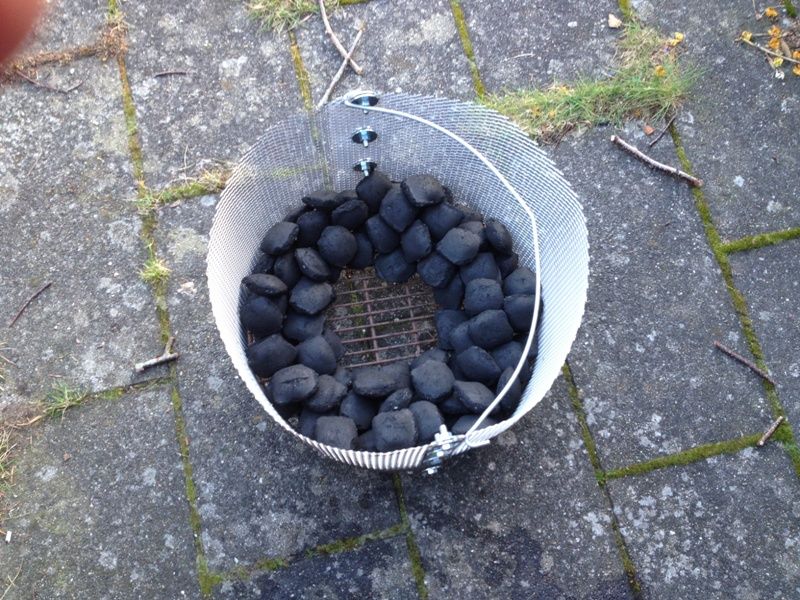  The end result of my UDS build:  The very next day I had to try to BBQ some beef:  Came out looking pretty good, and tasted even better. Also had a very nice smoke ring  Thats it for now. I'm very pleased with how my UDS looks and works. Kept the temp realy nice and steady and can't wait to smoke some beef short ribs next weekend |

|

|
| Thanks from:---> |
|
03-16-2014, 04:02 AM
|
#2 |
|
Babbling Farker
  Join Date: 11-20-13
Location: Uniontown,Pa
|
I love my UDS. You did a great job on the build and the cook. Nice plans.It is very rewarding cooking some nice Q on something you built yourself. The flavor from a UDS is awesome. Happy smoking my friend.
__________________
Ron-Born and proudly raised in New Orleans, Louisiana Pastry Chef Weber 22.5 Kettle,Blackstone 36 Griddle,UDS Shirley Fabrication 24x50 RF with warmer(Boss Hogg) Tab Benoit- Must listen to this artist. A cross between southern blues,Stevie Ray, and Louisiana cajun. Great listening while having a brew and tending the stick burner. |
|
|
|
|
03-16-2014, 04:56 AM
|
#3 |
|
somebody shut me the fark up.

Join Date: 02-13-12
Location: SE Florida
Name/Nickname : Marty
|
Nice lookin drum. Lets see some more cooks, the beef looks great.
__________________
Marty UDS now gone, WSM 18", WSM 22" and pellet pooper in the garage for 18 months now. |

|
|
|
| Thread Tools | |
|
|


