Hi everyone. I just want to say thanks to all you seasoned vets and your discussions about the UDS. I referenced this thread and the discussions here quite a bit in my build and created a blog for novices who want to build a UDS. Check it out and let me know if I've missed anything. I'll post pics on here soon.
http://udsrookie.blogspot.com/
 
My first UDS build (w/ pics)

Greetings Brethren!

I'm new to the site and happened to stumble across it when doing research on this UDS I recently herd of. I've always been a huge fan of BBQ but have never taken a shot at it on my own. When I found out about this midevil cooking device, I was hooked on making one of my own and give'n it a whirl. With about a week of research and compiling ideas, I set about to gather all the bits and pieces needed to build my contraption. I did not do allot of pricing around and pretty much just bought everything when I found it wherever that might have been. I had an idea of what I wanted it to look like and borrowed ideas from many other peoples builds(Thanks to everyone) :clap:! So with no further :blah: :blah: :blah:, here are a few pics of the making of my very first UDS build.

1.jpg


2.jpg


3.jpg


4.jpg


5.jpg


6.jpg


7.jpg


8.jpg


The drum I found was $35 w/ lid & ring. It was a "food grade" container that formerly held Pinapple concentrate. First I measured out all my holes and cut them out. Then I built a good fire with some scrap 2x4's I had laying around and torched it good. The next morning I proceeded to clean it up with some degreaser(purple power), water, and a scotch brite pad. I found out that this is the most labor intensive part of the build.... :mmph: After cleaning and drying the drum, I proceeded to put my two tone paint onto the exterior after giving the inside a lite coat of canola oil to keep it from rusting up on me. After applying the paint and waiting between coats for it to dry.... :wacko:.... I began to assemble all me pipes and joints. (I said "pipes" and "joints" :wink:). The next day was time to get everything hooked up for a good seasoning. I havn't made my basket yet (got the expanded metal today) so I used the basket from my turkey fryer for the break-in. After wiping the inside clean of the previous oil slick, I reapplied a liberal coating and fired off 10lbs of lump carcoal with some hickory chips for good measure! I put flame to coals at 6pm and the UDS climbed to 300 for about 1hr. I chocked off all the O2 for about 5 minutes and the temp slowly dropped down to 230 when I bagan to crack open some valves to revive things a bit. The drum krept back up to about 250 where it stayed for another 3hrs. I played with the valves a bit and was able to get it to stabalize at 230deg where it stayed until I crashed out at 4am the next morning. So in closing, I know the UDS will hold a temp (a little higher than I was hoping) for at least 10 hrs. I hope to put some dead animal products on it this weekend once I get the basket finished. I will use briquets this next time as I understand they burn a little cooler than the lump. It's my hope that with meat on the grill and cooler burning briquets, I can get it to run in the 215-225deg range. The last picture is taken with a nice bronze smoke patina on the guts of the UDS.... I can't wait to see how she cooks this weekend.

Cheers!!

Keith
 
Nice drum sandskipper, you may know this but just be aware that copper can get hot enough to burn kids/pets etc. It transfers heat very quickly. And it will turn green inside and out unless you coat it. Let us know how it works.
 
I copied advice I found on this site.

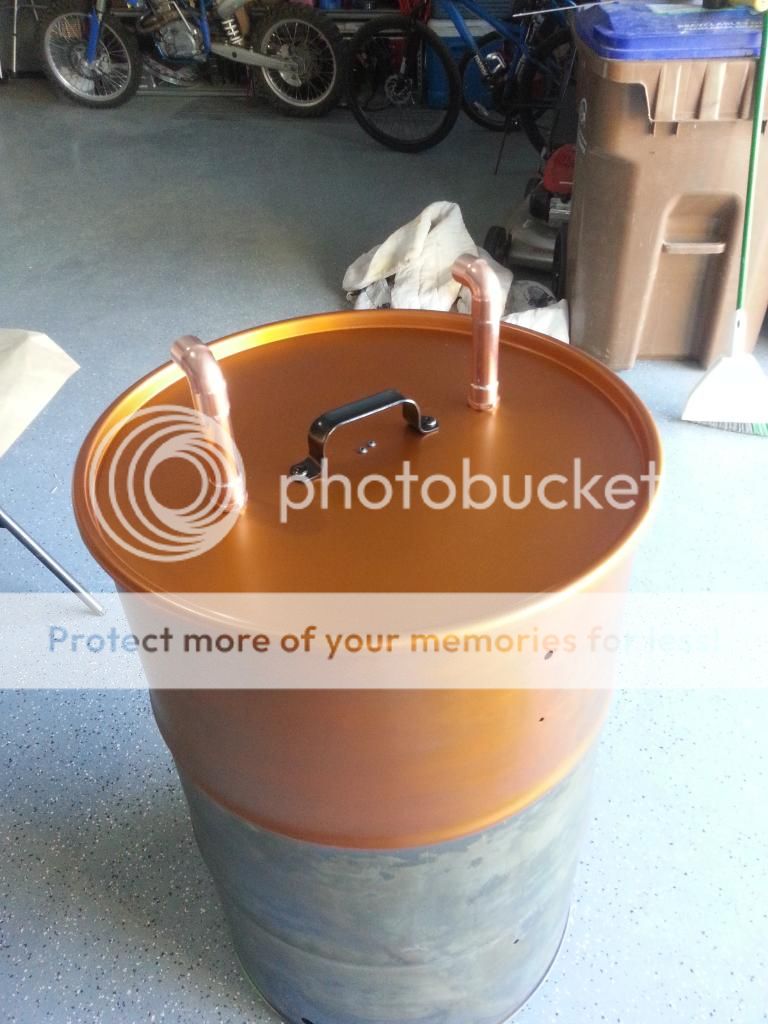
I used black pipe nipples, .75 inch I think, in holes cut with hole-saw.

The pipe just screws into the hole but I anchored and sealed with conduit washers, after I burned the galvanizing away with torch, which was likely not necessary.

Black pipe nipple caps cover three of them, the valve takes care of the one.

The valve takes care of the one that comes up to waste level with copper pipe, which is just pushed together, anchored to side with strap and couple small SS bolts.

One covered nibble is barely visible in pic.

I might add that I am glad I used smaller drum. I only smoke for two, but if need arises, I use both grates.

The hole for the chimney was a PIA to cut...took 10 minutes, but that top was a lucky stroke of luck...thermometer probe is near perfect position when installed and squatchin' going, as in second pic from last April...

The SS chimney is near exactly the diameter needed to maintain flow with its area matching the sum of the vents...or close enough it does the job, no creosote smoke after it gets going.

Rarely mess with it once it gets to temp, save messing with valve once in awhile. Usually end up with two vents open, bottom opposite and some degree of valve opened.

Better many vents to begin and later shut, to me.

The chimney may be from Char Broil...forgot, some brand of burner...will send if you call.
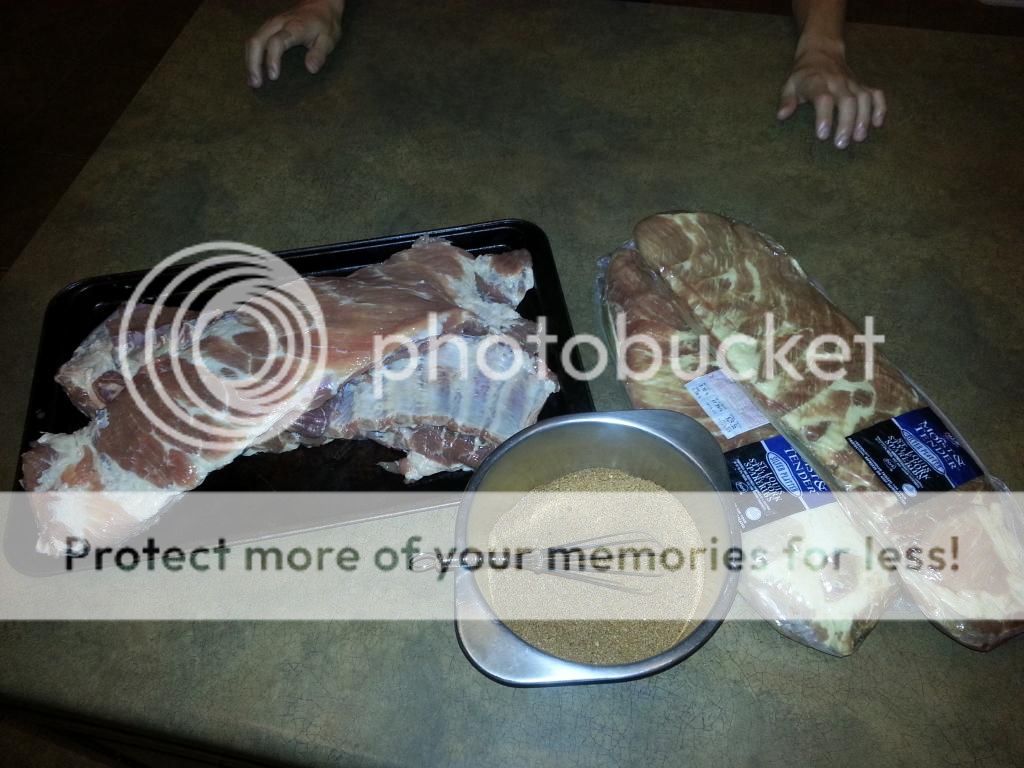
BobBill, where did you find, or how did you make, the stainless dome lid for your UDS?
 
Hello from CO

I have been reading over the site for the past several days. Today I purchased a large portion of the items needed to build my UDM. I will work on it in the evenings and hope to have it accomplished by the end of the weekend. I have ordered a few items online, so hopefully it will all arrive by the weekend.

Thanks to all of the lessons learned in this forum, I am sure it will turn out great.

Thanks in advance!

Christopher
 
250*-275* is Perfect UDS Smoking Temps.!.!. For All Meat :mrgreen: - except Psuedo meat like Chicken- then 325* is best. :shock:
 
In the middle of a build myself. Got most of it fab'd up already (hope it's done right). Now it's time for finish work and paint. Would sandblasting be a fair idea? The inside appears to be a dark red color, and I'm concerned it may be the dreaded liner I keep reading about. Anxious to get her finished, so considering a sandblast.... Thoughts?
 
In the middle of a build myself. Got most of it fab'd up already (hope it's done right). Now it's time for finish work and paint. Would sandblasting be a fair idea? The inside appears to be a dark red color, and I'm concerned it may be the dreaded liner I keep reading about. Anxious to get her finished, so considering a sandblast.... Thoughts?


Yes- if you know a place and can afford it. The Red Liner seems to be the harder one but I burned mine out- Weed burner couldn't handle it but 4 busted up pallets and a couple fire place sized logs and a lil lighter fluid did the trick. :shock: Burned it out in my Driveway and someone called Fire Dept on me! They made me put out the fire or get a Ticket- luckily it had burned long enough. :mrgreen:
 
All done with this one. Probably about my 15th one to date. This is going to a good friend.:thumb:

13+-+1
 
Finished my first tonight. Powder coated it in black bronze illusion. Not trying to spam but if your in sw Michigan and want yours powder coated give me a shout.


Nice job BenCA, I am about to finish my second with two more drums in waiting. :thumb:
 
Last week I completed drum however did not have everything to complete the charcoal basket. I wasn't about to let that stop me so I emprovised and used my turkey fry basket to do my first smoke. I used Kingsford blue briquets with three large Pecan chunks and a small handful of hickory chips tossed in for good measure. After allowing the fuel to steady, the temp to come up, and the smoke to thin for about an hour, I added 4 racks of St. Louis ribs my kids and I prep's the night earlier. To experiment, I mixed up 2 batches of rub I had found on the web and paired them with like sauces I also made from recipes found. I did 2 racks in a St. Louis rub, and the other two in a memphis style. After reading about perfered cooking methods, I thought to play it safe and start by using the 3-2-1 method and had good results. The ribs had a bit more fat left on them than I would have liked but did not trim them at all which I was told later I should have done a little bit of. Also, I did not trim the strip of meat on the inside of the racks which I was also told I should have done. All in all, for my first smoke, I thought it was a success and I learned alot from it as well. Here are a few pron shots I took of the experience to share and document my results...

Cheers!

91.jpg


92.jpg


93.jpg


94.jpg


95.jpg


97.jpg


96.jpg


98.jpg


99.jpg


Thank you to all who have contributed to making this the best resouce for BBQ and UDS builds on the net!
 
So, I picked up my drum last week. It was used for storing coconut oil. I picked up most of the parts for assembly yesterday morning... I say most because I am sure I missed something and will have to make a trip to the store. :wink:

I drilled my holes and did the burn yesterday and plan on sanding today. After that, I'll have to see how much time is left in my day. It is Sunday and I believe there may be a game or two on today!

I do have a question... I noticed that my lid does not sit flush with the top of my drum. I flared out the lip and it helped some, but not a nice flush fit. I do not know if the barrel is misshaped or if that is just normal. Any ideas or guidance is appreciated.

Thanks!

Christopher

Did you burn out the drum yet? I know when I burnt out my drum yesterday, the lid warped, and now I will need a new one. Side note; since your drum contained food product, beware the dreaded liner, as most food drums have a real PITA red or tan liner that can drive you nuts.
 
Did you burn out the drum yet? I know when I burnt out my drum yesterday, the lid warped, and now I will need a new one. Side note; since your drum contained food product, beware the dreaded liner, as most food drums have a real PITA red or tan liner that can drive you nuts.

I burned it out... No red liner on mine. It is (was before I burned it out) gold color. I am looking at picking up a Weber lid today from a Craigslist contact. So, it may not matter for much longer...
 
I burned it out... No red liner on mine. It is (was before I burned it out) gold color. I am looking at picking up a Weber lid today from a Craigslist contact. So, it may not matter for much longer...

I picked up the Weber for $15! Lid fits like a glove!!! Going to press with the drum over the next few days.

Wish me luck!
 
Back
Top