R
r2d3henry
Guest
Hi all,
I want to first tell you that this couldn't be possible without Marty Leach's detailed post about his Santa Maria Grill. Thank you so much Marty, even though we have never met, I can't thank you enough for doing a real quality Post.
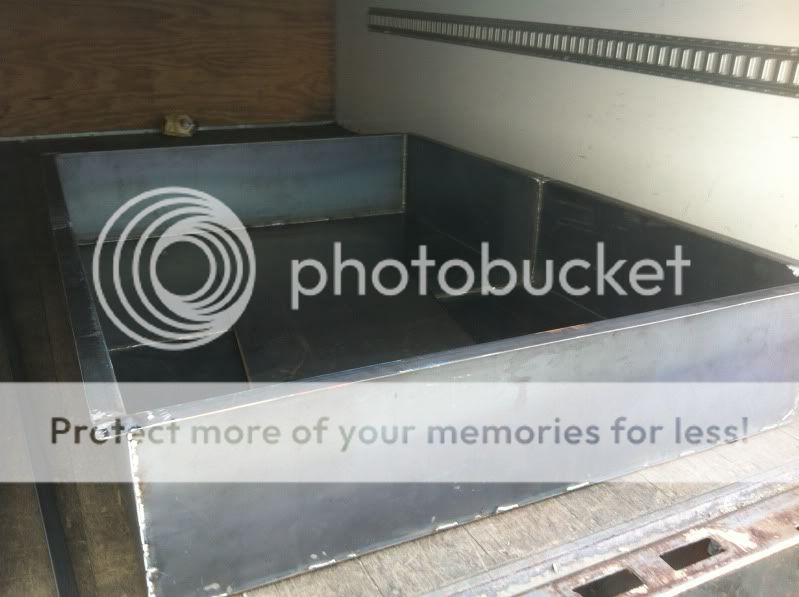
So...Here is the background info. The company I work for is EBS Sports & Entertainment and we do large scale events such as the Red Bull Air Races, Hard Events, and many concerts throughout Calfornia. So...my boss, who gives me alot of freedom wanted to buy a BBQ and have me modify it to put it on wheels. Well after calling around on some used units and a few new ones I decided I would like to tackle building it. That said I designed it to use the least metal and materials and labor without degrading it performance and reliability. So I went to my local metal supplier in San Diego and using 2 8' X 4' sheets of 12 gauge steel, had the supplier cut and bend the metal so I could begin the welding process. Here is a pic of it bent up and after I got it back from my buddies shop where he had a welder that could handle long distance welds.
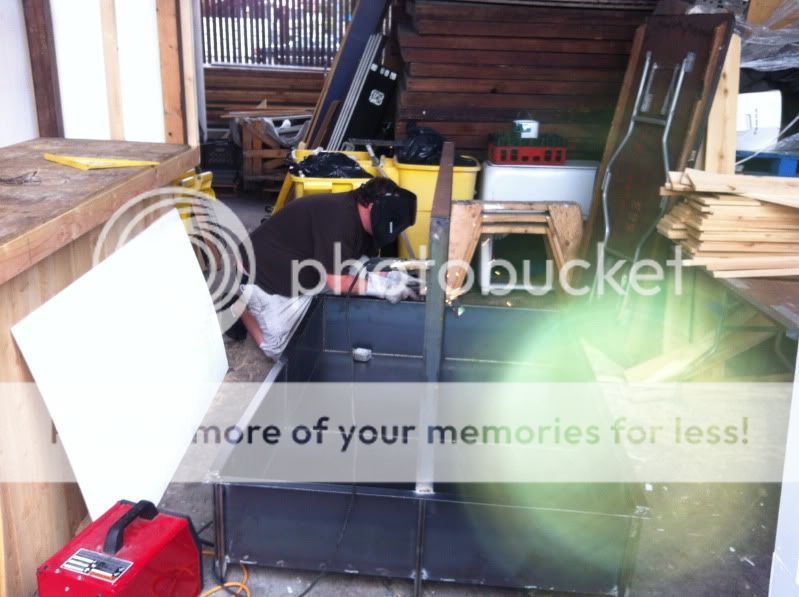
So now I have attached 3/4" standoffs for the wood trim(spot welded to keep heat transfer at a minimum. Also welding the 2" channel steel which will hold up the grill surface. As you can see I now have it back at the warehouse and am using my welder which can handle the few inch welds that I do at a time.
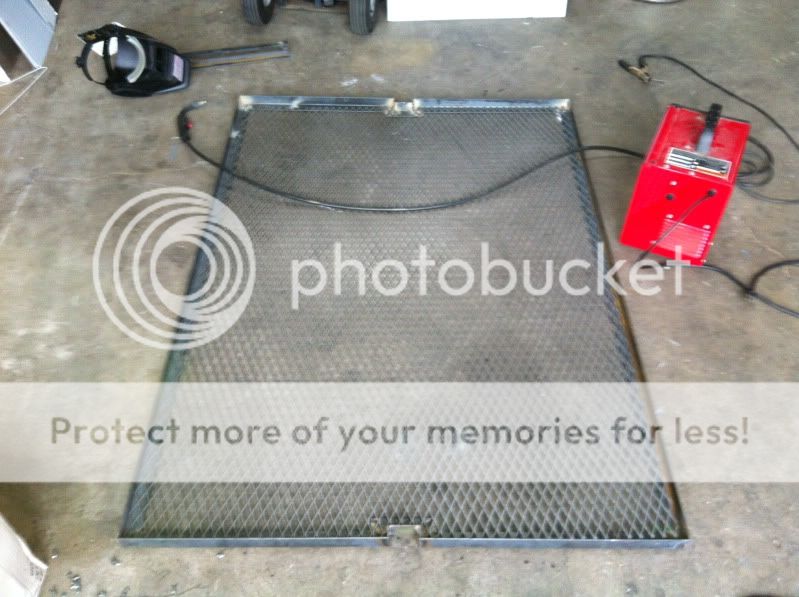
So below is a pic of the grilling surface. I decided to go with the angle iron approach and a rail setup. This was very difficult to do because of the 45 angles. It was like doing crown molding but much more difficult. The grilling surface is standard expanded metal and is tack welded all along the side so a grill changeout can be done in less than an hour.
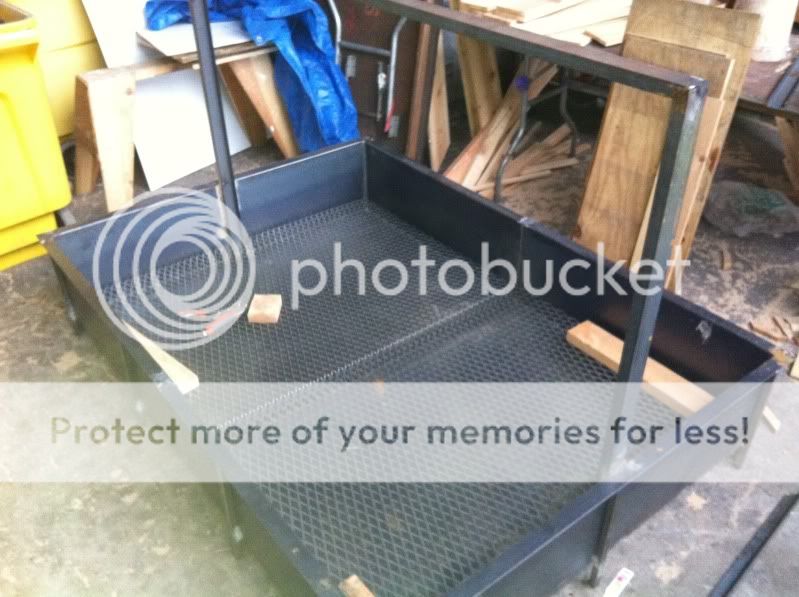
So below is the grill with support strut and a burnout preventer (sacrificial expanded metal 2 inches above the bottom. Even with our first burn which created crazy tempatures the bbq paint did not peel.
Below is the prep for paint. Since the grill will not be painted but instead seasoned with vegetable spray it was attached last. To prep the BBQ I grinded all the edges smooth, sanded, naval jellied, degreased, vinigered(is that a word, used for etching), and then finally I went to Harbor Freight and got a 2 cup sprayer for 15 bucks and sprayed the whole thing. Also I installed the wheel(15 bucks at junk yard and installed sprocket and brake)
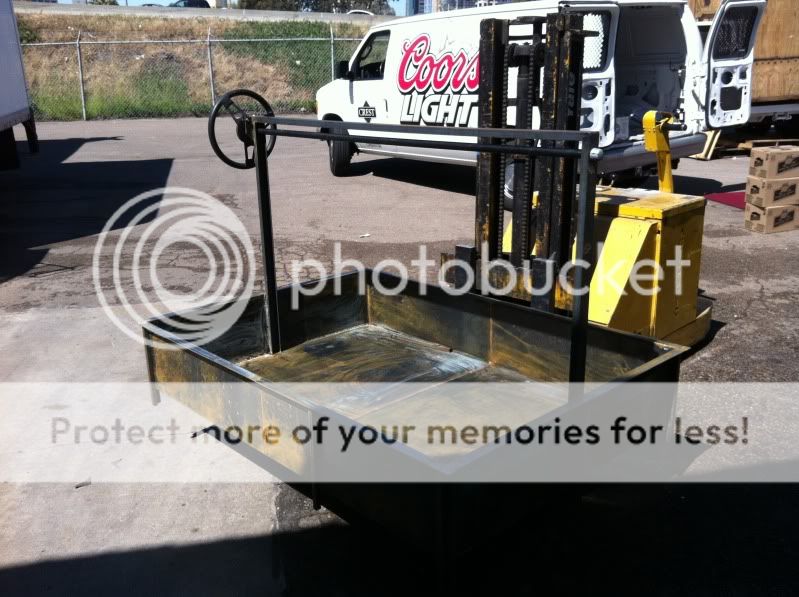
Painting the underside (just because I don't want it to rust, but not neccessary)

Wood trim installed

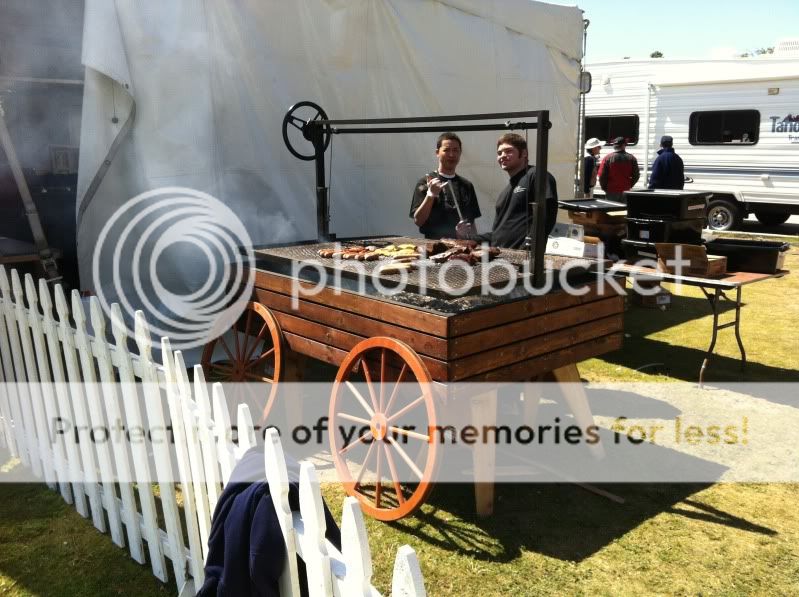
ALL DONE!!! Well not really, I am waiting for the wagon wheels to come from the Amish. I've been waiting a month already so hopefully soon I can repost the final product.

First Burn was at the San Diego Crew Classic. Not me but some of our employees loving the new BBQ. And missing wheels, still waiting!!!
Anyways, Thanks for letting me share.
I want to first tell you that this couldn't be possible without Marty Leach's detailed post about his Santa Maria Grill. Thank you so much Marty, even though we have never met, I can't thank you enough for doing a real quality Post.
So...Here is the background info. The company I work for is EBS Sports & Entertainment and we do large scale events such as the Red Bull Air Races, Hard Events, and many concerts throughout Calfornia. So...my boss, who gives me alot of freedom wanted to buy a BBQ and have me modify it to put it on wheels. Well after calling around on some used units and a few new ones I decided I would like to tackle building it. That said I designed it to use the least metal and materials and labor without degrading it performance and reliability. So I went to my local metal supplier in San Diego and using 2 8' X 4' sheets of 12 gauge steel, had the supplier cut and bend the metal so I could begin the welding process. Here is a pic of it bent up and after I got it back from my buddies shop where he had a welder that could handle long distance welds.
So now I have attached 3/4" standoffs for the wood trim(spot welded to keep heat transfer at a minimum. Also welding the 2" channel steel which will hold up the grill surface. As you can see I now have it back at the warehouse and am using my welder which can handle the few inch welds that I do at a time.
So below is a pic of the grilling surface. I decided to go with the angle iron approach and a rail setup. This was very difficult to do because of the 45 angles. It was like doing crown molding but much more difficult. The grilling surface is standard expanded metal and is tack welded all along the side so a grill changeout can be done in less than an hour.
So below is the grill with support strut and a burnout preventer (sacrificial expanded metal 2 inches above the bottom. Even with our first burn which created crazy tempatures the bbq paint did not peel.
Below is the prep for paint. Since the grill will not be painted but instead seasoned with vegetable spray it was attached last. To prep the BBQ I grinded all the edges smooth, sanded, naval jellied, degreased, vinigered(is that a word, used for etching), and then finally I went to Harbor Freight and got a 2 cup sprayer for 15 bucks and sprayed the whole thing. Also I installed the wheel(15 bucks at junk yard and installed sprocket and brake)
Painting the underside (just because I don't want it to rust, but not neccessary)
Wood trim installed
ALL DONE!!! Well not really, I am waiting for the wagon wheels to come from the Amish. I've been waiting a month already so hopefully soon I can repost the final product.
First Burn was at the San Diego Crew Classic. Not me but some of our employees loving the new BBQ. And missing wheels, still waiting!!!
Anyways, Thanks for letting me share.
