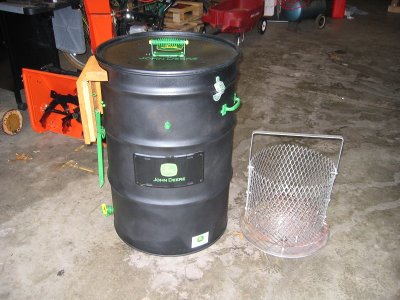
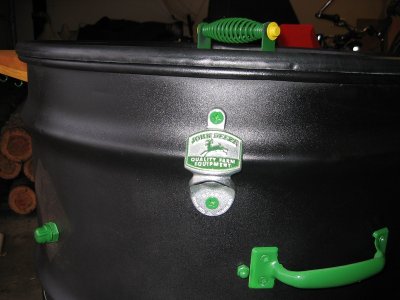
• working on DNS.. links may break temporarily.
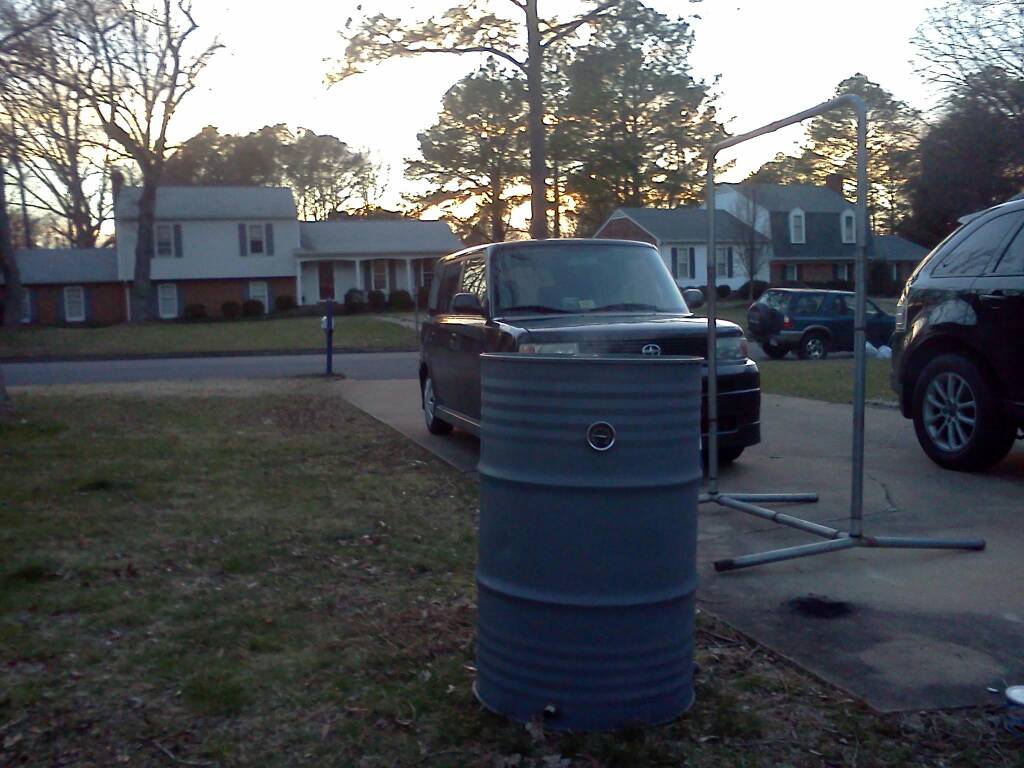
OK well the first time was a disaster, about 3 hours and it died. So I added a ton more fuel and added more vent holes. Lasted the 6 hours on a ton of fuel. I am guessing the water pan used a lot and the charcoal basket was too low.
So, I think that if I want to use the water pan she is going to use a LOT of fuel. so I will attempt wo water in the pan. Also, add another thermometer on the food grate to get a good accurate temp reading. I have a feeling with no water I will be plugging up a lot of holes to keep the temps where I want them. 225-250 for me personally.

I don't know I have this water pan thing that I want to use so maybe h20 for the first three hours where the meat soaks up the most smoke then control the temps and let the h20 run out. Any other suggestions?

Thank you in advance.

Lose the water pan, man. These aren't "designed" to operate with one. Millions of non-water pan UDS users can't be wrong! Don't give up on it yet, they're great cookers and like ALL cookers-store bought included, you must learn how to use it.
 
I had a pretty spec UDS, and initially had trouble with maintaining 225. I made a few small changes, then one large one. My first change was to ditch the budget grill ash pan. I replaced it with a pizza pan - it cleaned up the air flow at the bottom of the pit. Second change was to make 100% sure their was no extra humidity in my lump. After that things went much better.

Then I said to hell with this all and put a BBQ guru on it. I think I have managed a 24hr burn with 1 basket of coals (I did burgers for lunch, chickens for supper, and then pulled pork over night. Most of the time I just walk around the yard picking up limbs that have fallen from my by pecan trees - I can get a 6 hr burn off a basket of broken twigs. The guru is true set and forget - not only I can control a burn of twigs with it, I can usually go from empty to a locked in temp in 15 minutes (abet that is a bit of trial and error - you have to get a good burn started w/o overheating the pit).
 
Ok, plan on finishing my build this weekend, but I have one question. First I have ADD and my last day working on the drum it bit me in the arse. Without taking my parts list I FUBAR'd and got 1" fittings, got home, realized they didn't fit my 1" holes. So I start drilling and enlarging hole #1. Get the first nipple in, THEN :confused: it strikes me as odd it wouldn't fit, so I look at my list, :banghead: OHHH that's why was supposed to get 3/4". :( .
So back to Lowes get correct hardware as well as a 1" - 3/4 reducer. Got all installed and painted.
Hers the question. I lucked out, picked through a friends scrap pile and what do I find but 36" pipe, elbow and ball valve. :D get home and realize they are all 1". I still have 1" nipple that can be reinstalled to make it all work.
Can I use all the 1" stuff without it being much of an issue or should I just go buy 3/4" pipe and valve?

Oh yeah I like to talk a lot too.

Sent from my Galaxy Nexus using Tapatalk 2
 
No two UDS's are the same. 1" will be fine. The secret is and always has been learning how YOURS works. Have fun, don't get discouraged when the temps spike and/or drop (because they all do) and enjoy feeding your family and friends!

Sent from my pocket computer ( G III)
 
Ok here is my latest build. My first with a dome top. I used a template from another build with the bar stock mod. Painted with a hight temp white for something different and designed some custom magnets using Vistaprint. Going for a different look lol.

862595_10151546826097489_2124099076_n.jpg


804335_10151546825867489_1421773695_n.jpg


861822_10151546825672489_1420266771_n.jpg


804089_10151546823457489_1213087257_n.jpg


861962_10151546823252489_2142787342_n.jpg


862222_10151546822962489_1726689851_n.jpg


862583_10151546821982489_2100082623_n.jpg


862296_10151546821472489_93666192_n.jpg
 
My John Deere UDS

Well last summer someone at work was disposing of a shipping barrel that I took home with the crazy idea of making a smoker. When I searched the net, this thread came up and I realized what I really wanted was called a UDS. What a fascinating new world! Yes, I read every single post and kept great notes. Then, I made my own. Here it is... folding cedar shelf and all. Tonight, I lit the basket, and... IT WORKS LIKE A CHARM! Thin wispy smoke, holds a steady 225... I made MOINKs tonight and tried out the bottle opener on some Wisconsin microbrew. Oh my goodness I love this thing! To all the brethren who have posted their experiences in the first 700 pages of this thread, I thank you for the education.
 

Attachments

  • IMG_6375s.jpg
    IMG_6375s.jpg
    205.7 KB · Views: 815
  • IMG_6379s.jpg
    IMG_6379s.jpg
    153 KB · Views: 804
  • IMG_6381s.jpg
    IMG_6381s.jpg
    181.9 KB · Views: 808
  • IMG_6382s.jpg
    IMG_6382s.jpg
    161.9 KB · Views: 811
Ok, plan on finishing my build this weekend, but I have one question. First I have ADD and my last day working on the drum it bit me in the arse. Without taking my parts list I FUBAR'd and got 1" fittings, got home, realized they didn't fit my 1" holes. So I start drilling and enlarging hole #1. Get the first nipple in, THEN :confused: it strikes me as odd it wouldn't fit, so I look at my list, :banghead: OHHH that's why was supposed to get 3/4". :( .
So back to Lowes get correct hardware as well as a 1" - 3/4 reducer. Got all installed and painted.
Hers the question. I lucked out, picked through a friends scrap pile and what do I find but 36" pipe, elbow and ball valve. :D get home and realize they are all 1". I still have 1" nipple that can be reinstalled to make it all work.
Can I use all the 1" stuff without it being much of an issue or should I just go buy 3/4" pipe and valve?

Oh yeah I like to talk a lot too.

Sent from my Galaxy Nexus using Tapatalk 2

Use the one inch pipe and nipple. You can always just close the valve if needed.

Sent from my Galaxy Nexus using Tapatalk 2
 
I use 2, 1" nipples and 1, 1" ball valve on "Robot".... Works great.

My next build will be one 1" nipple /pipe cap, one 11/2" ball valve / nipple. I got the 11/2" brass valve for $11.00 !
 
Finally got mine done...

...and here it is! Going to start trying it out today. Ok so I know the paint job is a little Redneck....lol

photobucket-2401-1362924137693_zpscfd184d0.jpg


photobucket-43915-1362924161955_zps44864210.jpg
 
Just a thought here... as you all know I got a PBC and made a video about it.


[ame]http://youtu.be/wnIll1ZrSSE[/ame]


Now the purpose of this post is not really to promote that but when I spoke to Noah over the phone I remember telling him that he should make a little extra coin by making a rack/hook hanging adapter for our UDSs in case someone wants to hang.

Thing is, its really not necessary and here is why. Look at this photo from Ninesixteen's UDS.

02-22-09_1012.jpg


I was able to find this post by the way in the original and colossal 214 page UDS Thread by using my indexing thread I made here in case you want to find something in this thread without going through every page.

It more or less is the original lid design. Since this many of us have made exhausts that when you total up the area of outlet they equal more or less the total square inches of all these holes drilled in the top. Many of us have found we don't need all those holes and the regular top ports (one small and one) big will do.

Now look at this shot from a PBC thread...

5fb5fc10ea60ea23d026a1451cdba4f8.jpg


We liked the hanging aspect of the PBC, so we incorporated into our UDS.


We liked the hanging aspect of the PBC, so we incorporated into our UDS.
b09daca988f6d42e0cf3d430adea7f71.jpg


So think on it. Simply drill pretty much the same holes in you uds SIDE, get some rebar and hooks and you are good to go. Buy a new lid and DON'T put the holes in it... simply use the holes that are in it. Heck, technically you could simply drill ALL these holes in the side or less if you want to make them bigger.
 
mobilepics198.jpg.html

Well always late on the bandwagon...but got my first UDS up and running today. Brisket and beer can chicken are in the blue haze now....
mobilepics198.jpg.html
 
Last edited:
Well last summer someone at work was disposing of a shipping barrel that I took home with the crazy idea of making a smoker. When I searched the net, this thread came up and I realized what I really wanted was called a UDS. What a fascinating new world! Yes, I read every single post and kept great notes. Then, I made my own. Here it is... folding cedar shelf and all. Tonight, I lit the basket, and... IT WORKS LIKE A CHARM! Thin wispy smoke, holds a steady 225... I made MOINKs tonight and tried out the bottle opener on some Wisconsin microbrew. Oh my goodness I love this thing! To all the brethren who have posted their experiences in the first 700 pages of this thread, I thank you for the education.

Great build... How did you do the springer handle? I can't figure it out?
 
Great build... How did you do the springer handle? I can't figure it out?

Thank you. The spring handle is a steel rod slipped through a spring between a steel bracket. The two push nuts (painted yellow) hold the bolt and spring in place. The bracket is fastened to the lid with four 1/2 inch #10 stainless steel bolts. On the back side of the lid where the spring handle bolts come through I fastened a piece of 1" wide steel bar about 6 inches long. This bar is bent in a U-shape to serve as a lid hanger. I had read about some people having trouble with their lid blowing around in a good wind, if it was up, or not wanting to put the greasy thing down on the patio. I find my contraption holds quite solid and perfectly perpendicular.
 
UDS air intake question from a newbie

Hello fellow bar-b-quer's! I had a question on air flow for my first UDS build.Ive seen a lot of UDS with the ball valve extened with a pipe so you wont have to bend down to fine tune the air flow. Will this allow enough airflow through since the air has to travel a longer and more complicated distance to get to the fire instead of a short straight shot? I would love to be able to control the ball valve standing but dont want to lose air flow to the fire.
 
Hello fellow bar-b-quer's! I had a question on air flow for my first UDS build.Ive seen a lot of UDS with the ball valve extened with a pipe so you wont have to bend down to fine tune the air flow. Will this allow enough airflow through since the air has to travel a longer and more complicated distance to get to the fire instead of a short straight shot? I would love to be able to control the ball valve standing but dont want to lose air flow to the fire.

Here's an option, I have 3 extended valve adjusters on one of my drums;

assembly.jpg
 
Back
Top