lewisc
Is lookin for wood to cook with.
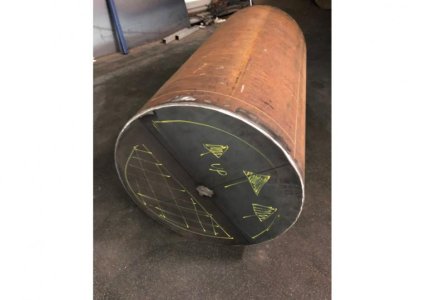
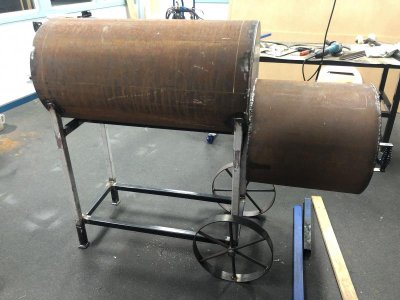
The firebox is just sitting there for now. The stand couldn't get high enough. The top of the firebox will sit around grill height. It's the first time I've assesmbled the parts to get an idea of the proportions.
I've been looking through a few smoker calculators but haven't workout the optimal size yet.
I've been looking through a few smoker calculators but haven't workout the optimal size yet.