• working on DNS.. links may break temporarily.
If you cut it so the "long diamond" is horizontal it's a lot more difficult, I learned this the hard way. For mine, I used an old 16" tire rim and three pairs of vice grips and a heavy hammer and rolled it around the rim and welded it.
 
Being off the ground does not help in cooking. The only reason for doing this is to create an air space under the drum so you don't burn anything under it or to prevent the drum from rusting if on the ground.

quick question. does a uds have to be lifted off the ground for some reason ? I'm going to put casters on mine but is there a reason for it to be off the ground ? does it help during cooks ?
 
Hot Enuff?

IMG_1026.jpg


Should have seen the other one...

Jeff S
 
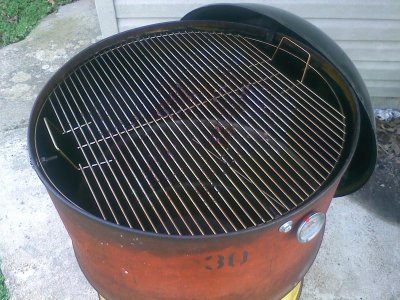
OK, finally got enough pics together to show the UDS of my dreams.

Clean 55 gal drum:

UDS005.jpg


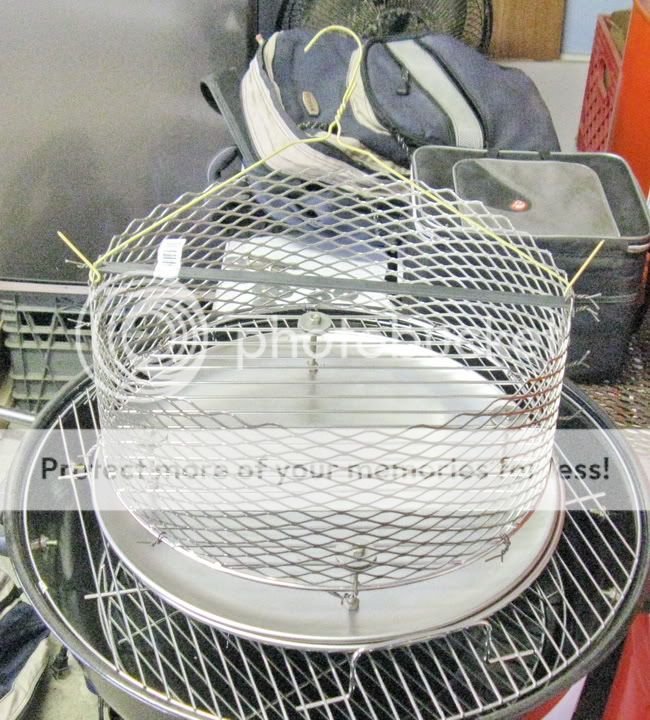
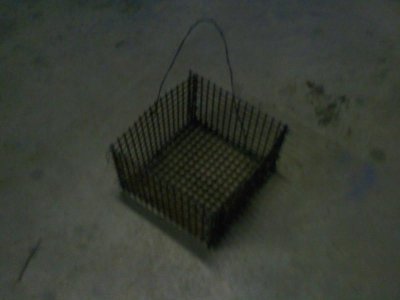
Charcoal basket:

UDS009.jpg


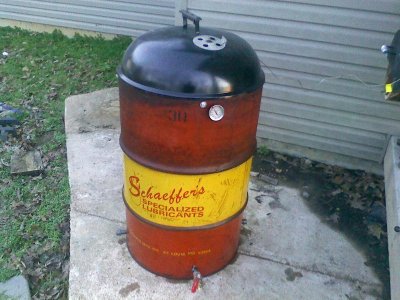
Complete unit with $25.00 Academy kettle lid:

UDS008.jpg


Basket ready for duty:

UDS012.jpg


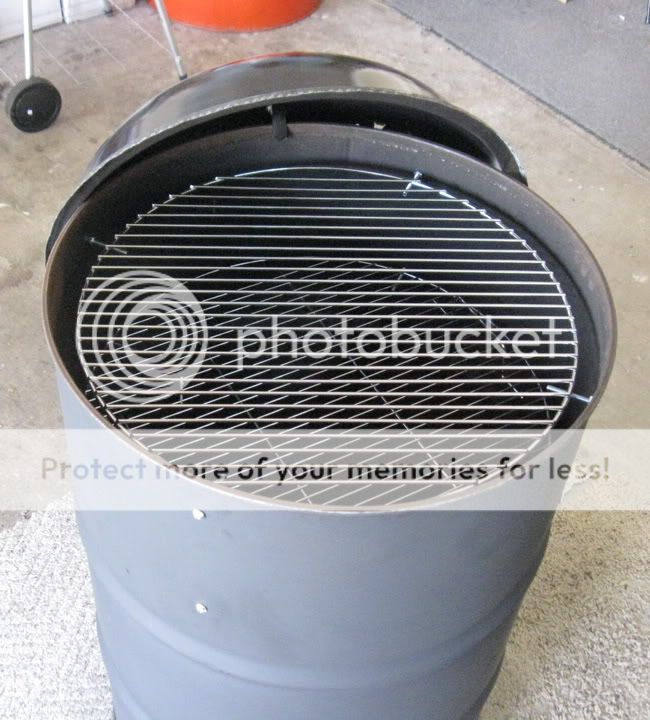
Cooking grates with lid hanging on side:

UDS011.jpg
 
Last edited:
^^^^^^^^ I would use a torch to get the paint off the coat hanger before you use it, or get an unpainted hanger. Nice build!!!
 
bending expanded metal reply

Quote

"I have read thru about half this thread and i didnt see anything like this (might be in the other half) I am trying to make the coal basket, have a piece of 3/4' #9 8" wide x55" long expando steel, and i am having a hard time shaping it. What is the best way to roll the expando around my cooking grate? I dont have a vice, or anything else i could use to keep it in place. Also i cant find any hog nose rings and i cant weld, would bailing wire work? Any help even a thread posting about this would be great. thanks"

Mossberg - I started my first one with gloved hands and a boot and then used a come-a-long hooked end to end around the metal. I used the all thread to pull it on around and hold it, but I used the needle nose visegrips to make final adjustments to line it up. The vise grips come in handy when you get close. I welded mine, so I tried to line it up so that the ends met. It took me a couple hours fiddlin' with it, before I got to where I could weld it.

I have made 3 more but I had the rosebud from the acetylene torch to heat and bend. It took me about 15 minutes to heat and bend the metal.
 
^^^^^^^^ I would use a torch to get the paint off the coat hanger before you use it, or get an unpainted hanger. Nice build!!!

Thanks.

I did a 6 hour test burn the first night I had it built. Played with temps, and got used to the intake(s). Had her up to almost 500 at one point, I'm thinking whatever was on that coat hanger was toast! The wood chunks were what I consider "culls", pieces that appeared to be really old, or moldy, feel lighter than they should etc. So I put 'em to good use.
 
Whaaaahoooooaahhhhh! I finally finished read the whole thing!

Thank you for all your input. I have learned many things durring this process. I have purchased two 55 gallon drums. I am going to apply what I have learned.

:clap2::clap2::clap2:
 
Here is my design. I took one of my drawings to a local machine/welding shop. They made me a charcoal basket. waaay too expensive. $100. With the other work i wanted done they wanted another $300! OK. so i bought my own used small Oxy Acetylene setup. Cheaper than their work and i'll own it afterwords.
 
Last edited:
Here is my design. I took one of my drawings to a local machine/welding shop. They made me a charcoal basket. waaay too expensive. $100. With the other work i wanted done they wanted another $300!

:shock:

good call on buying the tool instead...or 100+300=WSM

the sectional part is cool, but i don't like the access doors...they're just not needed on a UDS.

that said, i am a fan of ingenuity and building/modding stuff...
 
My gawd what a thread....but it had all I needed.

Took me a while to read it all but finally got through it and built one. Works great for such a simple system. Had a ECB and Walmart $99 sidebox both of which are junk. The sidebox takes so much tending and the ECB peters out after 5 hours. This thing seems like it will run for days on a basket of lump charcoal. I have about $40 invested and its worth every penny. Its great to be able to put meat on before bed and wake up in the morning to a delicious hunk of BBQ.
Thanks to all who contributed to this thread.
Oh heres a pic because of course no pictures means it didn't happen.
 

Attachments

  • 0316111902.jpg
    0316111902.jpg
    84.3 KB · Views: 1,227
  • 0323111946.jpg
    0323111946.jpg
    26.5 KB · Views: 1,224
Couple more pics of my UDS.
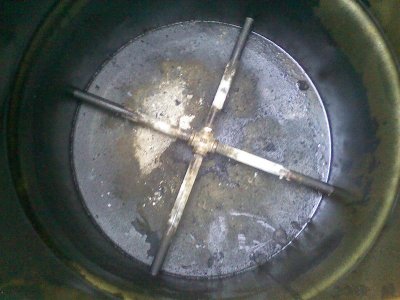
The pipes in the bottom are all have 4 1/4 in holes drilled in them. I figured this would support the basket and provide even air flow.
 

Attachments

  • 0317111738.jpg
    0317111738.jpg
    109.4 KB · Views: 1,226
  • 0317111739.jpg
    0317111739.jpg
    72.3 KB · Views: 1,228
Couple more pics of my UDS.
The pipes in the bottom are all have 4 1/4 in holes drilled in them. I figured this would support the basket and provide even air flow.

Interesting idea on the pipes! Are the outside ends regulated any way, w/ ball valves or something? Wondered if you wouldn't just get a cross draft, or if the heat rising pulls enough to draw in the air w/o that happening.... Neat idea though....
 
:shock:


the sectional part is cool, but i don't like the access doors...they're just not needed on a UDS.

that said, i am a fan of ingenuity and building/modding stuff...

I was on the fence about the upper door. Your point is well taken. I like the simpler design. So I am not going to do the upper door. But I still want the lower door. For access to the basket. I plan to make the door air tight with grill felt, or oven door trim and a draw latch. Turns out draw latches are hard to find these days. This was the hardest part I had to find.
 
gmatt, I still agree with righteousdog about leaving off the door. Everyone I know that tried it were extremely disappointed. I have been using my drums since 07 and have never had to refuel during a cook. I knowingly have extra fuel in case a longer burn time is needed for those stubborn pieces of meat. But, go for it if that's what you want. Good luck bro.
 
gmatt, I still agree with righteousdog about leaving off the door. Everyone I know that tried it were extremely disappointed. I have been using my drums since 07 and have never had to refuel during a cook. I knowingly have extra fuel in case a longer burn time is needed for those stubborn pieces of meat. But, go for it if that's what you want. Good luck bro.

+1, but go for it if you think you need it.
 
I say design a proper fire basket with proper distance underneath for ashes, and fill that sucker up! No need for an access door on a UDS.
 
Those pipes are 12" long 1/2" pipe nipples each has 4 1/4" holes cross drilled in it. 3 have pipe caps on them on 1 has a ball valve. Seems to work very well. In fact it may work too well. I am having trouble getting grill temps below 300. If i measure near the edge of the barrel I read 225-250 but over 300 right in the middle below the grill. The pipes fit very tight in the holes i drilled but i am going to try silicone around the holes to see if i am getting air leakage there. It may not be a big deal either way because it still makes great Q. :thumb:
 
Rust removal via electrolysis

Hey guys, I have adrum that i just finished the burnout, stripping, repainting, and drilling for the shelves and ports.

Unfortunatly i forgot one part.... I have some light surface rust on the inside of the drum i was planning to electricute off. But now with the holes in the drum i will have to seal, and the stainless parts exposed to the process i'm a bit concerned.

Do you think the electrolysis will strip the stainless parts? how long should i zap it for a light surface rust. deeply pitted parts usually get 24 hours. I am thinking of trying six to ten and see where i'm at.

Do i need a electrolite like baking soda, or does it work with clean water as well?

A grinder and my head inside a steel drum does not sound like a good day.
 
Back
Top