M
murdog
Guest
Backstory:
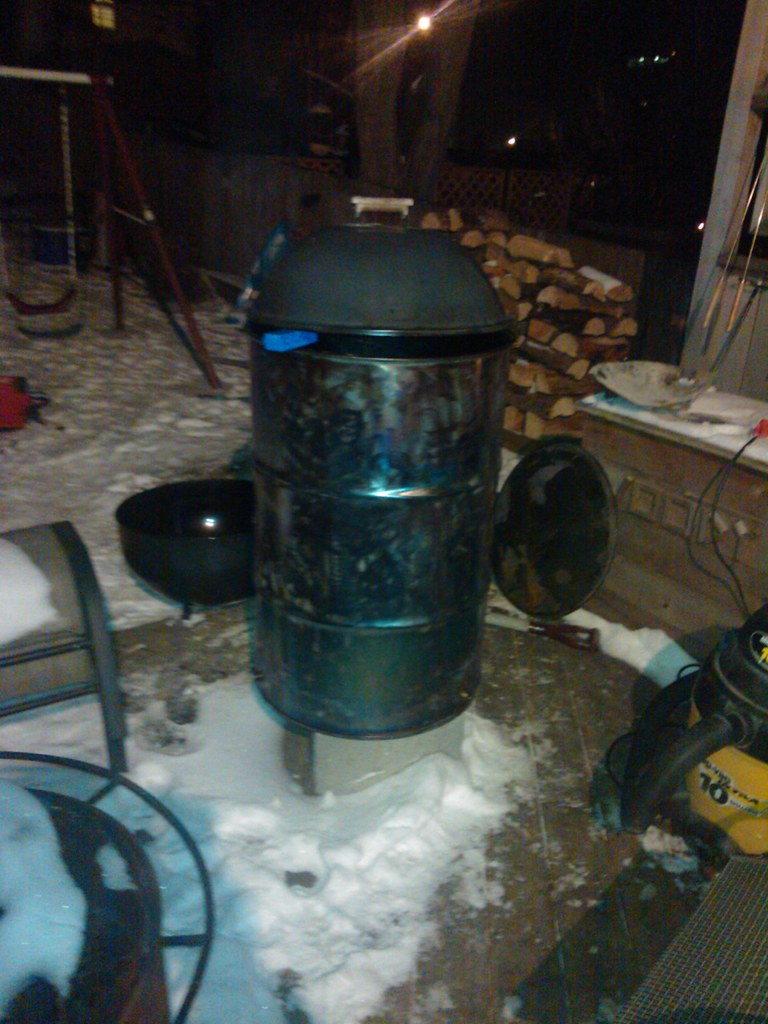
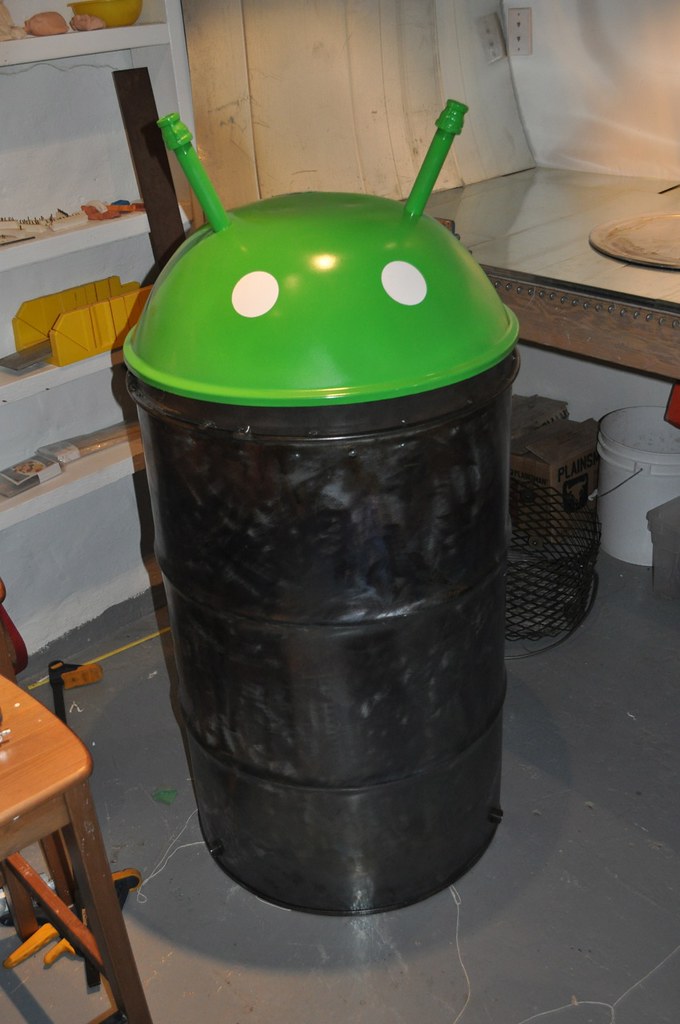
Completed UDS:

Here is the build out:
As many people have found, the barrel can be the hardest item to track down. Finding a local supplier with cheap unlined barrels did not exist. No luck on Craigs list, found a listing buried on kijiji - looked up on google maps- barrels on the side of the road! (http://maps.google.com/maps?q=calga...ugHht8nS8NjsFSCKjw&cbp=12,53.61,,0,12.83&z=14) - turns out they are food grade (pineapple juice) with a tan liner.
Had grown tired of searching for the "ideal" barrel and heck an excuse to sit out back burn chit and drink - I'm in. Put out the call to see if anyone knows where to get free pallets, brother in law points me to:
http://maps.google.com/maps?hl=en&l...U8BrqaGj_9d2EJ1BhWOGzQ&cbp=12,230.74,,1,10.66 - man I love google street view.
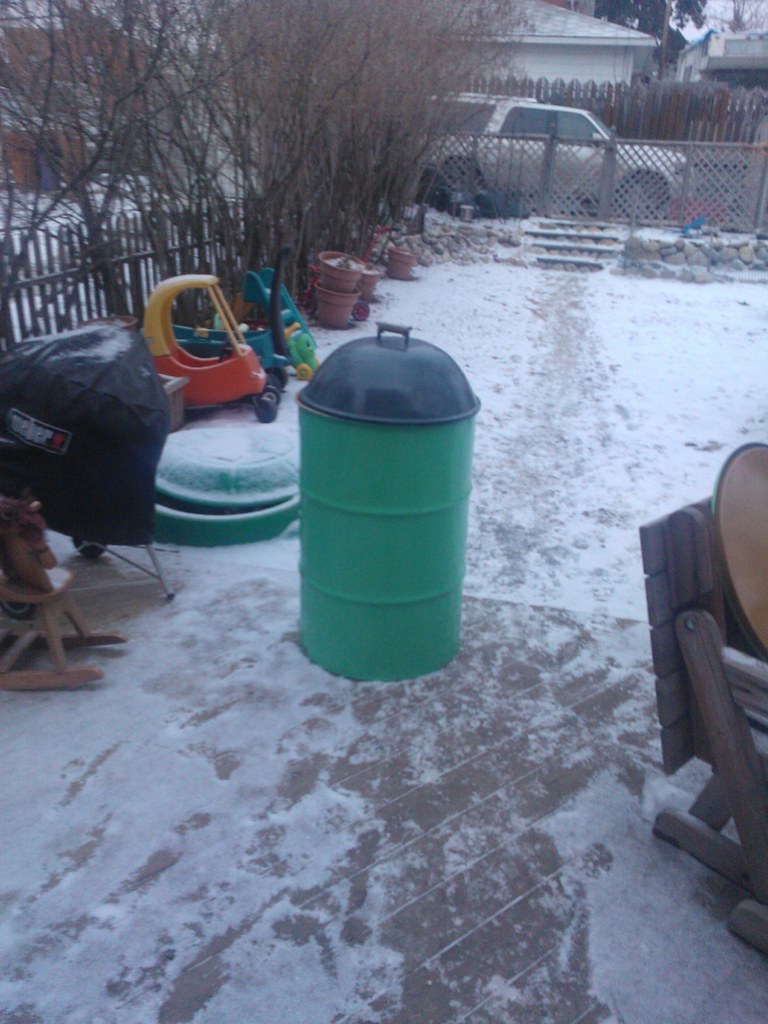
So Barrel @ home and weber kettle knockoff found on Kijiji:

First step deal with the liner - read lots of horror stories, turned out to be not too difficult - actually quite enjoyed the process.
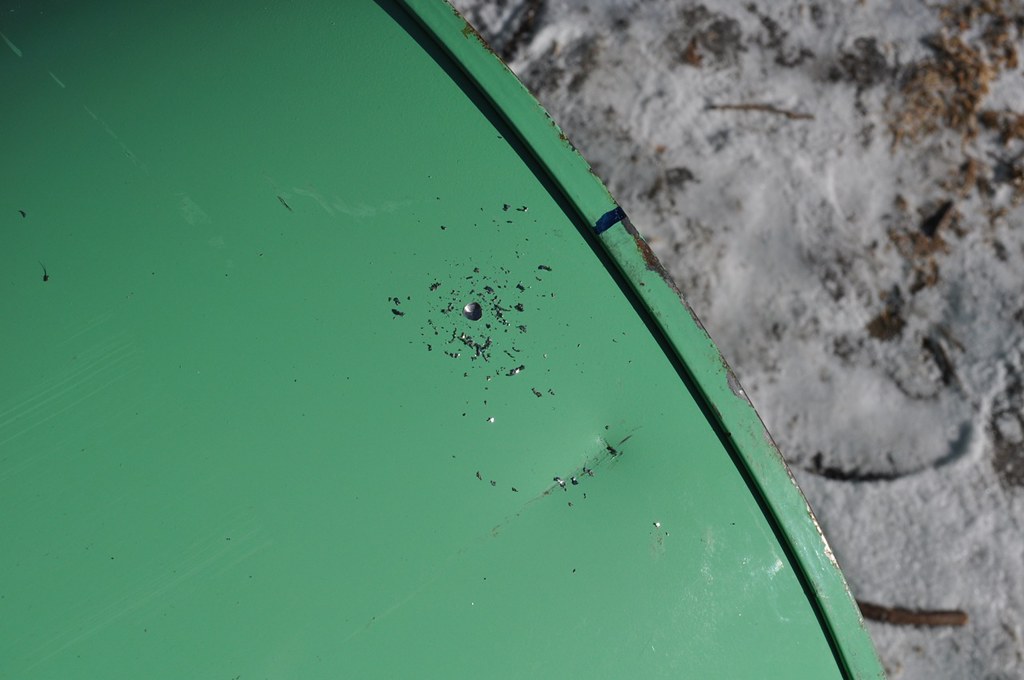
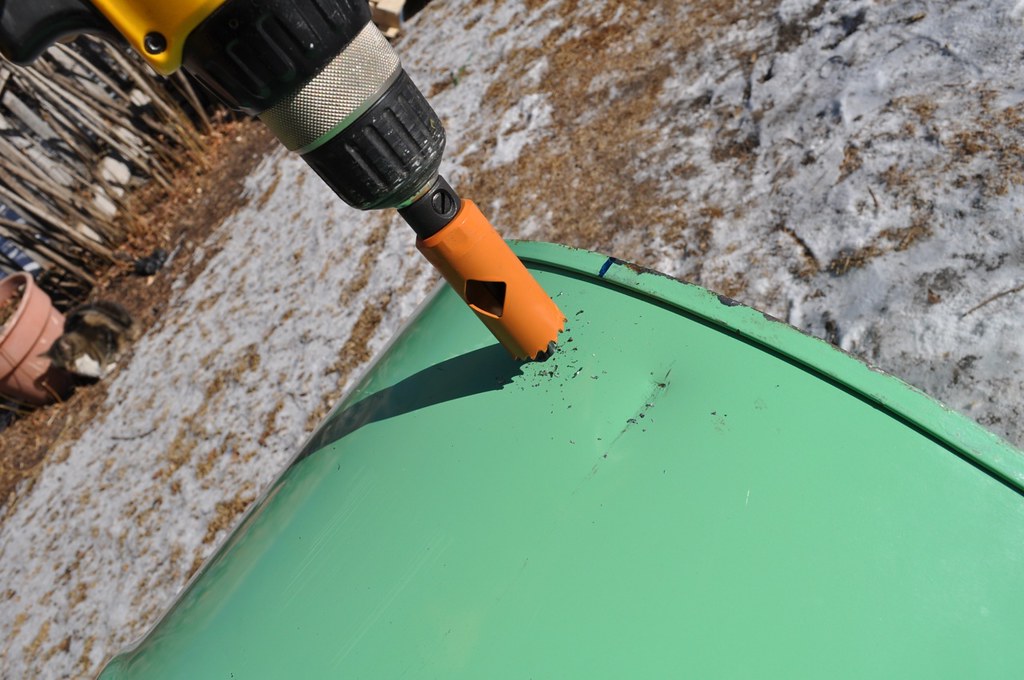
Cut out the intakes to help with the air flow:

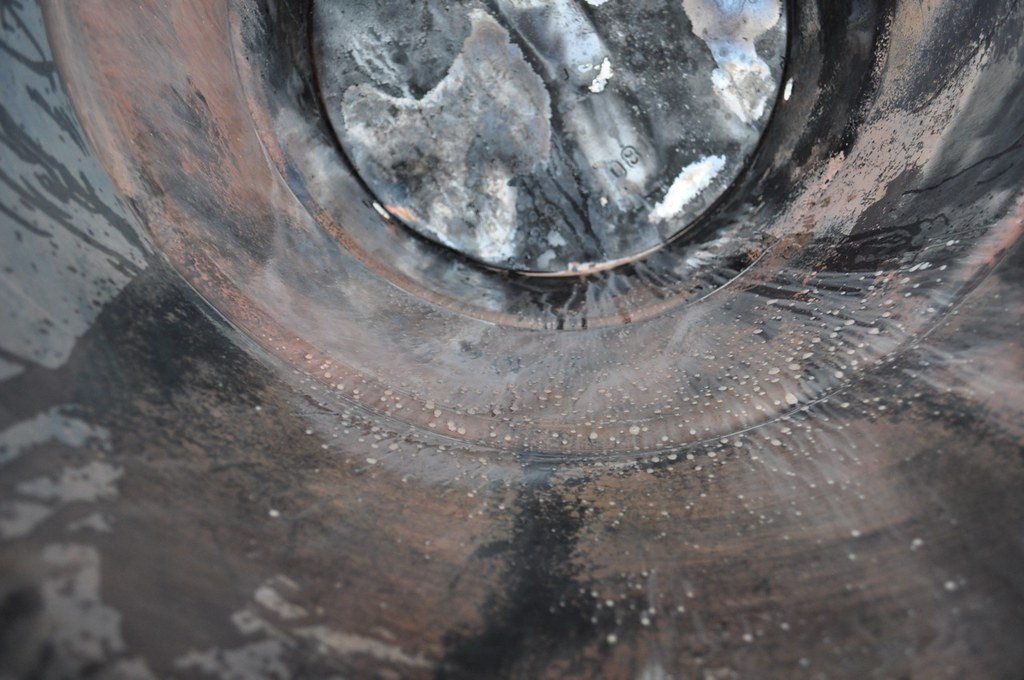
Here is a good shot of the liner:

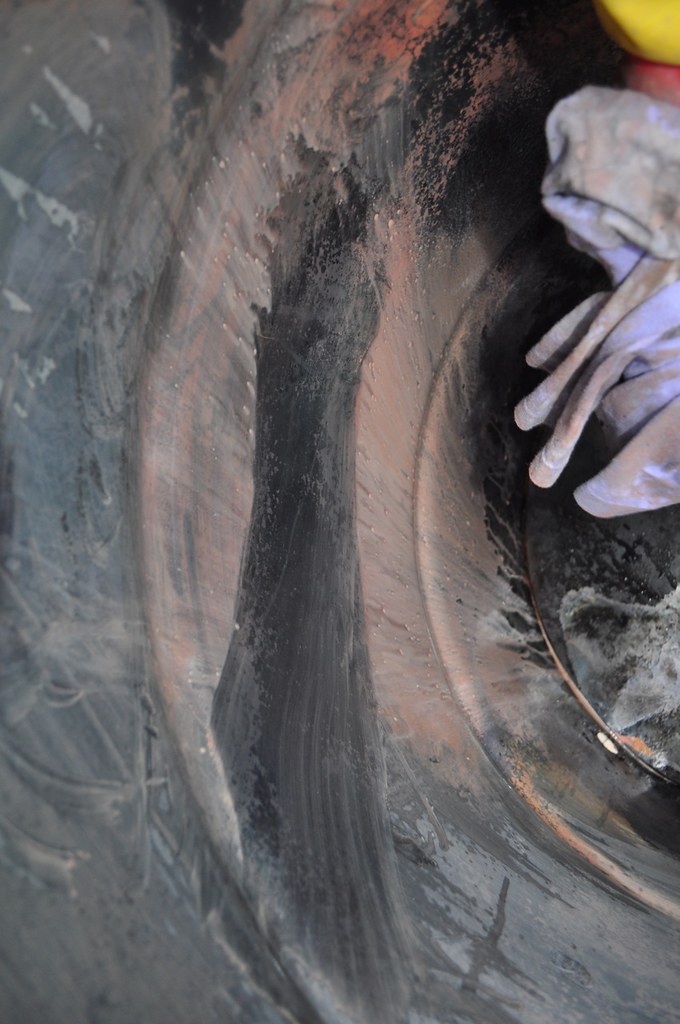
Hit it with the torch:

You can see from just holding it in one spot on the outside, the effect it has on the inside


Run the torch over the rest of the barrel:


The torch alone would have been sufficient to kill the liner, however I picked up these 5 pallets and needed an excuse for a good fire:

Gotta love the cold, nice toasty fire to keep warm and beer stays frosty cold without a cooler:


You can see the liner has taken a beating, easily comes off with the wire brush:


Barrel post burn:

I am no longer praising the weather for keeping my beer cold, now cursing the frozen hoses when I go to pressure wash. End up just hitting it by hand with a bucket, rag and tide:

You can see the residue of the paint/liner that would not burn off and how easily it wipes off:


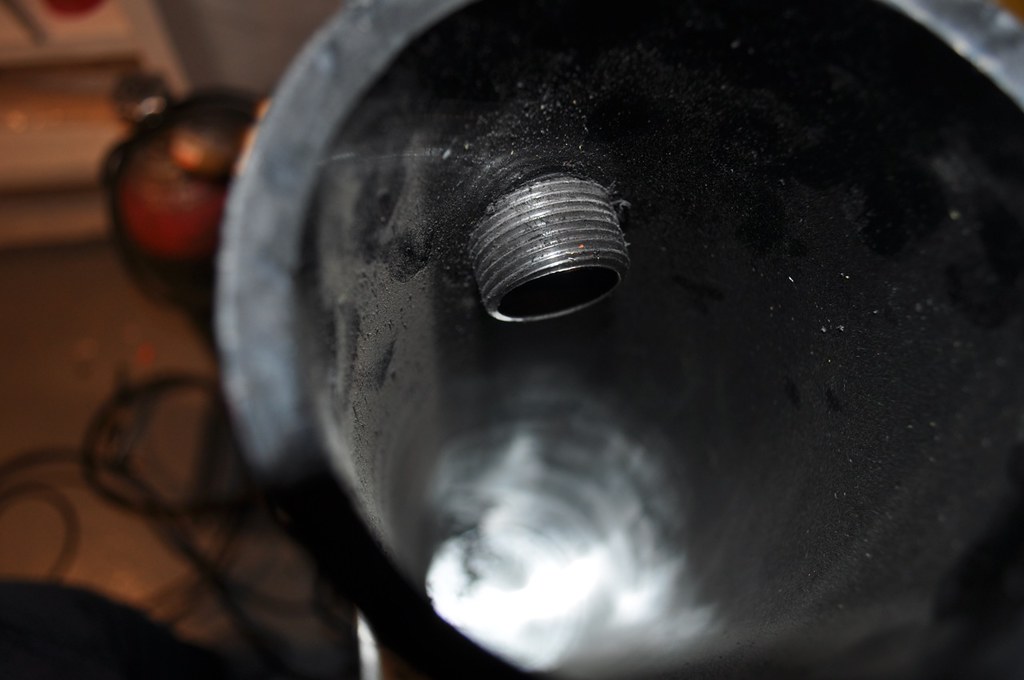
Bottom of the barrel - can see how much hotter the intakes are, ended up using the torch to burn off the remaining spots:

This is the barrel after just washing it out by hand:


Pretty clean already - but a few small areas with residue left, hit those spots further with the torch:

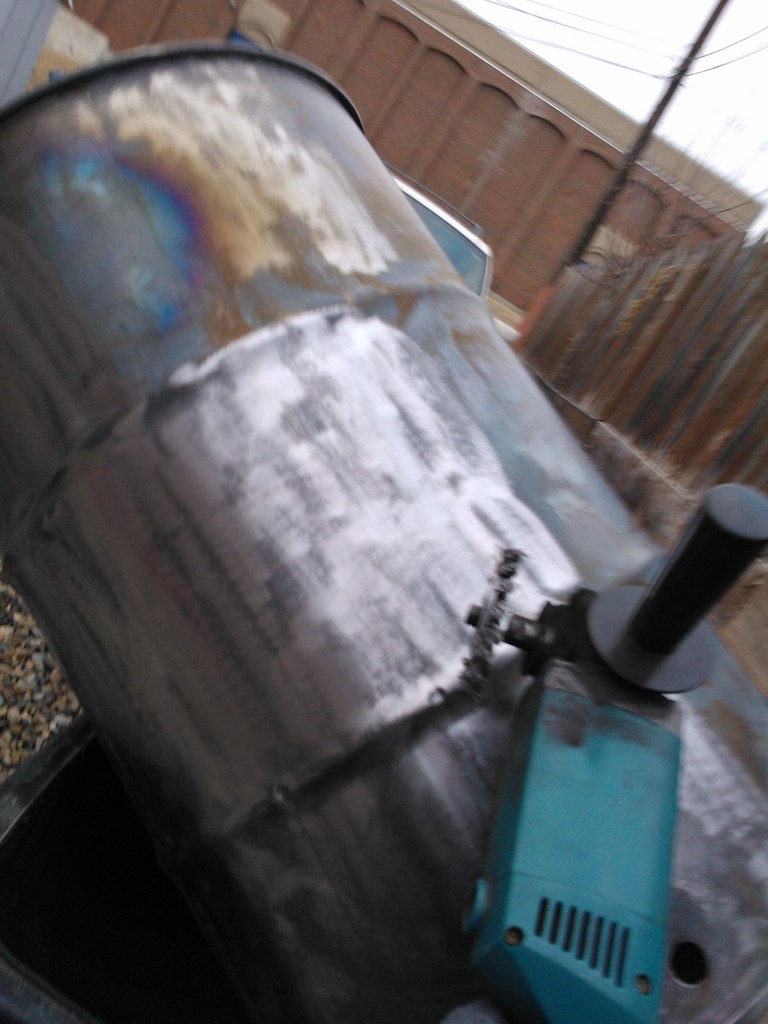
Started the angle grinder, can see the bare metal now:
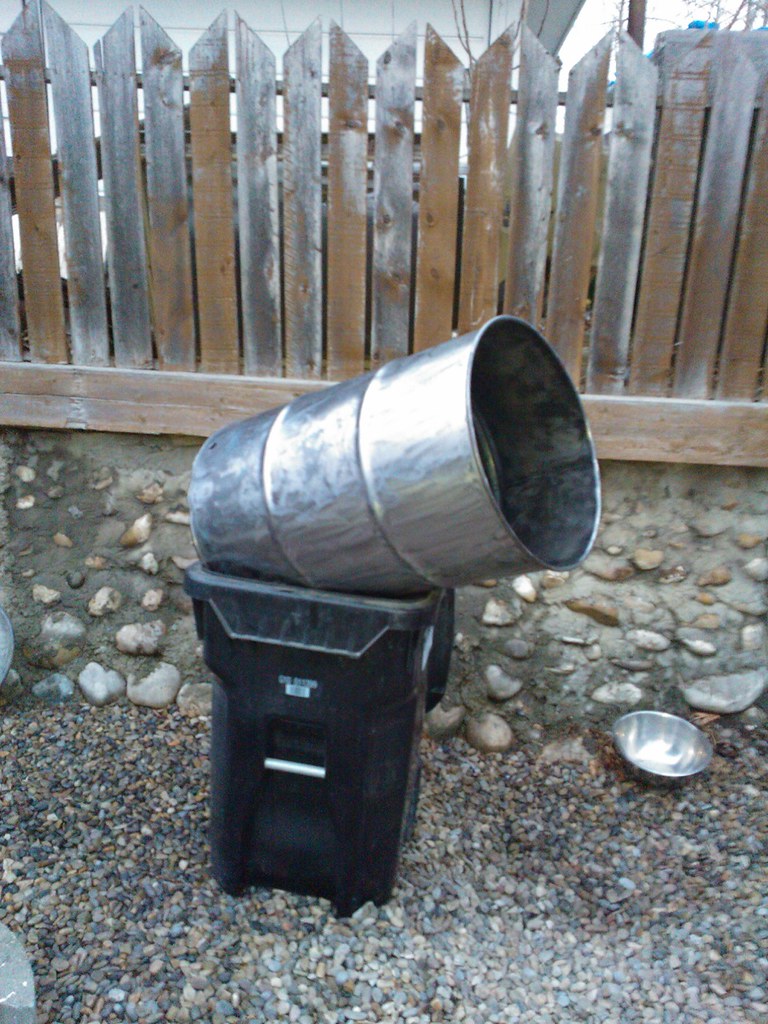
Here is the clean barrel after the wire brush. The city recycle bin was the perfect height for supporting the barrel and allowing easy access to the inside:

Decided to season the barrel right away to prevent any rusting while gathering up materials / planning the rest of the build out. Knew there was a reason I kept a mason jar full of bacon fat on hand:

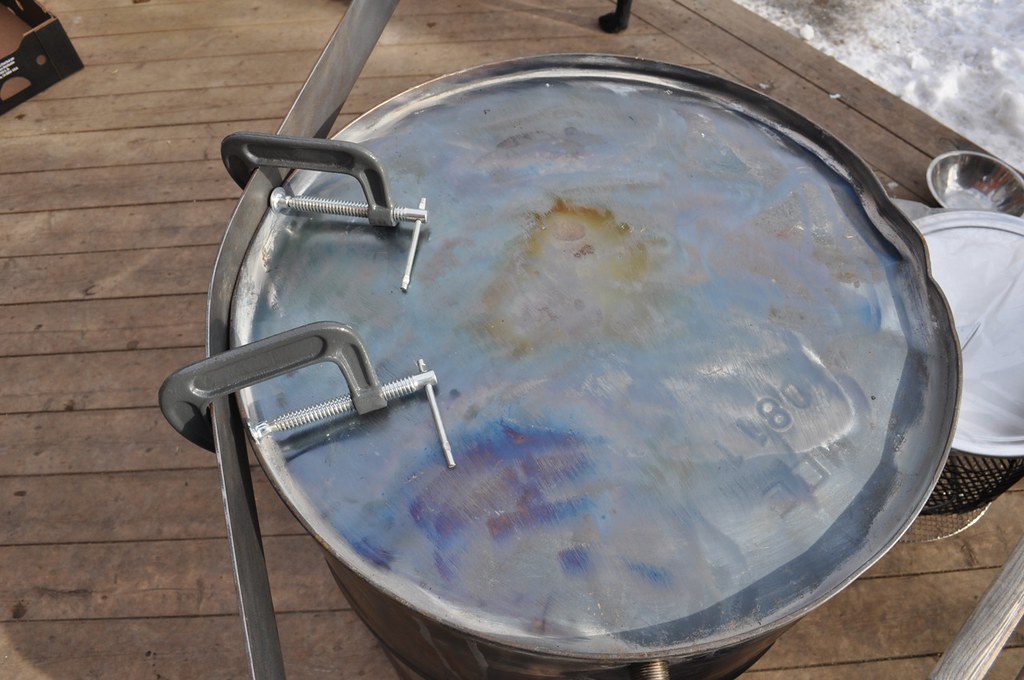
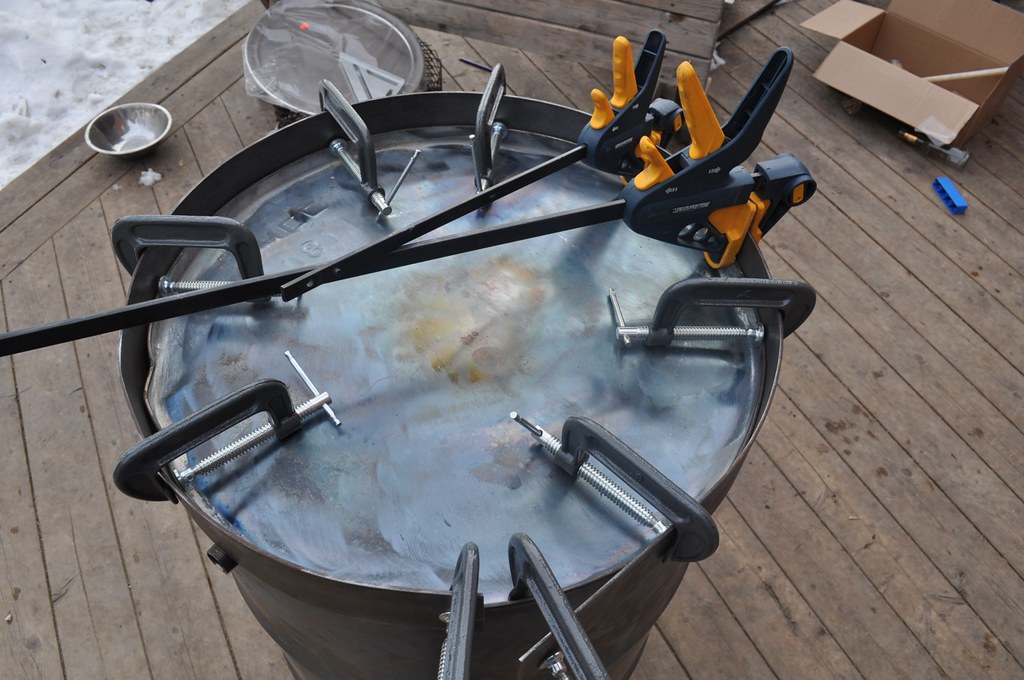
Next up needed to create a rim for the kettle lid to sit on, also the android robot needs a fairly wide gap for the "mouth" so went quite wide with the rim (3" wide flat 1/8" steel) - wasn't sure how easily it would bend. Found some great suggestions on the site for using c-clamps and doing it around the bottom of the barrel:


Man the 3" was some strong stuff, after clamping in place and hitting with the torch it still bent back quite a bit when I removed:

However it was enough to let me work it into the barrel without warping it out of shape:

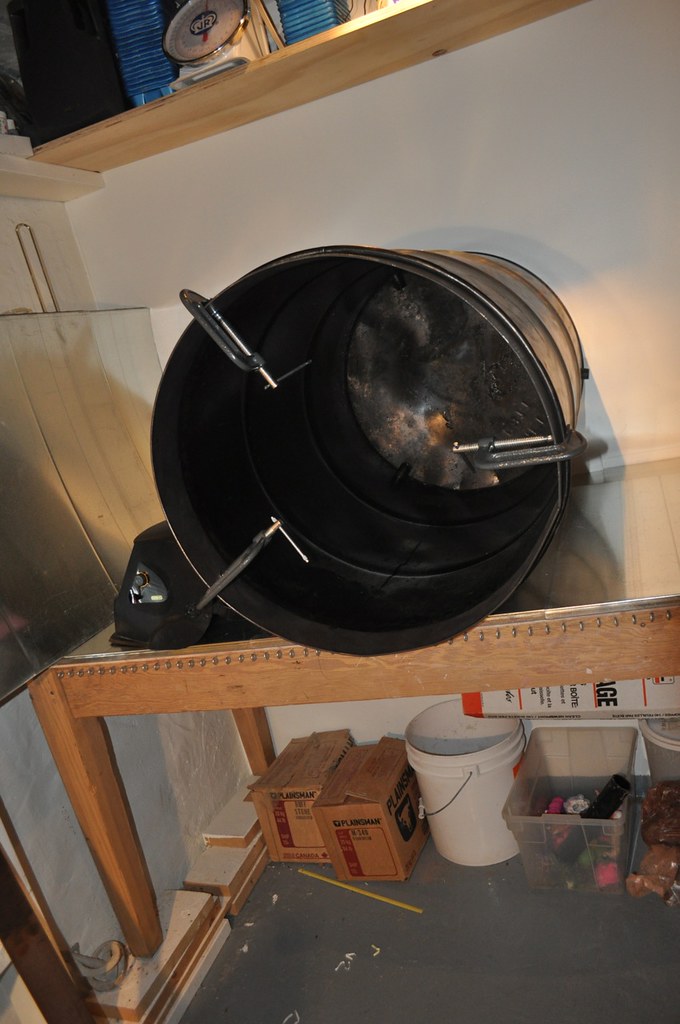

Was lucky enough to find a coworker who let me borrow his MIG welder. Took me a while to get the hang of it, originally tried to fill the gap between the barrel lip and the flat steel however the rounded rim was really easy to blow thru. Again turned to this site and found the magic solution "JB Weld" - so tack welded the rest of the rim in place and used the JB Weld putty to make a nice smooth transition. Here is the RIM tack welded in place:

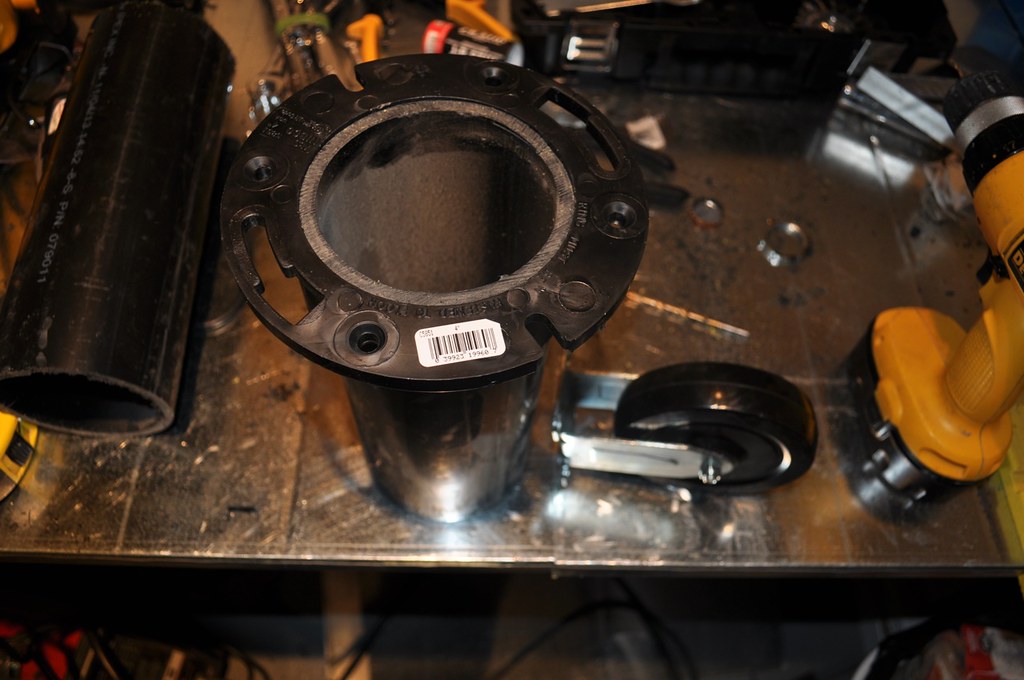
Next step, transform the lid into the android head. Decided the antennae would be super awesome if they double as exhaust. So cut holes and used 6" long 3/4" nipples with a reducer down to 1/2" and plugs:
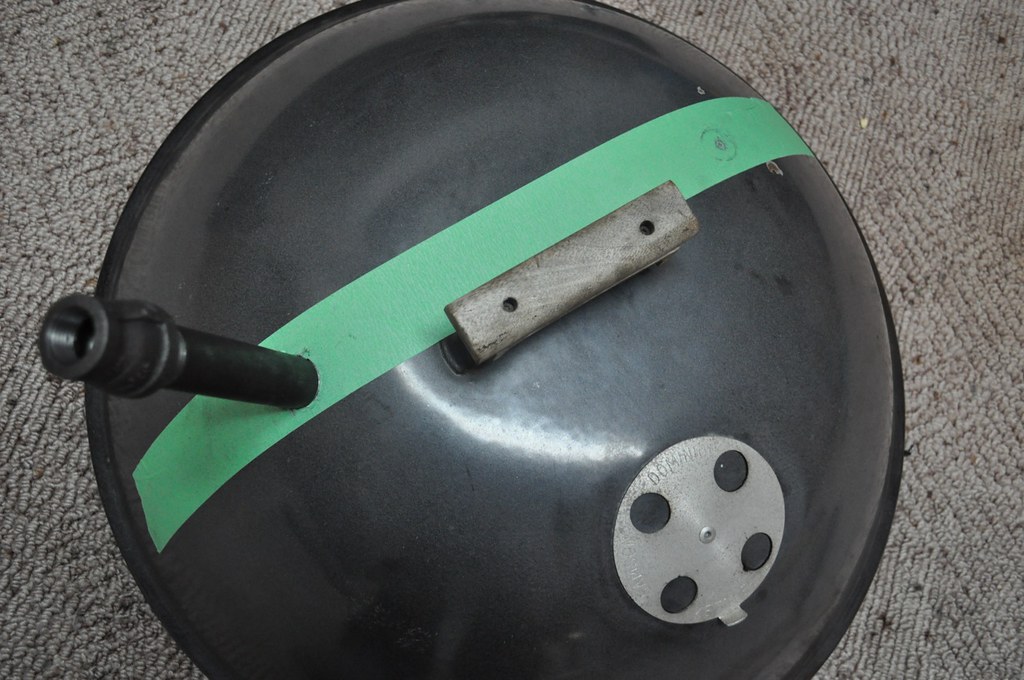

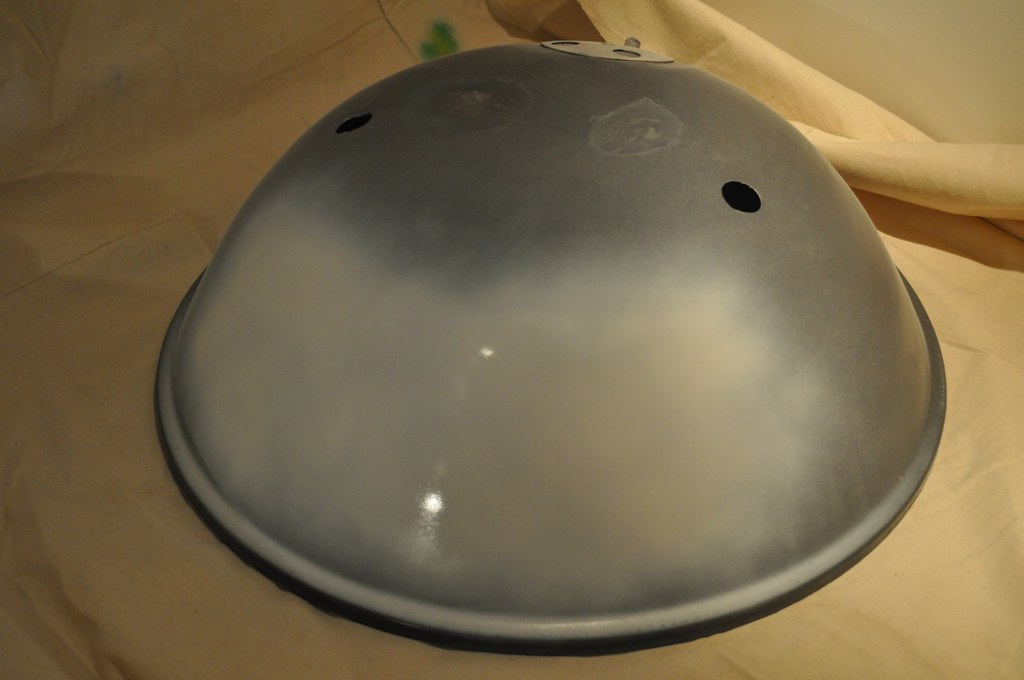
Was originally planning to keep the handle, but liked the look better without so off it came, white high heat spray paint for the eyes:
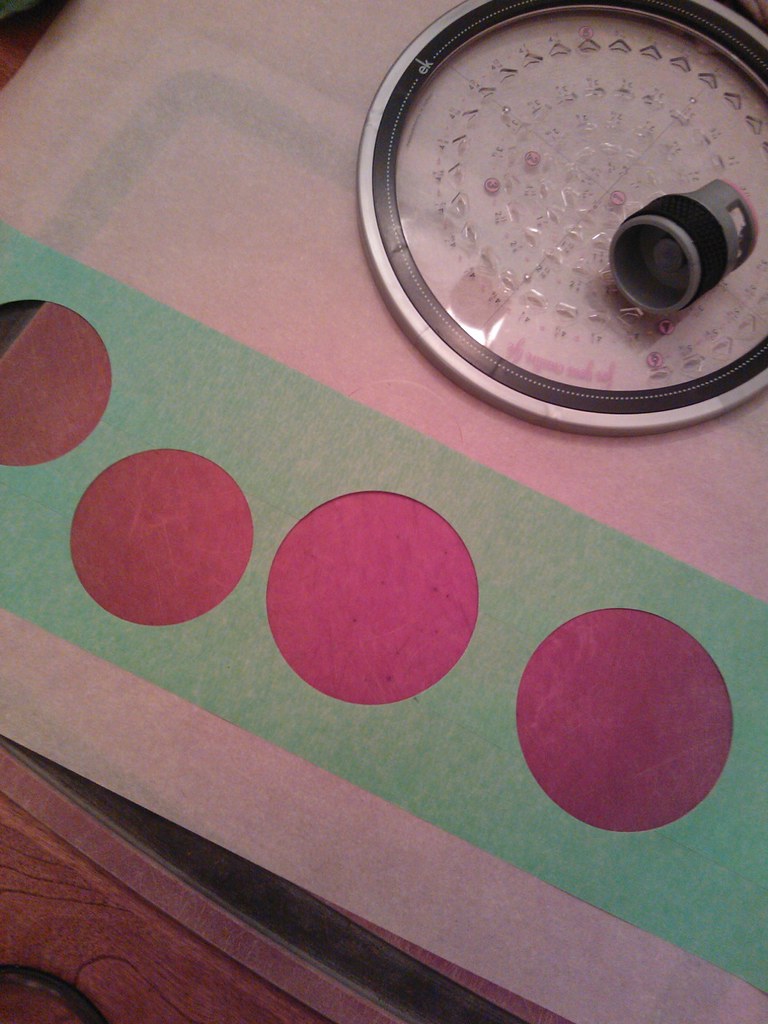
Needed circular eyes, wax paper with a few strips of painters tape and a circle cutter did the trick:

- Hometown with mediocre Q - check
- Bachelor party in KC, discover real Q - check
- NASCAR in Talladega, experience tailgating Q - check
- Vacation in Kauai, see Q done in a barrel @ "Chicken in the Barrel" - check
- Hit internet, google for plans, find UDS and entire community @ Brethen - check!
Completed UDS:
Here is the build out:
As many people have found, the barrel can be the hardest item to track down. Finding a local supplier with cheap unlined barrels did not exist. No luck on Craigs list, found a listing buried on kijiji - looked up on google maps- barrels on the side of the road! (http://maps.google.com/maps?q=calga...ugHht8nS8NjsFSCKjw&cbp=12,53.61,,0,12.83&z=14) - turns out they are food grade (pineapple juice) with a tan liner.
Had grown tired of searching for the "ideal" barrel and heck an excuse to sit out back burn chit and drink - I'm in. Put out the call to see if anyone knows where to get free pallets, brother in law points me to:
http://maps.google.com/maps?hl=en&l...U8BrqaGj_9d2EJ1BhWOGzQ&cbp=12,230.74,,1,10.66 - man I love google street view.
So Barrel @ home and weber kettle knockoff found on Kijiji:
First step deal with the liner - read lots of horror stories, turned out to be not too difficult - actually quite enjoyed the process.
Cut out the intakes to help with the air flow:
Here is a good shot of the liner:
Hit it with the torch:
You can see from just holding it in one spot on the outside, the effect it has on the inside
Run the torch over the rest of the barrel:
The torch alone would have been sufficient to kill the liner, however I picked up these 5 pallets and needed an excuse for a good fire:
Gotta love the cold, nice toasty fire to keep warm and beer stays frosty cold without a cooler:
You can see the liner has taken a beating, easily comes off with the wire brush:
Barrel post burn:
I am no longer praising the weather for keeping my beer cold, now cursing the frozen hoses when I go to pressure wash. End up just hitting it by hand with a bucket, rag and tide:
You can see the residue of the paint/liner that would not burn off and how easily it wipes off:
Bottom of the barrel - can see how much hotter the intakes are, ended up using the torch to burn off the remaining spots:
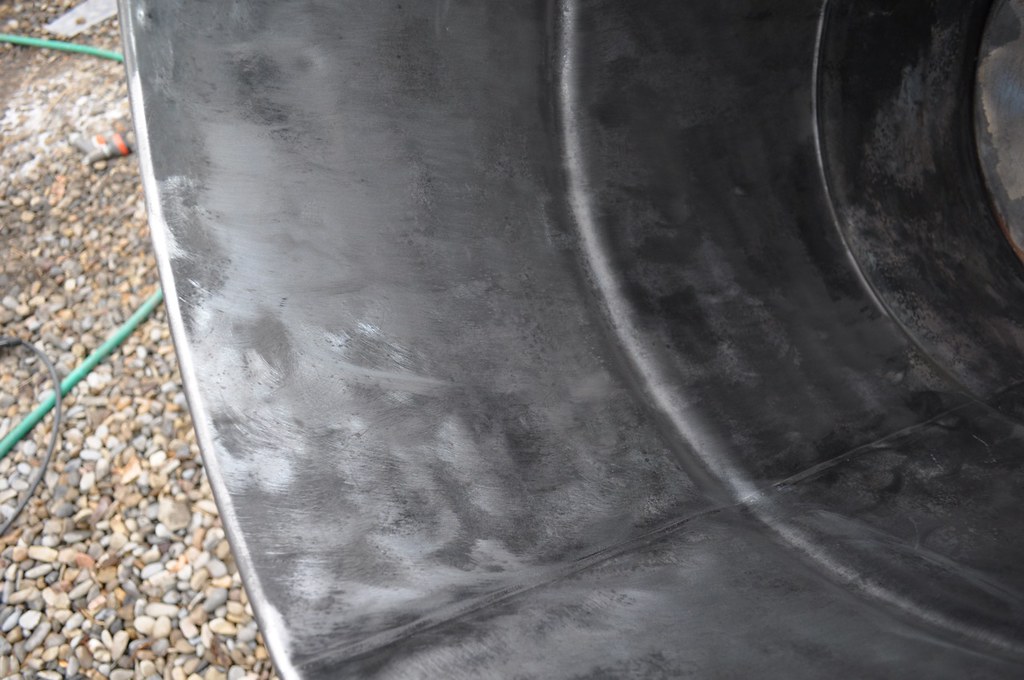
This is the barrel after just washing it out by hand:
Pretty clean already - but a few small areas with residue left, hit those spots further with the torch:
Started the angle grinder, can see the bare metal now:
Here is the clean barrel after the wire brush. The city recycle bin was the perfect height for supporting the barrel and allowing easy access to the inside:
Decided to season the barrel right away to prevent any rusting while gathering up materials / planning the rest of the build out. Knew there was a reason I kept a mason jar full of bacon fat on hand:
Next up needed to create a rim for the kettle lid to sit on, also the android robot needs a fairly wide gap for the "mouth" so went quite wide with the rim (3" wide flat 1/8" steel) - wasn't sure how easily it would bend. Found some great suggestions on the site for using c-clamps and doing it around the bottom of the barrel:
Man the 3" was some strong stuff, after clamping in place and hitting with the torch it still bent back quite a bit when I removed:
However it was enough to let me work it into the barrel without warping it out of shape:
Was lucky enough to find a coworker who let me borrow his MIG welder. Took me a while to get the hang of it, originally tried to fill the gap between the barrel lip and the flat steel however the rounded rim was really easy to blow thru. Again turned to this site and found the magic solution "JB Weld" - so tack welded the rest of the rim in place and used the JB Weld putty to make a nice smooth transition. Here is the RIM tack welded in place:
Next step, transform the lid into the android head. Decided the antennae would be super awesome if they double as exhaust. So cut holes and used 6" long 3/4" nipples with a reducer down to 1/2" and plugs:
Was originally planning to keep the handle, but liked the look better without so off it came, white high heat spray paint for the eyes:
Needed circular eyes, wax paper with a few strips of painters tape and a circle cutter did the trick:


")


