• working on DNS.. links may break temporarily.
Well I think I finally figured out what the problem was (cigarette ashtray taste)

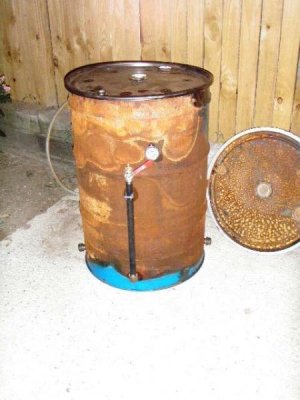
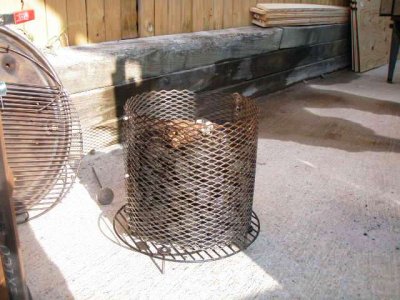
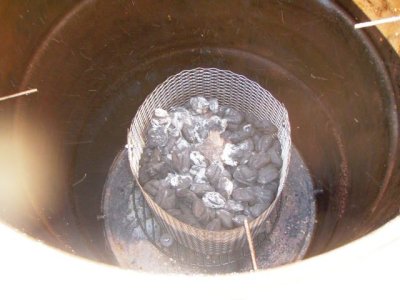
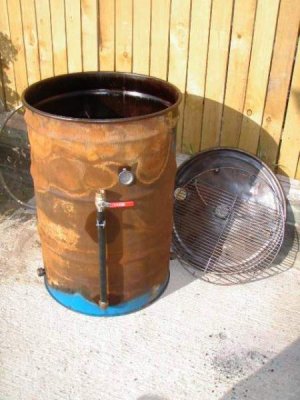
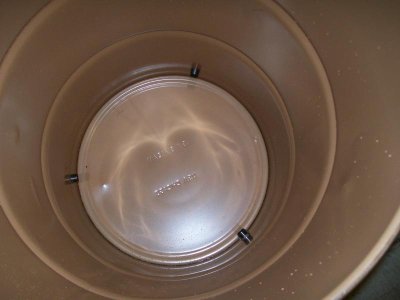
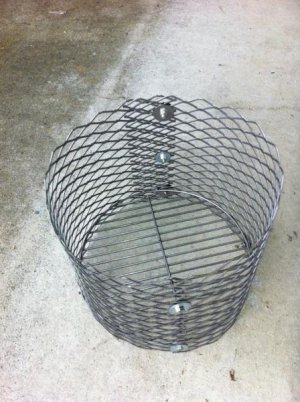
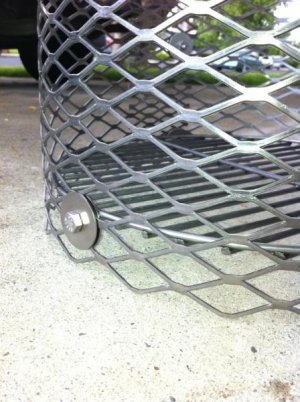
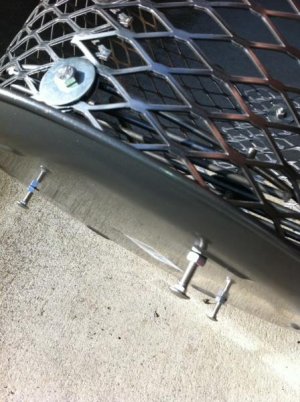
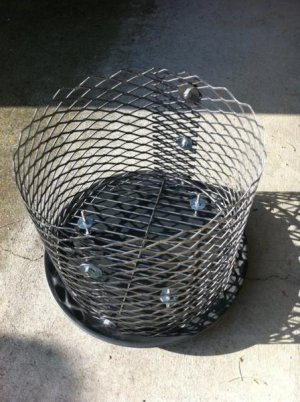
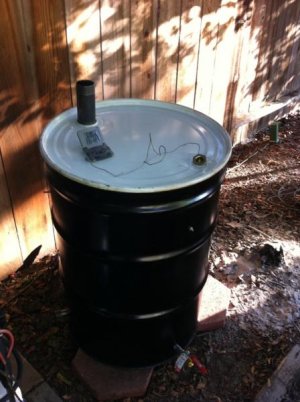
The holes in my steel grate I used for the bottom of my fire basket is too small. I believe what is happening is that the ash from the coals aren't falling through. Thus my clean smoke at the beginning becomes the thick smoke, and my fire gets put out, causing my temp to drop. I temporarily fixed this by just shaking the whole drum every hour or so :becky:

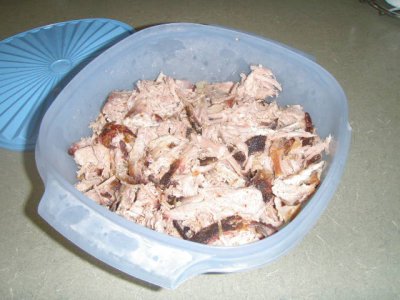
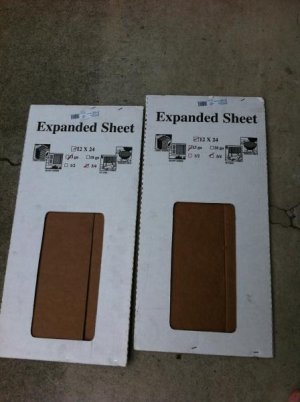
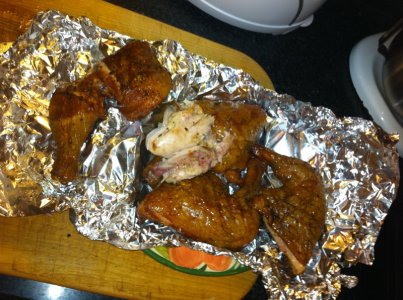
Anyways, did some side ribs, and they turned out a whole lot better. Way better than the first few times. Now i'll have to either snip or grind off some of the expanded metals so the ash can fall more easily.

5897695736_4f6b157063_z.jpg


thanks for all the help!
 
bluesninja said:
I'm building my first UDS next week and I see a few designs with a Heat Diffuser and Water pan between the firebox and the cooking great, but most designs do not. Is this just personal necessary or personal preference?
I am wondering the same thing. I have seen the diffusion plates but I don't' know if anyone has used them with success at keeping the temps within 5-10 degrees for example. I have my UDS done, but what exactly does a water pan do for the meat and is it worth the trouble of installing one?
By the way, my first cookout with my completed UDS turned out the best tri-tip I have ever had. Thanks for the tips everyone.

It's really easy to do, and it depends on how you want to cook, how much are you cooking, and what you're cooking. If you just drill holes for some bolts down low, like some 6 inches higher than your fire basket. Same as you would have done for your cooking grate. The easiest thing to do, is use another cooking grate to put down low, and something on it. The best is to have something that sort of shields the food above, but allows the meaty goodness juices to drip and still make it into the fire. You could use a cheap aluminum tray and punch some holes in it.

If you're smoking a whole chicken, you may want to actually place the chicken right on the grate down low, no drip pan. That will make the skin nice and crispy. Would only take 1-2 hours. Should be like 350 degrees down there.

If you're cooking a lot of stuff like a couple shoulders, some brats, fatty, etc.. then you'd want it up high, but you may want something to diffuse the heat so that it more evenly cooks around the edges.

If you'd like to smoke something at 275 or higher temp, you may consider something to diffuse if you don't want the bottom of the food to get grilled.
 
Not a Raiders fan but that's a pretty cool drum!!! :thumb:

Agreed! It was pretty hard to me to put that logo on it, but hey, what are friend's for right?! :wink: I was able to surprise him with it this weekend. He was speechless!... mainly because the Ribs we smoked on it were amazing!
 
Last edited by a moderator:
One quick tip for the UDS is oil those pipe nipples with something, I had an awesome first cook and got ready for the second, cleaned her out, made some tweaks, room tempt the meat, it was going to be the first orderely organized/civilized cook, I wasn't going to be behind the eightball again, was all set to open her up and the nipps were rusted solid, now i had to climb back into this godforsakin thing, which wasn't fun the first time, and this time it was full of stinky grease an ash, so oil those nipps!
 
Hey guy's, I got a quick question, I would never think of this as I just don't know if it will work but i got a local dealer with drums that have held acetone. Well unfortunatly he barely ever gets food grade drums:sad: I told him what i was going to do with these drums and he informed me of people buying the drums that held acetone and still using them for bbq. Is it just me or is that crazy? Or can you wash it out real good and get a realll hot burn and acctually make a drum that held acetone safe for bbq?

Roby
 
FINALLY!!!! Built my (F)UDS

Well after considering building one and getting 1/2 the materials needed, I finally got it all together and finished my (F)UDS.

Several months ago, I got the drums and ground and burned the junk that used to be in them (Spray-In Bed Liner Part "B") and bought the hardware.
Then last week, got the parts for the Charcoal Basket. Nothing but a little time and sweat (HOT IN TEXAS) and here it is!!

I rubbed it down with Lard and set it going for about 6 hours for a Seaoning burn. I got it up to around 300 for an hour or two and then backed it down to 225. It stays there perfectly!!!

On Monday, I did a Pork Shoulder. Set it on at 8:30 am at 225*. Minor temp fluctuations and a little experimenting throughout the day. Nothing like the old ECB though....

I took it off around 10:30 PM.

During one experiment, I left one of the caps off and forgot about it when I took the meat off that night. I closed everything up, or so I thought. Next morning, around 9:00 am, it was still sitting right at 225*.

24 hours at 225*? That is cool!! Love this smoker.

Thanks for all the tips and instructions. Yes, I read them ALL!!!!!!!!!!!!!!!:shocked:
It is one (F)UDS and you will understand the (F).

First Pic -Seasoning up - Ain't it (F)UGLY?????
Second Pic - Basket after Seasoning Burn
Third pic - loaded and ready for the meat
Fourth Pic - Seasoned
Fifth Pic - Results :clap2::clap2:
 

Attachments

  • P7010029.jpg
    P7010029.jpg
    39.7 KB · Views: 771
  • P7040031.JPG
    P7040031.JPG
    64.7 KB · Views: 772
  • P7040032.JPG
    P7040032.JPG
    64 KB · Views: 772
  • P7040033.jpg
    P7040033.jpg
    46.6 KB · Views: 773
  • P7050034.JPG
    P7050034.JPG
    64.5 KB · Views: 773
That's awesome. That really puts the U in UDS. And I mean that in a good way.
 
One quick tip for the UDS is oil those pipe nipples with something, I had an awesome first cook and got ready for the second, cleaned her out, made some tweaks, room tempt the meat, it was going to be the first orderely organized/civilized cook, I wasn't going to be behind the eightball again, was all set to open her up and the nipps were rusted solid, now i had to climb back into this godforsakin thing, which wasn't fun the first time, and this time it was full of stinky grease an ash, so oil those nipps!


Nothing worse than rusty nipples. Glad ya cleaned 'em before ya got a bad after taste.:becky:
 
I am new to the UDS and am sure this has been asked but can not find it..What grate is the best to use the Weber 70901 non-hinged grate or the
Weber 7436 Hinged grate?
 
I'm new but just started my first UDS build after browsing through a lot of this thread, and felt I should share. Thanks to everyone for the advice. I got a barrel that contained liquid sugar and just put the intake holes in tonight. I went with 3 3/4" pipe nipples, 2 capped and 1 with a ball valve, 3" from the base. I only messed up the first hole, the rest fit real tight. I'm planning on welding them in, but I have no experience welding so it should be interesting. I haven't burnt the barrel out yet, that is going to happen this weekend. I used the existing hole in the lid that came with the barrel and put a 2" x 5" pipe nipple for the exhaust. If I end up needing more, I'll just drill in some additional holes. I also added a cheap handle to the lid. I'm planning on starting with a single grate from another grill for the cooking surface. I got some scrap expanded steel to make the charcoal basket out of, but I haven't started that yet. I'll post some progress pictures along the way. Here are some pictures so far. Please let me know what you think, or if I should add anything.
 

Attachments

  • 102_1496.jpg
    102_1496.jpg
    16.3 KB · Views: 863
  • 102_1499.jpg
    102_1499.jpg
    33.7 KB · Views: 860
  • 102_1501.jpg
    102_1501.jpg
    60 KB · Views: 864
  • 102_1505.jpg
    102_1505.jpg
    29.5 KB · Views: 863
:thumb: Big thumbs up to this forum for all the great information and inspiration:clap2:

I scoured the pages upon pages of information, then set out on my own journey to build the ultimate backyard bbq beast. :wink:

Just a few notes that may be helpful to the next guy:
I have no welding skills or access to equipment -- and still ended up with a pretty decent fire box. I found the expanded metal at Orchard Supply in 12" x 24". Picked up two pieces and molded them around the ol' propane tank. Bolted the two ends together. Used the bottom bolts (about 2" from the edge) to serve as supports for the Weber Kettle coal grate. Added 2 additional bolts opposite of the seams to complete the support. This gave the coal grate 2" of lift from the bottom of the pizza pan / ash pan. The stainless steel carriage bolts lift the pizza pan about 1" from the bottom of the drum and secure the fire box to the ash pan. End result -- base of coals are about 3" off the bottom of the drum. Not shown is the wire basket handle I added. I fretted for a bit regarding the placement of the food grate. Lots of different opinions on distance from fire, etc.
I ended up just measuring about 7" down from the top of the drum and placing the grate there.

Once it was assembled, I built two fires in it just to burn it out and season it a bit. Then I gave it a go with some chicken quarters. I had it running about 225 - 250 depending on how I fiddled with the air flow.

I let the chicken go about 3.5 hrs -- internal temp about 160 degrees. Ended up super tender and juicy! I'm a convert!
 

Attachments

  • IMG_0621.jpg
    IMG_0621.jpg
    32.7 KB · Views: 847
  • IMG_0625.jpg
    IMG_0625.jpg
    58.6 KB · Views: 850
  • grate support.jpg
    grate support.jpg
    56.8 KB · Views: 850
  • bottom of box.jpg
    bottom of box.jpg
    53.8 KB · Views: 853
  • Complete box.jpg
    Complete box.jpg
    58.8 KB · Views: 850
  • UDS.jpg
    UDS.jpg
    44 KB · Views: 857
  • smoked chicken.jpg
    smoked chicken.jpg
    211.2 KB · Views: 856
Last edited:
I'm new but just started my first UDS build after browsing through a lot of this thread, and felt I should share. Thanks to everyone for the advice. I got a barrel that contained liquid sugar and just put the intake holes in tonight. I went with 3 3/4" pipe nipples, 2 capped and 1 with a ball valve, 3" from the base. I only messed up the first hole, the rest fit real tight. I'm planning on welding them in, but I have no experience welding so it should be interesting. I haven't burnt the barrel out yet, that is going to happen this weekend. I used the existing hole in the lid that came with the barrel and put a 2" x 5" pipe nipple for the exhaust. If I end up needing more, I'll just drill in some additional holes. I also added a cheap handle to the lid. I'm planning on starting with a single grate from another grill for the cooking surface. I got some scrap expanded steel to make the charcoal basket out of, but I haven't started that yet. I'll post some progress pictures along the way. Here are some pictures so far. Please let me know what you think, or if I should add anything.


Burn it out, wash it good with some soap and water, dry it, spray it down with some Pam (or other spray oil), put a hot fire in it and let it season good, paint the outside with some high heat paint, then start coooking on it and post some pron! It looks good, bro.
 
I am new to the UDS and am sure this has been asked but can not find it..What grate is the best to use the Weber 70901 non-hinged grate or the
Weber 7436 Hinged grate?

The Hinges are great for adding hot coals to a Kettle. Can't see a need for on the drum.
 
I am new to the UDS and am sure this has been asked but can not find it..What grate is the best to use the Weber 70901 non-hinged grate or the
Weber 7436 Hinged grate?


I used hinges to hold the grates. It makes it a lot easier to remove the grates, charcoal basket and ash pan.

picture.php
 
I just got my first UDS and am as proud of it as my first pickup truck.
 
Back
Top