• working on DNS.. links may break temporarily.
First post! I've got three drums with the tan liner in them. I burned two of them for 5 hours filled 1/3 of the way elm. They burned HOT for a solid 5 hours. Paint on the outside turned to pink powder, inside I have patches of bare metal with patches of what looks like remaining carbonized tan liner.

So my question is, should I take it ALL off on the inside, right down to bare metal? I can't seem to get the black patches off, wire wheel isn't doing much.

Are the patches neart the top or bottom?

I had to burn my barrel twice. The first burn built up ash too fast and the bottom 1/3 wasn't hot enough. On the second burn I dumped a couple of chimneys of briquettes and just let it burn for a long time before adding longer cnunks of wood and working up the barrel.

A weed burner might help as well. I was tempted to leave some patches as getting the last bits out with a wire wheel SUCKED but I didn't want to risk anything toxic in the barrel.

Stick with it and take it down to bare metal.

Mike
 
I had the same prob with that lining. I burned it out three times, tried the wire wheel, then broke down & got my oldest boy to sand blast that puppy :biggrin:.
 
Patches are in the top, some on bottom. I just called a fellow who does sandblasting, he figures about $20 or so will get it nice and shiny. We'll see how the sandblasting works on the raw coating as well. I couldn't get it burned off the lids at all.

Thanks to Rookie48 for the sandblasting tip.
 
What you want is called a fan bus. Its used by computer geeks to manually control different and multiple fans within the computer case.


or google: computer fan bus

:idea: What about just using a ball valve or a gate valve to adjust the amount of air flow, either in front or behind the fan, that is what the guru does. The fan is not a variable speed unit and is only adjusted by the flap after the fan, thus altering the air flow. Of course the hard part would be fabricating some kind of box to mount all this.
Dave
 
Straight to the horse's mouth...

Magnets have been working great for quite a few. Check WHL3 post.

I'm on page 80-something and saw many of your threads on the how-to builds. Call me dumb but I can't seem to figure out a couple of things;
1. If I want to build my UDS with 2 racks to hold meat, does your tutorial have that? Even if I'm keeping the original lid (no 22" Weber kettle add on).
2. Can I effectively have 2 racks for a 55 gal drum?
3. Do you and the others recommend drilling before burning?

Thanks
 
Only one rack will work if you are useing the flat lid.
If you want 2 racks you will need a domed lid or make a lid from another drum (i did).
If you are going to burn, YES drill the bottom holes first, you will need to get the air down to the bottom of the drum.
 
Using a Donor Drum I extended my DrumPit and now have 3 racks.
picture.php
 
Using a Donor Drum I extended my DrumPit and now have 3 racks.
picture.php

N8man, I don't have a welder and don't think I want to try something that ambitious! I've never built one before but, I'm gonna give it a try with all the info here...i figure i can't screw it up too badly:icon_smil Pat, from Des Moines showed me his at a recent comp and now...I must make one ASAP. For a first timer, do ya recommend building one with just one rack or tryin to find a dome that will fit it? I've been watchin for 22" domes around CL and local sales but no luck yet. Can I buy a new replacement Weber for it, from Weber? Thanks for all your help.
 
N8man, I don't have a welder and don't think I want to try something that ambitious! I've never built one before but, I'm gonna give it a try with all the info here...i figure i can't screw it up too badly:icon_smil Pat, from Des Moines showed me his at a recent comp and now...I must make one ASAP. For a first timer, do ya recommend building one with just one rack or tryin to find a dome that will fit it? I've been watchin for 22" domes around CL and local sales but no luck yet. Can I buy a new replacement Weber for it, from Weber? Thanks for all your help.
Mine is no weld....just bolts, a lid clamp and wood stove gasket. I cut the donor drum with a hacksaw and a jigsaw. Easy, simple to do.:-D
 
Last edited:
Can I buy a new replacement Weber for it, from Weber?

Yes You Can
I also got a rotissery option and was able to put a screen in it

 
N8man, I don't have a welder and don't think I want to try something that ambitious! I've never built one before but, I'm gonna give it a try with all the info here...i figure i can't screw it up too badly:icon_smil Pat, from Des Moines showed me his at a recent comp and now...I must make one ASAP. For a first timer, do ya recommend building one with just one rack or tryin to find a dome that will fit it? I've been watchin for 22" domes around CL and local sales but no luck yet. Can I buy a new replacement Weber for it, from Weber? Thanks for all your help.

GaryK1398,

I have rescued 4 weber grills for free from the trash and spent 5 bucks on a mint one-touch gold at a garage sale. They're out there if you are patient. My last one was free from a friend who had a cabana at a beach club (end of the season, she grabbed one that was left behind). Any colleges near you? May is a great time to find them at the trash when the students move out. Christmas and father's day are great times to hunt too --lots of people get new grills then. I would wait and get a freebe before I would buy a new replacement from Weber. You can still fit a lot on the single rack with the flat lid until you find a cheap or free Weber lid.
 
in the works

:p
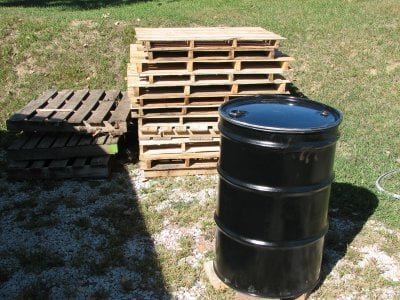
All you UDS farkers got me going and I finally got down to buying and building...I'll keep ya posted but here is my first pic of the unlined 55 gal I picked up! Do ya think that's enough pallets to burn with:?:
 

Attachments

  • IMG_2272.JPG
    IMG_2272.JPG
    717.4 KB · Views: 1,782
That about the only thing I'm concerned about. i got it from a recycling drum company. There claim is that is never held any pesticides or harsh chemicals otherwise they wouldn't have taken it. They said it was blasted on the inside and washed several times over. The inside is VERY clean. I just want to burn it really good to be sure!!! Plus fire is a good thing!!

From the looks of the inside. Seems like I could just sand out what little dark residue that in there, but i figure what the fark. Can burn as many pallets as i can haul from the local builders supply a few blocks away!!
 
What a thread,eh?!

If you can't find it here, it can't be found! I've built two, here is what I have learned:
The first got a Weber kettle lid. When I cut the top of the drum to accept the lid, I was never able to get a cut plum enough to make a good seal ( I am not sure if it is the drum that is not cut perfectly or the lid itself is out of plum). This drum has 4 1 inch tubes welded in as vents. 1 has a ball valve, and 1 has a mount for a guru.
This drum is fairly jumpy in the temp department, and I am sure it is the seal of the lid-I can put the lid on one way, and the temp drops. Another way and temp goes up. Add the variability of the ball valve and I have a unit that requires a decent bit of babysitting. It is a bit more stable at higher temps, so chicken and the like do better on this one than say pork butt.

So I built a second, and went as old school as I could.
Three 7/8" holes with plugs. 1 rack 24 inches from the bottom of fire basket and the regular drum lid with a good tight seal. This lid had two bungs on top- a 1.5" in the center and a 2" off to the side. I threaded a 1.5 ", foot long pipe in the center hole.
With that setup, the temps dropped steadily with one vent open, and ran around 300 with two open. Soooooo, I lost the small pipe in the center and got a 2 inch for the side bung (got a 90 deg for the top for rain also).
Eureka. One intake open is a little under 225 and steady, 2 open around 275 or 280 and steady. El perfecto. Runs just like a BDS-a little hot, but it is a different kind of cooking technique. Love it. Since it is now very consistent I think it will be a real hoot to put the guru on it (choke down the exhaust), but not at all needed.
The difference between the two drums is the consistency of the airflow.
So the next project:
I really want to get the kettle top thing figured out to have a usable 2 decker. Step 1 I want to try to get a perfectly level cut on top of the drum (I think I have 1 more chance at that before the cut gets too close to the "rib" of the drum and the lid on longer fits), and get that seal a bit better. If not, that drum goes on the scrap heap, and another flattop will be born. Maybe that will be a double decker.
 
Back
Top