New Braunfels Black Diamond Repair

flseminarian

Well-known member
Joined
Apr 5, 2020
Messages
28
Reaction score
20
Points
0
Location
MOSCOW, ID
When I was asking questions in preparation for working on the NBBD someone asked me to post the work. So here goes.

After building about 160 feet of 6' fence in the backyard I was able to get started. After taking it apart, the attached is what it looked like
 

Attachments

  • IMG_20200701_171741489_HDR.jpg
    IMG_20200701_171741489_HDR.jpg
    43.6 KB · Views: 112
  • IMG_20200701_171840208_HDR.jpg
    IMG_20200701_171840208_HDR.jpg
    74.7 KB · Views: 112
When I was asking questions in preparation for working on the NBBD someone asked me to post the work. So here goes.

After building about 160 feet of 6' fence in the backyard I was able to get started. After taking it apart, the attached is what it looked like

Unsolicited advice:

I'd fix that hole.
 
Looks repairable to me. Do you have the tools to make the repairs? I recommend getting it sandblasted first just to see how bad the pitting is. Are you looking for a long lasting repair or just a patch job to get by for a couple of years? Good luck.
Tom
 
Getting steel

I found a local sheet metal company that could roll some sheet steel for me. I had them roll a new belly and cut a new end out of 1/8" steel, what the NBBD was originally made of.
 

Attachments

  • IMG_20200701_210204376.jpg
    IMG_20200701_210204376.jpg
    40 KB · Views: 111
  • IMG_20200701_210147633.jpg
    IMG_20200701_210147633.jpg
    38 KB · Views: 111
Starting the mounting process

The new belly isn't an exact fit, but close enough. To get it fitted correctly, I needed to start at one end of the bend and progress around the circumference so that progressive bolts could draw the steel to the body of the cooking chamber.

Unfortunately, I did not take a picture, but I used a couple of those 1" ratchet straps to force it as close as I could get it after I set these two bolts.
 

Attachments

  • IMG_20200702_133521686_HDR.jpg
    IMG_20200702_133521686_HDR.jpg
    50.8 KB · Views: 107
drilling the holes

A little out of order...

Before I started drilling into the cooking chamber body through the new belly I marked and drilled the holes through the belly itself. I am attaching pictures of the drill press setup, and of the belly once drilled. I can't provide a selfie of teh drilling process, because it required several unnatural acts and I only have two hands. :wink:
 

Attachments

  • IMG_20200702_145255416.jpg
    IMG_20200702_145255416.jpg
    36.8 KB · Views: 108
  • IMG_20200702_141340225_HDR.jpg
    IMG_20200702_141340225_HDR.jpg
    67.9 KB · Views: 108
  • IMG_20200702_141328602.jpg
    IMG_20200702_141328602.jpg
    49.5 KB · Views: 108
Ready to bolt on the belly

I'll spare you the hours spent with an angle grinder and wire brush cleaning out the belly and with a belt sander trying to remove rust and old paint from the outside.

Let's just say that as of last night I had the cooking chamber and new belly ready to bolt together.

I will tell you that using a jigsaw to cut around the circumference is not for the faint of heart. There's no solid footing for the footplate of the jigsaw, and I snapped one blade. Also, it sends shrapnel that feels like tiny little bullets from Hell when it hits unprotected skin.
 

Attachments

  • IMG_20200703_135852403.jpg
    IMG_20200703_135852403.jpg
    56.2 KB · Views: 106
  • IMG_20200703_182546559_HDR.jpg
    IMG_20200703_182546559_HDR.jpg
    45.2 KB · Views: 106
Last edited:
Bolting on the belly

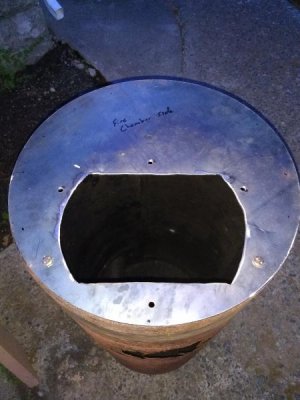
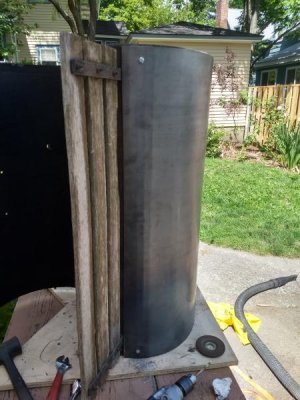
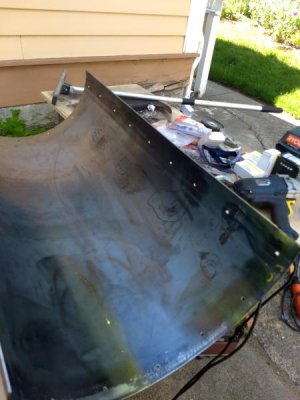
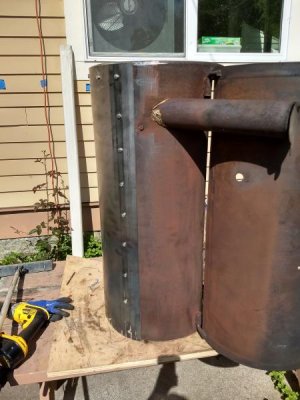
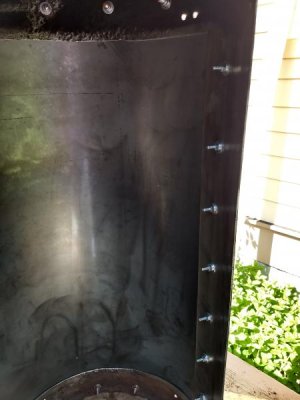
This morning I bolted on the new belly. If you look at the upper edge of one of these photos, you'll see some red stuff. I put in a liberal quantity of Lava Lock high-temp RTV silicone, to try to control air flow (maybe overkill).

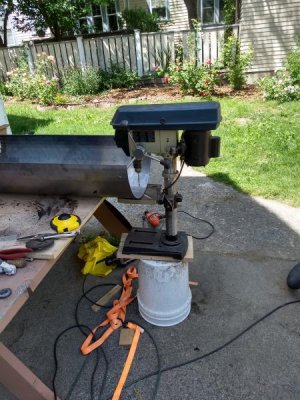
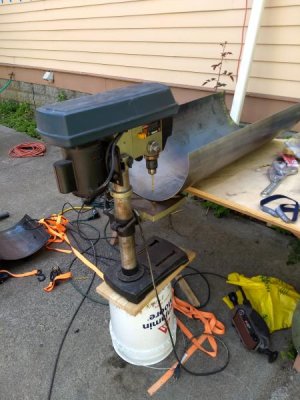
Also, I may have used bolts that are too long. Given the vagaries of fit for all of this, having longer bolts is probably better, because then you're more likely to have enough of it exposed to have something to get washers and nut on. I'll use an oscillating tool or angle grinder to cut them off.

One of my friends here has a stick welder and a wire feed. I am hopeful that we can weld the joins inside and out. Stick welder will work fine for the exterior joins, but using the flux-bearing rods inside concerns me because of the potential for outgassing. So we'll probably use the wire feed for interior welding.

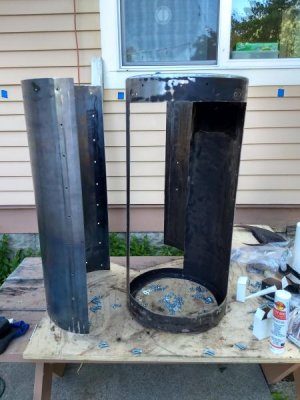
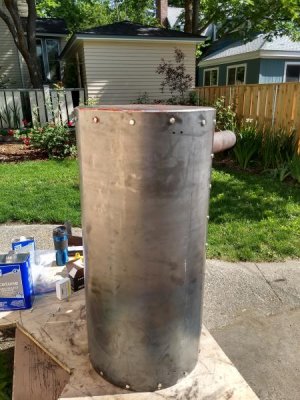
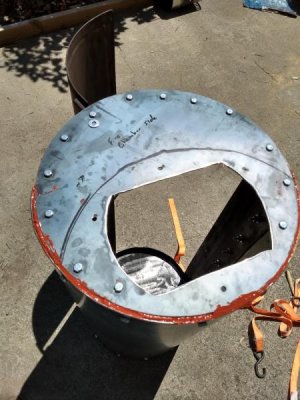
This is where it is so far.
 

Attachments

  • IMG_20200704_093345478_HDR.jpg
    IMG_20200704_093345478_HDR.jpg
    60.2 KB · Views: 105
  • IMG_20200704_093353940_HDR.jpg
    IMG_20200704_093353940_HDR.jpg
    43.5 KB · Views: 106
  • IMG_20200704_093419198_HDR.jpg
    IMG_20200704_093419198_HDR.jpg
    30.2 KB · Views: 106
Nice save! Dont forget to extend the stack 15 inch!

20200704_091458.jpg


Got a butt on right now

20200704_105456.jpg
 
Bolting on the end piece

Here is the end piece bolted on, also with a liberal application of RTV.

Some of those holes will later be bolted through the firebox, but for now they are just bolted through to squeeze out the RTV to make sure there's a good seal.
 

Attachments

  • IMG_20200704_114801789_HDR.jpg
    IMG_20200704_114801789_HDR.jpg
    50.7 KB · Views: 95
Those 4 bolts where fire box mates will be an issue... better to run bolt from inside fire box right into cook chamber

and dont use the calk high heat... weld it
 
Like I said above, the holes that will hold on the fire box will be cleared of bolts and teh fire box bolted on.

To the extent that we can weld at the edges, we'll do that. I think some of these gaps may be wider than we can bridge with a weld.
 
Like I said above, the holes that will hold on the fire box will be cleared of bolts and teh fire box bolted on.

To the extent that we can weld at the edges, we'll do that. I think some of these gaps may be wider than we can bridge with a weld.


Another issue I see is ... right now I have 2 inchs of fat at the bottom (I let smoker cool and scoop this out), but I have NO idea where your grease will run out once the fat starts flowing...
 
I have had a recommendation to drill two or three holes in the belly. We'll see. Fat accumulation has never been so much of a problem for me, for some reason. Leaving the ashes in (and their caustic effects) has been a more abiding issue.
 
Back
Top