
|
|
|||||||
| Q-talk *ON TOPIC ONLY* QUALITY ON TOPIC discussion of Backyard BBQ, grilling, equipment and outdoor cookin' . ** Other cooking techniques are welcomed for when your cookin' in the kitchen. Post your hints, tips, tricks & techniques, success, failures, but stay on topic and watch for that hijacking. |
 |
|
|
Thread Tools |
 02-29-2012, 07:08 AM
|
#9271 |
|
Full Fledged Farker
Join Date: 09-02-11
Location: Evans, GA
|
  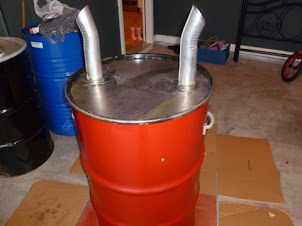  Here she is. About done; need to do a couple of things like paint the lid, install thermos & ball valve. Trying to decide if I want to keep the lid red. I forgot the brand of the paint but its caliper red or something. Speaking of ball valves, I was at lowes and they had 3 3/4" valves on their clearance shelf for some reason so I picked up 3 for $18. Perfect as I'm going to build 2 more. |

|

|
|
03-01-2012, 08:13 AM
|
#9272 |
|
Knows what a fatty is.
Join Date: 11-26-10
Location: Somewhere, CT
|
Nice build! The 2 exhausts in my opinion work better to prevent the heat escaping too quickly up a shoot. Though your exhaust vent pipe length might still cause it to "suck" out. It'll be great, just will burn more coals than an average UDS.
Regarding something to diffuse with: Don't stress it. Run it like it is first. When you put big cuts that stay for a long time, try putting the FAT side down if doing a brisket to act as a shield from the direct heat. Pork butts I do fat side up because they are just a lot easier to cook. But the thing I've done multiple times now (meaning multiple smokers I've built) is to put bolts down fairly low to put a cooking grate on. Down at that low I might smoke a whole chicken because it works better at higher temps. But when doing something else, leave that grate down there and just put something on top. Perhaps some AL pan but punch holes in it. It's most important to let those juices drip into the fire. What I do I on top of that grate I lay down some angle iron (or angle AL) pieces close together. It allows the juices to drip into the fire, but the main heat is forced to come up out through the sides. It helps stabilize the temp throughout the drum nicely. |
|
|
|
|
03-01-2012, 08:52 AM
|
#9273 |
|
Got Wood.
Join Date: 03-19-10
Location: Austin TX
|
Here is a pic of my UDS. Pig Skull and Cross Bones.
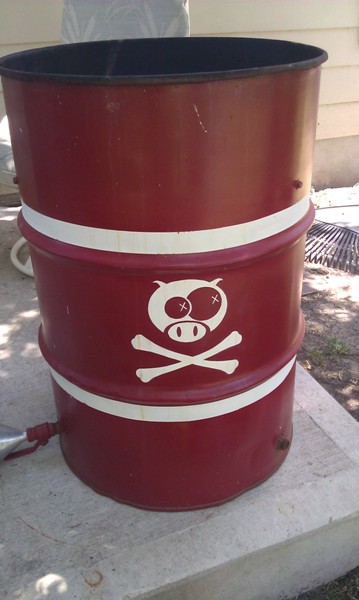 I made the stencil in MSpaint. Feel free to use it for your own smoker if you like it.  I cut it out with a razor on a cutting board and used some 3M spray to attach it to the barrel. Then just mask off the rest of the barrel and spray away! |
|
|
|
|
03-01-2012, 09:32 AM
|
#9274 |
|
Full Fledged Farker
Join Date: 09-02-11
Location: Evans, GA
|
nice!!! I like that pig!
|
|
|
|
|
03-03-2012, 09:03 AM
|
#9275 |
|
Full Fledged Farker
Join Date: 09-02-11
Location: Evans, GA
|
fyi Big Lots is doing their 20% sale this Sunday for those who want to pick up their 21.5" kettle grill for parts
|
|
|
|
|
03-03-2012, 10:01 AM
|
#9276 |
|
Is lookin for wood to cook with.
Join Date: 02-18-12
Location: Coconut Creek, Florida
|
Hello Everyone!
I was going to buy my brother a smoker for his new house, and was looking at those cheap offsets at Home Depot. After reading some bad reviews and finding this thread I decided to build a couple of UDS's. I read through this entire thread (which has more pages than any book I've ever read). It's funny how a couple of people were complaining about its size at the 60 page mark. I bought 2 drums off craigslist and got to work.  I followed the basic no-weld charcoal basket plan, using a pizza pan   Finished product  They both held temperature stable. But the one on the right has too big of a gap on lid, and the charcoal didn't die after I closed the valve and capped the exhaust. But nothing a little love with a hammer can't fix. I seasoned it using a spray bottle with canola oil and threw on a fatty. I stuffed it with jalapenos, cheddar and cream cheese.  Sorry no cooked pics, it was gone before I even thought about it. Next time I will definitely buy new barrels to save time. Thank you everyone! |
|
|
|
|
03-04-2012, 03:03 PM
|
#9277 |
|
is One Chatty Farker

Join Date: 10-11-11
Location: North Pole, Alaska
|
Starting on my new builds :)
pwa 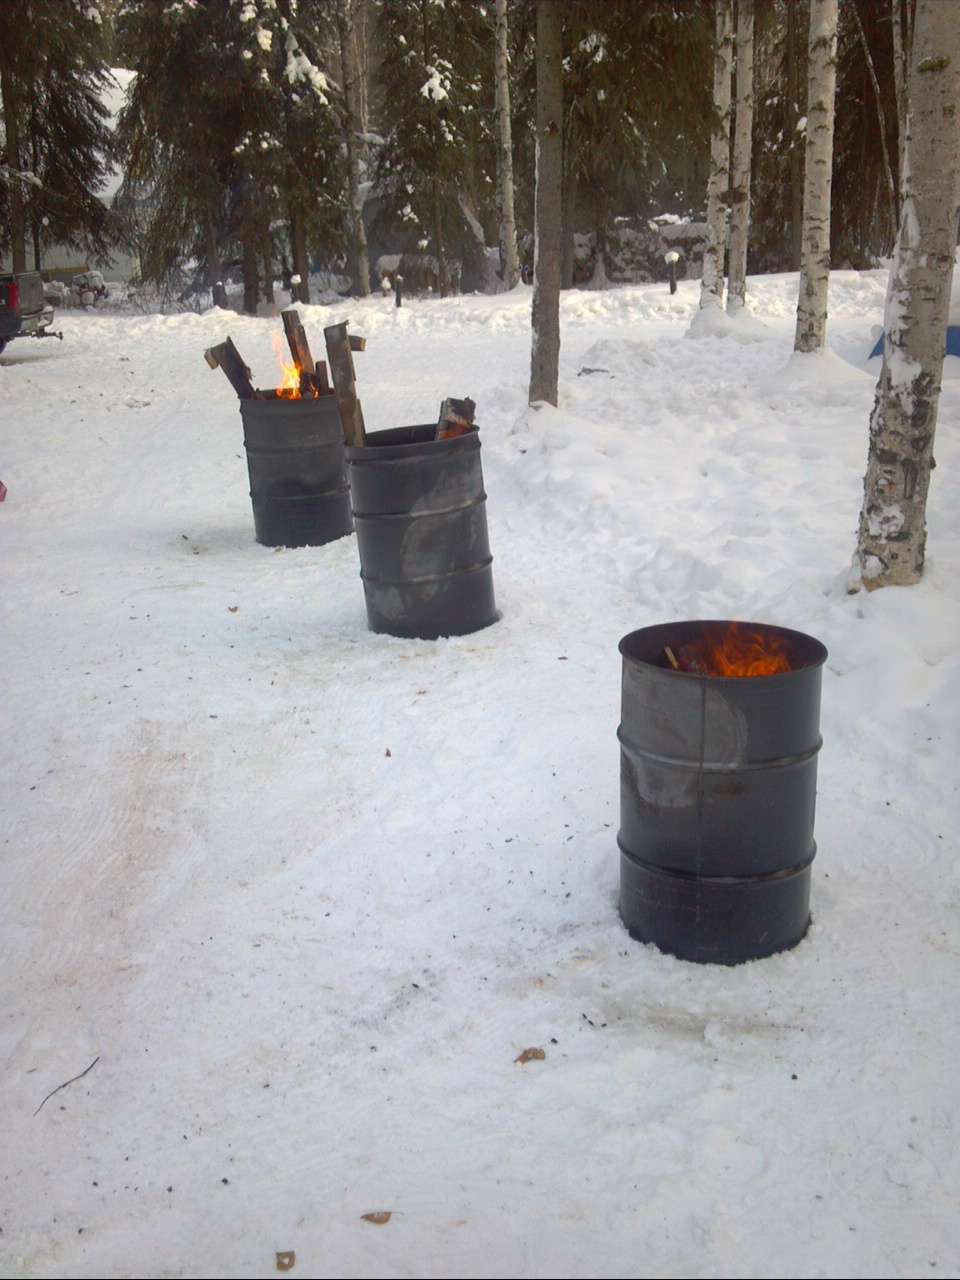 |
|
|
|
| Thanks from:---> |
|
03-05-2012, 07:32 AM
|
#9278 |
|
Full Fledged Farker
Join Date: 09-02-11
Location: Evans, GA
|
I did my seasoning/test run yesterday and I'm very impressed. Got it up to 400* for a little while just to give it a nice burn then dropped it down to 225* and put on a fatty. Turned out awesome but had to do some tweaks w/ the UDS. The temps kept rising even when I had everything capped. Here were my issues and even though this was my test run and learning I'm loving this unit already.
I didn't have the best conditions for cooking; wind gusts easily over 40mph, a PIA for sure but I wanted to do my seasoning Sunday. I did about half load of charcoal in my square basket (12x12x6) and put about 8 lit coals on top minion method style. Had all the valves open, and I swear I hit 225* in about 10 mins. Very fast. I wanted to get a nice burn so I took it up to about 350ish and it went up to about 400*. At that point I started capping the valves and I wanted to bring the temp down to 225-250*. However the temp would not budge. I had all the valves closed and then with the wind blowing as hard as it was it dawned on my that maybe it was circulating from the exhaust pipes down into the smoker. So I got some aluminum foil and I capped one exhaust pipe completely. That did it; the temp came down fast. So is that possible that my dual exhaust pipes could cause that issue? See my pics above, but the length is about a foot but the opening is on a bias and is wide. I'm hoping to do another cook this coming up weekend and hopefully it will be in good conditions and I can do another test. I would like to avoid having a tin foil cap on my exhaust as I like the look. Also; my next 2 builds will have to be the same way as the tops have the same holes unless I cap one some how and one stack. Also I must have some gigantic barrels because I went and bought a 22.5 kettle at big lots to use for parts and its too small to use. I measured about 24ish" in dia. |
|
|
|
|
03-05-2012, 07:54 PM
|
#9279 |
|
Knows what a fatty is.
Join Date: 02-29-12
Location: Suburb of NYC
|
Howdy all,
Thought I'd add my UDS build to this massive and treasure trove thread. My barrel is stainless and at least 40 years old. Came out of a chicken soup factory originally. It was handed down to me so I have a bit of the history. Anyway, here are some before pictures. Until I find a donor weber, I'm going to use the flat lid. Since it'll mostly live outside I was thinking of a vent pipe arrangement. Planning a standard layout otherwise so there will be three 3/4 intakes (one with a valve) but here's my first question about the top vent... Would one 2" OD vent on the lid suffice? There's no bung hole on the lid, it's smooth, so I was thinking of adding a flange then threading on a pipe (8-12" or so) which I can then thread on a cap to keep it weather tight or just shut it down. Would anyone advise against this? I've read probably 75% of the posts here and searched too but can't find something specific enough. Thanks a bunch for any advice. |
|
|
|
| Thanks from:---> |
|
03-06-2012, 08:15 AM
|
#9280 |
|
Knows what a fatty is.
Join Date: 11-26-10
Location: Somewhere, CT
|
A 2" hole right in the middle would work, with just a small pipe of length about 2" as well. More is not needed because it'll be 1 pipe right at the top.
However I would opt to not do that as the heat will shoot up and you'll burn a little more fuel. My friend and I both have built ones where we have 2 holes on the side of the barrel, each of those holes big enough to thread 1.5" iron pipes. Then do an elbow to go up with another short nipple on it so that you can use the cap (instead of the plug) to close it. These holes on the side would be 2-3 inches down from the top, and I'm referring to the top of the hole. So that the smoke has to come out by going down a little before going out. This has worked great at keeping things moist inside and evening the temp and being fuel efficient. Plus, if you make the holes exactly opposite side of each other, you could remove the elbows and insert a rotisserie rod through it. Don't necessarily need to use the elbows. If it's outside, you should either spray it with oil or paint it or use galvanized. The temps will not get anywhere close to hot enough there to have health issues with the galvanized. Painting would be for the outside. The point is to prevent the iron from rusting. Shopping list for the side exhausts: 1.5 inch iron nipples x 4 1.5 inch iron 90 elbow x 2 1.5 inch iron cap x 2 To drill hole to fit just right, you typically need about 1/4" to allow for the iron piping, so you'd have to drill like 1.75" hole. |
|
|
|
|
03-06-2012, 08:24 AM
|
#9281 |
|
Is lookin for wood to cook with.
Join Date: 02-28-12
Location: greensburg, pa
|
Just starting my first build and I have kingsford grill from gander mountain that will be donating
The lid and racks. My charcoal rack is 14'' and I wraped it with expanded metal, how tall does it Need to be? Is 8" enough for a long burn, not sure how much charcoal is needed for pork but. Thanks guys |
|
|
|
|
03-06-2012, 03:15 PM
|
#9282 |
|
On the road to being a farker

Join Date: 03-01-12
Location: Radcliff, KY
|
My first UDS is off to the sandblaster, should be back in a few days. I picked up a used Weber, complete, for the lid, grill etc....also went to Lowes and got the pipe, ball valve and angled pipe pieces.....and a 1" hole saw.....also picked up a new Weber rotisserie off eBay for 28.00 bucks...whooo whoo!
Will post a thread and pictures when I get her done, can't wait! Now for the color....I'm thinking either University of Kentucky colors ( blue and white) or Dallas Cowboy theme, blue and silver.....got to be a little fancy sitting out of the deck.....  |
|
|
|
|
03-06-2012, 03:42 PM
|
#9283 | |
|
Babbling Farker
Join Date: 04-16-09
Location: Lake Charles La
|
Quote:
A 2" pipe will work out fine. I used PVC for my pipe and have had no problems with it. When not in use i use the top off a can of spray paint to keep the wasps and bugs out |
|
|
|
|
| Thanks from:---> |
|
03-06-2012, 04:56 PM
|
#9284 |
|
Full Fledged Farker
Join Date: 10-01-09
Location: Seminole Florida
|
I've built a couple of them using 2" pipe (which is actually quite a bit bigger than 2"). They work well, but seem to run a little hot, especially when it's windy. I put a 1/2" wide baffle in mine which seem to get it under control. Charcoal usage is the same as a Weber lid. You want to have a way to cap it off, because if you close the intake and exhaust, your fire will (or should) go out quickly, which will save you some charcoal for the next cook.
__________________
I'm very intelligent, but I mask it by doing stupid stuff. |
|
|
|
| Thanks from:---> |
|
03-06-2012, 09:33 PM
|
#9285 | |
|
Knows what a fatty is.
Join Date: 02-29-12
Location: Suburb of NYC
|
Quote:
Do you have a picture? And of course, thanks. - Nemo |
|
|
|
|
|
| Tags |
| divided circle template, uds, ugly drum, ugly drum grill, ugly drum smoker |
 Similar Threads
|
||||
| Thread | Thread Starter | Forum | Replies | Last Post |
| Ugly Drum Smoker | ironslob | Q-talk | 2 | 09-19-2010 10:16 AM |
| Ugly Drum Smoker - Need Help | Bartkowiakj | Q-talk | 10 | 06-18-2010 09:38 PM |
| One Ugly Drum Smoker | Steve_B | Q-talk | 15 | 09-21-2009 10:32 PM |
| My (not-so) Ugly Drum Smoker. | hav | Q-talk | 47 | 11-05-2008 02:30 PM |
| Ceramic Cooker Meets Ugly Drum Smoker - BUDCS - Concept Drum Discussion | Hook_Line_and_Sinker | Q-talk | 9 | 04-26-2008 02:24 PM |
| Thread Tools | |
|
|


