Smokin' D
is Blowin Smoke!
Well it took a bit longer than I first thought because I couldn't get the sacrificial drum till Thursday, so here goes.
Reconditioned drum with a crimped, not rolled, bottom seal

A Weber top fits nicely

Cut the bottom off the drum about 3/4" past the first bulge

Cut the bottom out of the bottom

Beat the heck out of the edge with a 3 pound sledge to open her up a bit.
Thanks, Hugh

A close up.

Everything fits together nicely. Time to drill some holes.
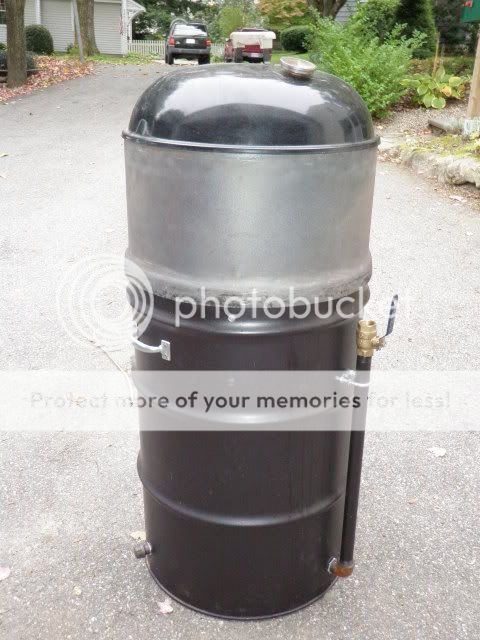
Holes all drilled and the first exciting test fit of the meat carousel.
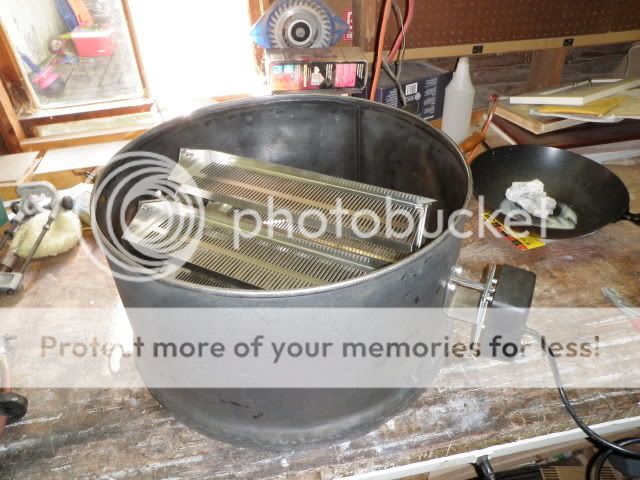
Please note the very fine garage fabrication of the rotisserie motor bracket.
Oh, and the bacon fat in the background for the seasoning.
A future addition of two handles above the rotisserie rod is planned. Not necessary but will make for easier handling of the unit.
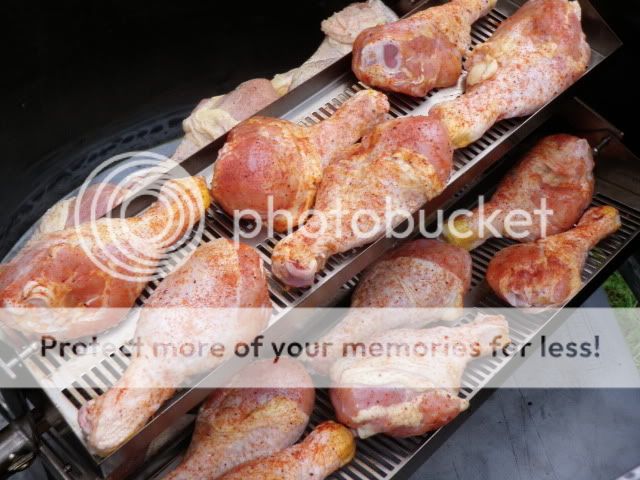
24 Chicken Drum Sticks for the DRUM-O-LATOR
12 with the world renowned Yardbird and 12 with celery salt and pepper

Loaded up. Notice how the drum sticks are parallel to the long side. Don't do that. The meat can move and throw the shelf out of balance resulting in disaster. Caught it before there was a serious problem though.
After about an hour. Getting nicely browned up. Also note the drums are at a slight angle. No movement and hence no loss of protein to the Fire Gods below!

All done at about the two hour mark. Kept them on a bit long as the nine year old was at a neighbors house for a campfire. Chicken was tender and moist with a nice crispy skin for the most part. I do love rotisserie cooking!

This thing is going to be a lot of fun. Get one for yourself.
Stay tuned because next time I'll tell you about fuel consumption and temperature control. Would have done it now but it's raining this morning and have yet to go outside.
Reconditioned drum with a crimped, not rolled, bottom seal

A Weber top fits nicely

Cut the bottom off the drum about 3/4" past the first bulge

Cut the bottom out of the bottom

Beat the heck out of the edge with a 3 pound sledge to open her up a bit.
Thanks, Hugh

A close up.

Everything fits together nicely. Time to drill some holes.

Holes all drilled and the first exciting test fit of the meat carousel.
Please note the very fine garage fabrication of the rotisserie motor bracket.
Oh, and the bacon fat in the background for the seasoning.
A future addition of two handles above the rotisserie rod is planned. Not necessary but will make for easier handling of the unit.

24 Chicken Drum Sticks for the DRUM-O-LATOR
12 with the world renowned Yardbird and 12 with celery salt and pepper

Loaded up. Notice how the drum sticks are parallel to the long side. Don't do that. The meat can move and throw the shelf out of balance resulting in disaster. Caught it before there was a serious problem though.

After about an hour. Getting nicely browned up. Also note the drums are at a slight angle. No movement and hence no loss of protein to the Fire Gods below!

All done at about the two hour mark. Kept them on a bit long as the nine year old was at a neighbors house for a campfire. Chicken was tender and moist with a nice crispy skin for the most part. I do love rotisserie cooking!

This thing is going to be a lot of fun. Get one for yourself.
Stay tuned because next time I'll tell you about fuel consumption and temperature control. Would have done it now but it's raining this morning and have yet to go outside.

