• working on DNS.. links may break temporarily.

Weber Kettle, low-n-slow, let's see your setup

landarc

somebody shut me the fark up.
Joined
Jun 26, 2009
Messages
30,788
Reaction score
30,160
Points
0
Location
sAn leAnDRo, CA
Let's see some of the various setups we all use for cooking low-n-slow on a kettle.

ballsofoil.jpg


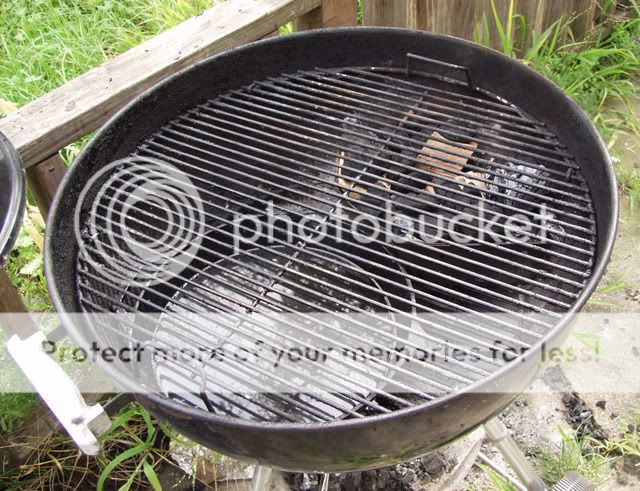
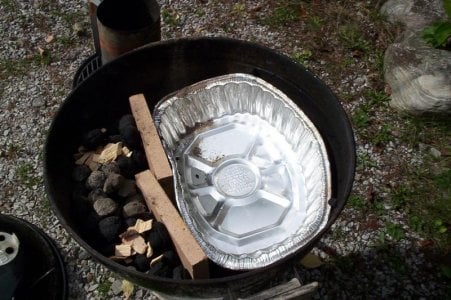
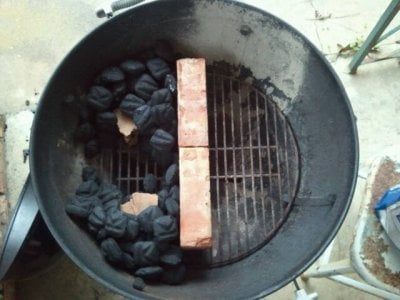
A large cast iron pan with charcoal around the edges, I like to put lump over briquettes, and the wood goes on top. Foil balls to hold up cast iron pizza pan. Water in skillet.

diffuser.jpg


Cast iron pizza skillet on top of foil balls, the skillet is filled with water. The charcoal will eventually be lit in one end and it should burn around the edges.

brisket-blurry.jpg


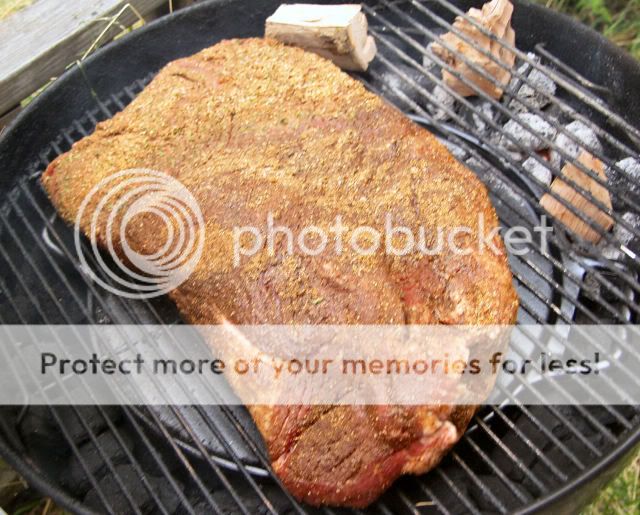
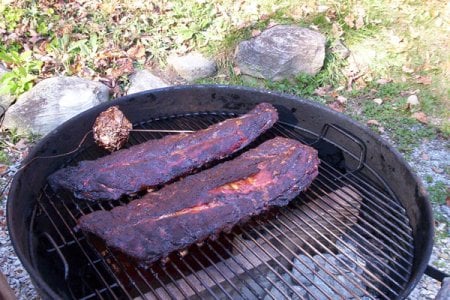
Here is the wood on top of the charcoal. The end of the charcoal is lit in this image. That is a 14 pound packer and the charcoal burned at 275F, for 8 hours. The charcoal burned, counter-clockwise, around to about 8 o'clock in that photo.
 
I use concrete bricks on top of bottom grate. They act as a separator between temperature zones as well as heat sinks/barriers.

If I want 2 zones I put in a wall of bricks (2), If I want a 3 zone, I'll go t-shape with the bricks.

I bank the charcoal on the bricks, not the wall of the kettle. This allows for the circulatory air flow still.
 
Here is another setup I use...
kettlesetup.jpg


Charcoal piled on one side of kettle. Large water filled cast iron skillet on the other side, sometimes I will place a folded foil barrier between the fire and skillet.

This is mostly the mod I use, that I give you credit for. Only difference is I divide the fire with fire bricks. Tri-tips, sausage, and ribs in Reichlin's rib rack. (for low, slow). I'll use the same set-up, but with more lit charcoal to reverse-sear a 2" thick ribeye. For a spatch cocked chicken, only foil in the empty cast iron skillet. Thank you landarc for these tips from at least a year ago, Alan :clap:
 
Pitmaster ique 110, Weber extension ring / rotis and ribolator. Cover charcoal grate in HD foil leaving about 6" exposed. Place one chimney of unlit charcoal over opened portion of grate. Place watedr pan on foiled area. Toss on 2-3 pecan wood chunks. Light with Weber starter cube, close lid, turn on ribolator and pitmaster 110, enjoy 225 degrees for up to 8 hours.
 

Attachments

  • photo (1).JPG
    photo (1).JPG
    96.6 KB · Views: 4,817
I use a large disposable roasting pan to close off about 2/3 of the lower grate area. Fill the other 1/3 with unlit and drop about 10 lit briquettes off to one side for a long burn. Couple chunks of hardwood mixed in with the unlit. Sometimes I use a couiple steel cans for water in the roasting pan.
 
I used to use steel cans for water, but, someone threw them away while I was in the hospital. Decided I don't need them anymore. The disposable pan is a good thing, but, I hate the idea of throwing them away. The cast iron will last a long time.
 
Previous LNS kettle setup, using a Smokenator and the extra shelf.

readytosmoke.jpg


Nowadays I just use two firebrick splits to block off 3-4" from one side of the kettle, and fill the narrow . I wrap the charcoal grate with HD foil and put a foil pan on the bottom rack to catch drippings. I light the coals with the Minion method, using 6-10 lit briquettes placed at one end to get the fire going. I place 3-4 chunks of hickory, pecan, apple or cherry wood in the coals as I add them. The smoke wood changes based on what I am cooking on the kettle.

Here's a good pic of the setup I used for some ribs on one of my early cooks. I was using two paving bricks wrapped in foil, but I have started using fire brick splits because they handle heat better and they reach all the way across the kettle. Yeah, it looks like there's too much smoke wood in the charcoal, but what I had was very dry and burned up quickly with little smoke. I now bury the wood chunks in the coals instead of placing on top. Things you learn as you cook more. :idea:

Minionkettle.jpg


Notice the foil pans to catch drips. Not a big fan of flare ups on subsequent cooks. :shocked:
 
This stainless steel bowl is part of the Smoke-EZ extension kit. It fits right inside the charcoal ring, so I can use it this way when I'm looking to add some extra moisture to the cooking environment.

My criteria for using a water pan or not in the Kettle is this: For a small quantity of meat, I use the water pan. A lot of meat in the cooker will produce enough moisture all by itself, so then I skip the added water.

SimplyMarvelousRibTips86008.jpg
 
I used to use steel cans for water, but, someone threw them away while I was in the hospital. Decided I don't need them anymore. The disposable pan is a good thing, but, I hate the idea of throwing them away. The cast iron will last a long time.

Love the cast iron idea but just haven't got an extra one yet. I can get several cooks out of one disposable pan though.
 
I use a set-up similar to Brother tnjimbob's firebrick method, sometimes , like Brother deguerre,with a big oval disposable pan(excellent drip coverage), sometimes with a smaller disposable lasagna pan, or the enamel pan that came with my rib rack. When I remember, I put a water pan over the coals (usually the enamel pan mentioned earlier).
The oval pan is good because you bend up the one curved side facing the coals, creating a dollar-store Smokenator.
I'm not doing too well with the photo loading feature, otherwise there'd be pron.
 
Here is mine. Still tweaking it to get results I'm happy with. I put a water pan on the right side. Last time I foiled the cooking grate above the fire.

Sent from my SCH-I500 using Tapatalk
 

Attachments

  • uploadfromtaptalk1332896857758.jpg
    uploadfromtaptalk1332896857758.jpg
    38.7 KB · Views: 2,323
Back
Top