• working on DNS.. links may break temporarily.

Rusty Pup's First UDS Build

R

RustyPup

Guest
Let me preface this by repeating what I said in my Cattle Call post - YOU. GUYS. ROCK!

I joined this forum just to say that when y'all unknowingly helped me to cook a top round roast on my OTS to perfection, then I stayed for... well... ummm... just because!

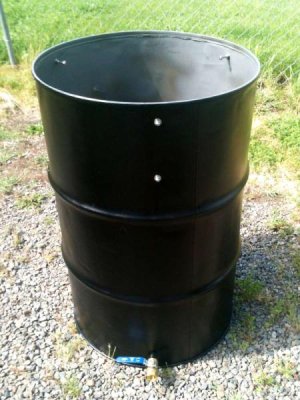
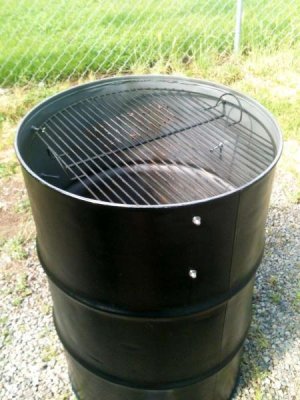
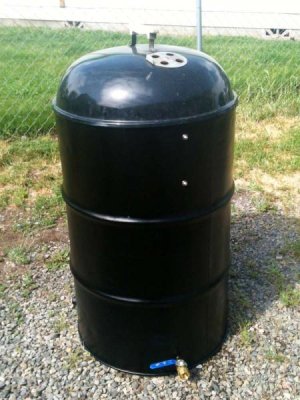
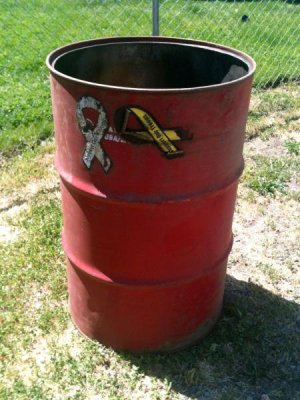
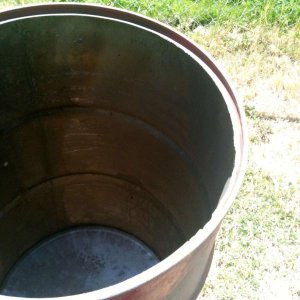
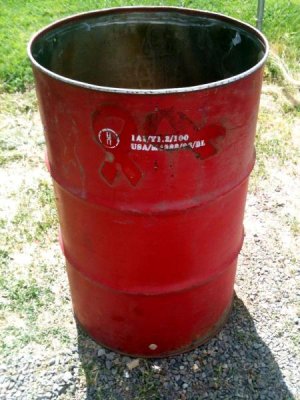
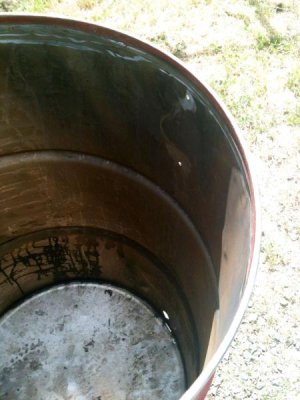
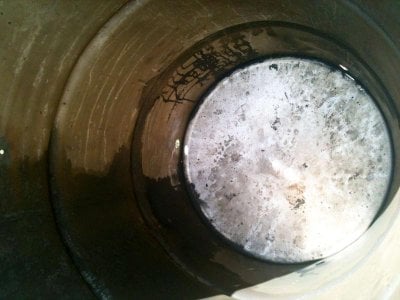
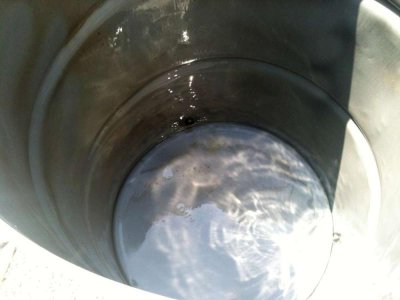
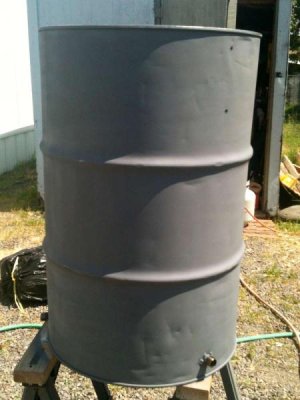
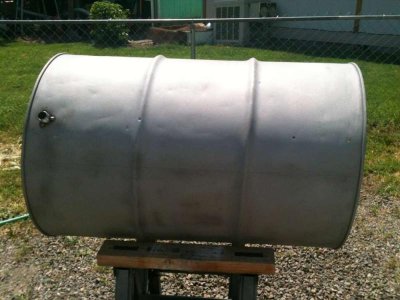
I started digging into the forums a bit, then made a horrible mistake - I found the mother of all UDS threads. Prior to this, I'd never heard of a UDS. Ok, I knew that folks made smokers out of drums and such (my grandfather had one made out of an old 1950s refrigerator,) but I'd never heard them called by that name. Well, I think I got to page 3 and decided that I had to build one. As of today, I still haven't read the entire thread (I'm on page 363,) but I'm working on it. Suffice to say, I decided to start this thread rather than document the entire build on that thread.

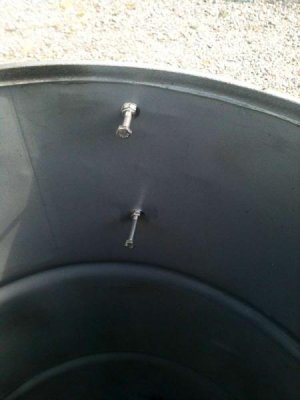
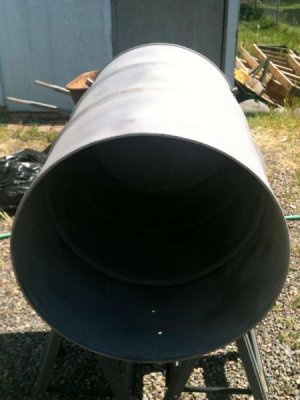
Let me also say that I'm NO kind of metal worker. I work with wood (in one form or another for about 35 years) but my metal working knowledge can be held in an average non-metallic thimble. As a result, I don't have many tools made for metal. I have a lot of shop tools that can be used on metal, but I got them for woodworking.

With that in mind, I'm approaching this build as a mope who has no metal working experience (other than grinding the paint off a trailer to repaint it,) limited metal working tools, a lot of ambition, and an average amount of energy. I do have a favor to ask the more seasoned builders, however. That is: If you see that I'm getting ready to make a big-arsed mistake (other than getting into that long UDS thread to begin with, that is) PLEASE LET ME KNOW!

I do know how to handle my tools, I do try to keep safety foremost in my mind, and I'm fairly confident in my skills - but nobody knows everything. Please feel free to chime in with any/all comments, suggestions, warnings, requests, or demands for payment*. Ok, enough of that - let's get to building.


*Demands for payment must be typed up in triplicate, notarized, accompanied by a postage paid envelope, and hand carried to my home by a 23 year old blonde nymphomaniac who owns a Ferrari dealership.
 
Ok, first I had to find a UD to make an S out of. That seems to be a major chore for a lot of people. It started out to be one for me too. Then I remembered that I live about 3 miles away from a scrap metal dealer. I bopped on over and found that he had probably 50 drums out in the yard, and about 6 of them in a rack right next to the office. I went through the 6 up by the office and came away with the drum with the least amount of rust in/on it - for a whopping $8.

My lesson learned? Check the scrap yard for drums!
 

Attachments

  • UD 2.jpg
    UD 2.jpg
    55 KB · Views: 302
  • UD 4.jpg
    UD 4.jpg
    46.2 KB · Views: 302
  • UD 6.jpg
    UD 6.jpg
    45.3 KB · Views: 302
I think the drum had hydraulic fluid in it, but I'm not 100% sure. With the drum home, I started laying things out, marking where to drill holes, and just generally cleaning up what I had.

Between my pneumatic cut-off wheel and my angle grinder, I got the top rim cleaned up and ground nice and smooth. I then figured how high I wanted to place my cooking racks. In keeping with the conventional wisdom that the bottom rack should be 24" above the charcoal grate, I drilled my bottom grill mounting holes 27 1/2" from the bottom of the drum. Since I'm using a Weber lid, I drilled the upper grill mounting holes 1 1/2" down from the top. That gives me 6 1/2" between the grills.

I then flipped the drum over and marked the location of my 1" holes to mount the three 3/4" close black iron nipples. I marked the locations, then used a center punch to give me a little divot for the tip of the drill bit. I turned the drum on its side and put a drop of pneumatic oil on the mark I was about to drill, then drilled the pilot hole with a 1/4" bit. I drilled all of the 1/4" holes the same way.

Then I switched over to the stepped bits. Harbor Freight tools aren't known for lasting very long, and to be honest, I didn't expect much out of the stepped bits I got there. I was more than pleasantly surprised that they worked like a champ. The stepped bit set I got had 2 bits. I started with the smaller bit and drilled the intake holes to 1/2" with it. Then I swapped out the bits and drilled up to the required 1" with the larger bit. It just took me longer to type that than it did to do the drilling. I was very impressed.

So with all of the drilling done, what remains to do tonight is to go ahead and burn it out. I can see a bit of greasy residue along one side (see the pics,) so I figure it needs it. I called a few local sandblasting shops to get quotes, and suffice to say I'll be taking the drum down to be blasted inside and out Monday morning. I figure that for the price he quoted me ($25,) it'll be worth it.

My lesson learned? Harbor Freight stepped bits drill this drum steel pretty durned well!
 

Attachments

  • UD Build 1.jpg
    UD Build 1.jpg
    52.6 KB · Views: 296
  • UD Build 2.jpg
    UD Build 2.jpg
    40.2 KB · Views: 294
  • UD Build 3.jpg
    UD Build 3.jpg
    56.1 KB · Views: 295
Not worth having it blasted, imo. Youre going to have to burn it out anyway you look at it, from a safety stand point, which will burn off the outside paint anyways.

These are very fun projects that dont require alot of tools, or expensive tools at that. Its a good project for someone like you who doesnt have much metal experience or someone that isnt very DIY inclined.

Have fun building it, cooking in it, and eating (what comes out) it.

And those step bits ROCK i have about 200 holes on one and it still works like it did on the first one.
 
Thanks for the comment! Funny - we just moved back to Oregon from your neck of the woods in November. Spent 15 years down in the Carson City area - most recently Stagecoach (You know - where teeth and shoes are both optional?) We loved the NV desert, but it was time to get home where the families (and the salmon) are.

I'm definitely going to burn it, but it looks like tonight is out of the question. We got a storm front coming in, and the winds have really kicked up. Maybe tomorrow night. As far as blasting it is concerned, I figure for $25, it beats crawling inside it with a wire brush and scrubbing it down any day. And he'll do it while I wait.

I figure those step bits will last me a lifetime. Unless, of course, all the relatives want a UDS after I get this one done and they taste what comes out of it. If (when) I burn these bits up, then I might wind up splurging on the Uni-bits. For this build, though, I couldn't see spending $45 to drill 3 holes.

And yeah - I'm documenting at this build from the standpoint of a guy who has little to no metal working experience. I figure everyone is a beginner at some point, so why not?
 
Last edited by a moderator:
Busy day today. I went to burn out the drum last night, and I was out of propane. Two empty tanks just won't cut it - no matter what kind of weed burner you have. So, I got up bright and early (for me) this morning and hit the gas station to fill up a tank. I had read in the Mother of All UDS Threads that burning a drum on concrete can result in said concrete exploding. I didn't want that happening to me (we're renting,) so with propane secured, and weed burner in hand, I set about burning the bejeebers out of the drum in my gravel driveway. (Sorry there are no pics, but my hands were kind of full.)

Once it was burned to the point of having no oil, grease, schmutz, or intact paint at all on it, I ran it down to the sandblasting shop. I was there a total of 15 minutes, talking to the owner (Shane) while his helper (Jim) blasted the drum inside and out. Jim loaded the drum into our Jeep when he got it done, I paid Shane the $20 he wanted for the job, and I was on my merry way.

I took the drum straight over to my neighbor's house and he tacked the three 3/4" close nipples into the holes I had drilled for them (for which he charged me a 6-pack.) While he was doing that, we discussed the UDS project, and he's really interested in building one for himself. He wants to wait until I have mine done so he can see for himself what all goes into it. (He doesn't have a computer or anything else that goes online, or I'd have brought him here to see what I was talking about.)

With the nipples tacked in, I set it up on my saw horses and shot the inside with Pam, and the outside with Rustoleum high-temp primer. I'm letting the primer cure overnight, then I'll paint the outside tomorrow morning. Then maybe I'll use my Smokey Joe to go ahead and do a seasoning burn on it. We'll see what the weather is doing.

My lessons learned?

1.) With the right amount of concentrated heat, driveway gravel will pop like popcorn.

2.) Don't be afraid to offer a neighbor a 6-pack to do a simple welding job.
 

Attachments

  • UD Build 8.jpg
    UD Build 8.jpg
    35.7 KB · Views: 242
  • UD Build 7.jpg
    UD Build 7.jpg
    34.7 KB · Views: 241
  • UD Build 5.jpg
    UD Build 5.jpg
    32.2 KB · Views: 240
  • UD Build 4.jpg
    UD Build 4.jpg
    59.5 KB · Views: 241
Last edited by a moderator:
Looking good so far. I knew about the concrete and the gravel.

It is amazing I was ever trusted with a welding torch
 
Great thread. I was in your shoes last year around this time. Sold my first drum to a neighbor, and made some nice improvements on my second UDS.

Keep the updates coming! Oh, and I loved the gravel popping comment!
:popcorn:
 
Lookin good, every time I see someone building one, I wanna build another one....:becky:

Build another one!

I have a strange feeling that this will NOT be the only UDS I build. My neighbor, my nephew, and my oldest daughter are all very interested in this build. And, I figure there's no limit on how many toys I can have - as long as nothing else is neglected or suffers along the way... :becky:
 
Thanks for the comment! Funny - we just moved back to Oregon from your neck of the woods in November. Spent 15 years down in the Carson City area - most recently Stagecoach (You know - where teeth and shoes are both optional?) We loved the NV desert, but it was time to get home where the families (and the salmon) are.


Lol yep, optional is about right. I actually havent been into carson for probably a good 10 years , its probably ALOT different from that time. Maybe i should go for fun, plus i want to drive the new bridge.

Ah everything is good about the desert here, i love it. Scorching heat in the summer, 0 degree in the winter.
 
Ok, I got the drum painted (semi-gloss black - going simple on my first build,) the hardware and valve installed, and tried out a grill and the lid from my old Weber OTS. It fits great!

I think I messed up in spraying the Pam into the drum before I got it painted. I did cover the holes in the sides for the hardware, but it seeped under the tape in a couple of places. I also think that next time I'll use shortening instead of Pam. It's a bit neater to apply. Spraying the inside of the drum was just a mess.

I went with SS acorn nuts on the outside of the drum for a neater appearance and to keep me from snagging myself on the end of the bolt. If there's a way I can cut myself, I'll find it. Covering the end of the bolt eliminates one such possibility.

Now I just need to get hold of a piece of expanded steel (scrap metal dealer,) an ash pan (water heater pan or el cheapo 18" BBQ from the convenience store) a turkey fryer thermometer (and the fittings to mount it,) and we're ready to rock.

My lesson learned? Rub the inside of the drum down with Crisco and season it like I do cast iron cookware. Spraying the inside of a drum with Pam while I'm half-way in the danged thing is just a big mess.
 

Attachments

  • UD Build 9.jpg
    UD Build 9.jpg
    49.6 KB · Views: 74
  • UD Build 10.jpg
    UD Build 10.jpg
    23.7 KB · Views: 73
  • UD Build 11.jpg
    UD Build 11.jpg
    23.7 KB · Views: 73
  • UD Build 12.jpg
    UD Build 12.jpg
    48.4 KB · Views: 73
  • UD Build 13.jpg
    UD Build 13.jpg
    49.2 KB · Views: 73
Looks great. I used an 18" pizza pan for my ash pan. I've had my UDS operational for about 3 weeks and I LOVE it !!!

2013-04-27 15.51.07.jpg


2013-04-27 15.51.17.jpg
 
Back
Top