• working on DNS.. links may break temporarily.
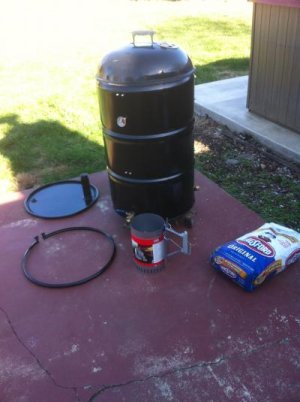
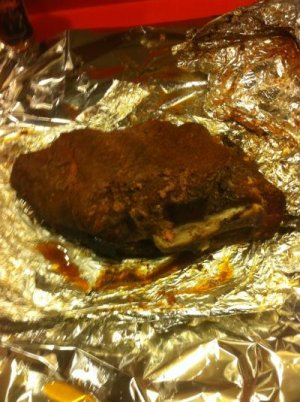
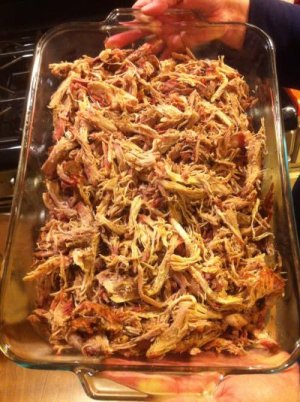
First Butt on my new UDS

I posted my first cook on my UDS already but I did my first butt today and I just had to post it here on the mother of all drum threads. If it wasn't for this thread and the brethren and sisters here, I would not be the proud owner of a UDS. Hope you enjoy!
Harold
 

Attachments

  • UDS29.jpg
    UDS29.jpg
    28.3 KB · Views: 951
  • UDS37.jpg
    UDS37.jpg
    50.9 KB · Views: 892
  • UDS39.jpg
    UDS39.jpg
    54.1 KB · Views: 890
Fire Basket size ?

Got my expanded metal and 18.5 Weber charcoal grate. Cut my metal in half it is now 2 - 12"X24" pieces. Should I place it around grate to make it 12" deep X 13.5" around with bolts for 3" feet or 3" up to make it 9"X13.5" to give me 3" clearance for ash? Whats best for long cooks?

Also I found these at Lowes to cap the pipe nipples. They are brass garden hose caps and the seal the nipples real nice and won't rust. only $1.58 ea
 

Attachments

  • iphone 003.jpg
    iphone 003.jpg
    58.9 KB · Views: 806
If you put the grate 3" up you can just use the mesh as "feet". 3" of clearance seems to be about right for ash buildup.
 
I just put my grate 3" up in the expanded metal ring. This has the added advantage of making a 3" deep charcoal pan for putting underneath the top grate and using the UDS as a grill. I just added a third grate level at 15" beneath the top grate. That works perfect for the charcoal basket (upside down) to sit on in the grilling configuration. It's also the perfect height for a water pan if you're so inclined. It's amazing the versatility you can add just by using the bolts you were going to use for the feet to add a third grate level. Let me know if this doesn't make sense. It is much easier to do than to describe...
 
I just put my grate 3" up in the expanded metal ring. This has the added advantage of making a 3" deep charcoal pan for putting underneath the top grate and using the UDS as a grill.
I like this idea where you can flip the basket. I'll convert my spare deep basket to do this and get rid of the bolts.
 
I just put my grate 3" up in the expanded metal ring. This has the added advantage of making a 3" deep charcoal pan for putting underneath the top grate and using the UDS as a grill. I just added a third grate level at 15" beneath the top grate. That works perfect for the charcoal basket (upside down) to sit on in the grilling configuration. It's also the perfect height for a water pan if you're so inclined. It's amazing the versatility you can add just by using the bolts you were going to use for the feet to add a third grate level. Let me know if this doesn't make sense. It is much easier to do than to describe...

I got it thats a great idea. Thanks for the input. After reading 485 pages you tend to go into info overload but I shall read it all!
 
attachment.php
I like the hose caps!
 
Well I'am just about done with my new UDS! Got alot of new & good idea's here on The BBQ Brethren & I thank you All, Hud.
attachment.php
 
Got my expanded metal and 18.5 Weber charcoal grate. Cut my metal in half it is now 2 - 12"X24" pieces. Should I place it around grate to make it 12" deep X 13.5" around with bolts for 3" feet or 3" up to make it 9"X13.5" to give me 3" clearance for ash? Whats best for long cooks?

Also I found these at Lowes to cap the pipe nipples. They are brass garden hose caps and the seal the nipples real nice and won't rust. only $1.58 ea

What department did you find those in? I likey, no rust and they look sharp. Def. would compliment the brass ball valve.
 
Just finished building my first UDS! This thread was a wealth of infomation! Will post some pron this week!
 
What department did you find those in? I likey, no rust and they look sharp. Def. would compliment the brass ball valve.

LOWES in the plumbing across the aisle from the black and galvanized pipe. They have a display of various brass fittings. Easy to find. Home Depot should have them also.
 
Last edited:
What I have is Stubs lump coals. And I started it the same way I start the KF blue; put some in a chimney, light that and let it stop smoking and flaming, then dump onto unlit coals in the drum. I usually put the flavored wood and meat in the drum right away. Doing that procedure without a doubt creates that nasty smelling smoke.

Bubblehead mentioned to let it burn in the drum for like 15 mins and then it was a clear smoke. I will try it, but I came after 1 hour of my method and still it was nasty smoke. But perhaps Stubs lump coals are not the same as what you are using?

I'm thoroughly confused and can't see how it's possible that there is such variation on people's experience on this.

Are you waiting for the lump coals to be white before cooking?

I usually only load my cookers with Royal Oak Lump (or Best Choice which is the same product packaged for some grocery stores). Like I was saying, I just load it up and stick a torch in the center for a bit (20 seconds-ish) and let it go for a bit, replace the grate and put the lid on. I load the food AFTER the drum is up to temp and the smoke is nice and clean throughout the session.

I hope this makes sense/helps.
 
I built my first UDS back in March and haven't been all that thrilled with it. I come from the WSM school of cookers so not having a door was bothering me. I went back and forth with some cool sliding door designs and decided to keep it simple. I used the bottom of the aluminum pot I had removed to make my mini wsm last year. All the hardware was around $8 from Lowes. I used small hinges and tool box type latches. The door seals great and my UDS is now my go to smoker. I also added wheels by attaching 3 all metal casters to the original lid and fitting it to the bottom of the smoker.

206.jpg

209.jpg

211.jpg

213.jpg

216.jpg

215.jpg

214.jpg

223.jpg

246.jpg

The seal is not perfect be good enough. Absolutely zero problems controlling temps. In fact, I think it runs better than it did before.

302.jpg

304.jpg

306.jpg

I love being able to wheel this in and out of the garage.
 
Back
Top