landshark530
Knows what a fatty is.
- Joined
- Aug 18, 2008
- Location
- Pigsdofly, wi
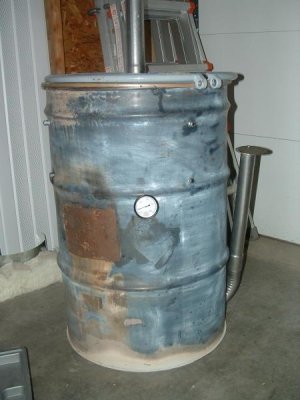
I finished my UDS, But I was only able to do with the help of this great forum.
After reading 90 pages of thread, here is what I collected to complete the build.
(1) 1 55 gallon drum, free
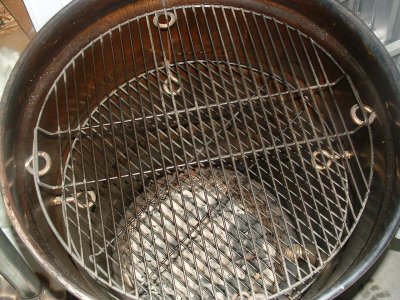
(2) 2 22.5 inch racks/shelves 7.49 each at Menards cost 15.00
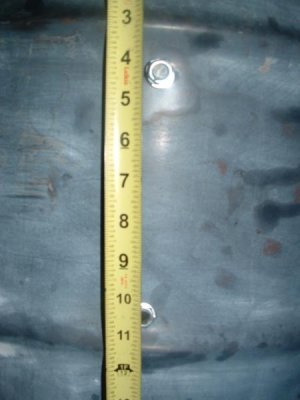
(3) 8 3.8 eye bolts, .75 cents each at Menards cost 6.00
(4) 1 2” 90 degree exhaust elbow
(5) 1 18” 2” straight exhaust pipe
(6) 1 18” 2.5” straight exhaust pipe. Total exhaust parts cost 21.00
(7) 2 flanges from the hardware store to fit the pipe cost 6.00
(8) Scrap piece of expanded steel from welding shop cost 5.00
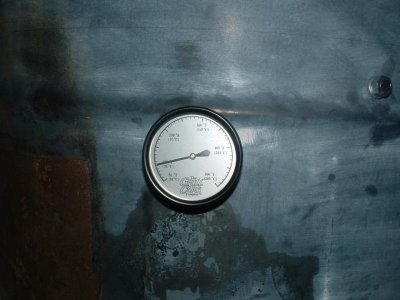
(9) 1 BBQ grill thermometer from walmart cost 13.00
Total investment $66.00
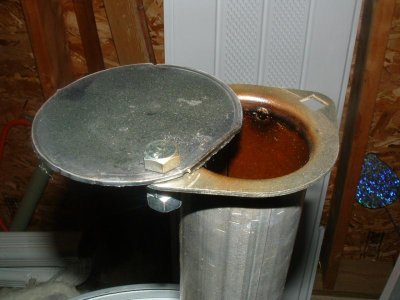
The drum had the redish orange liner in it, but was clean. I drilled three 5/8” holes next to each other and filed the thing with hardwood, let it burn for 10 hours, keeping it full. I put it out, dumped the coals and scrubbed it out with brillo pads to clean out the paint residue.
Luckily I have a friend with a welder and a plasma cutter, so the assembly was cheap (ie FREE).
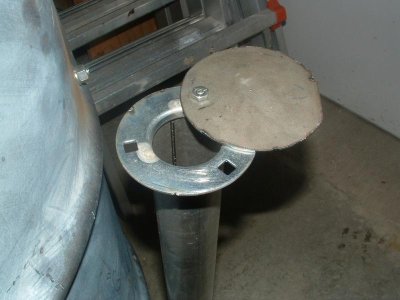
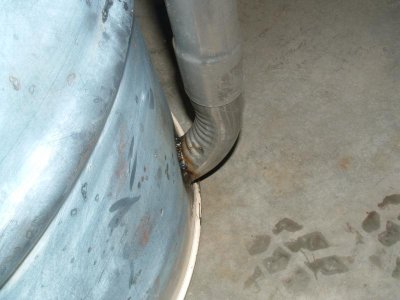
For the intake, the 90 degree exhaust elbow was cut off at the end so it extends about 3 inches into the drum. I put the 18 inch riser on that and welded a flange onto the end. Then I bolted a piece of steel as a damper. I used the holes that I drilled for the initial burn out as the intake, just made it slightly larger. It’s 2 inches from the bottom.
The exhaust is a 2 ½ inch exhaust pipe with a flange and damper on it.
I did this after seeing the video’s related to making a UDS. I found that because of the larger volume of the intake pipe related to the exhaust, I hardly have to open the intake (maybe ¼”) to get the proper temps. Not having to bend down to make adjsutments was a major factor also.
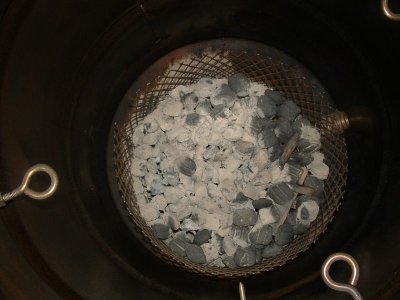
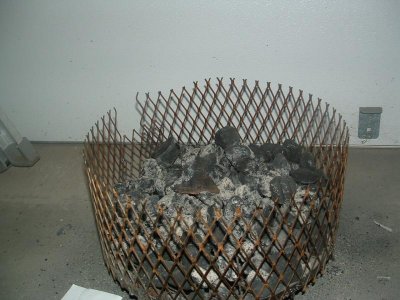
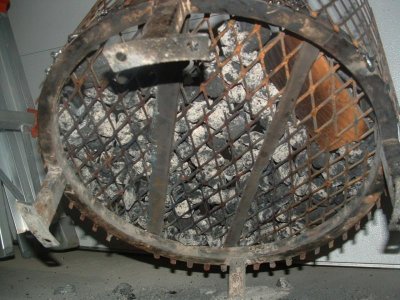
With the intake open a ¼’, and the exhaust open ½ way I can get 6hrs easy. The attached picture of the coal basket showed 75% of the coals still intact after a 6 hour seasoning of the barrel. Running it wide open I got about 325 degrees. It was easy to adjust to 225-250 degrees.
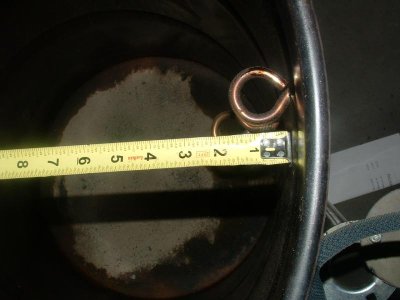
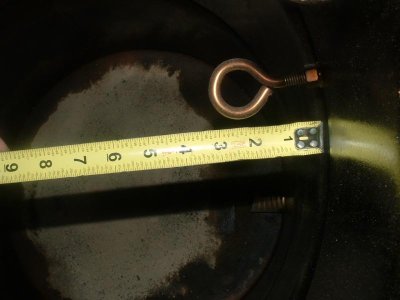
The top eye bolts are closer to the side. This had to be done otherwise you cannot remove the lower grate.
The fire box it 16 inches across and 6 inches high, and sits 3 inches off the ground. I used a riser from a barstool as the base, and welded the hardware cloth to it. I barely had it 1/2 full, so it could have been only 5 inches tall.
The thermometer is set so it’s just below the lower grate.
First cook it tomorrow. Still working on a paint scheme.
After reading 90 pages of thread, here is what I collected to complete the build.
(1) 1 55 gallon drum, free
(2) 2 22.5 inch racks/shelves 7.49 each at Menards cost 15.00
(3) 8 3.8 eye bolts, .75 cents each at Menards cost 6.00
(4) 1 2” 90 degree exhaust elbow
(5) 1 18” 2” straight exhaust pipe
(6) 1 18” 2.5” straight exhaust pipe. Total exhaust parts cost 21.00
(7) 2 flanges from the hardware store to fit the pipe cost 6.00
(8) Scrap piece of expanded steel from welding shop cost 5.00
(9) 1 BBQ grill thermometer from walmart cost 13.00
Total investment $66.00
The drum had the redish orange liner in it, but was clean. I drilled three 5/8” holes next to each other and filed the thing with hardwood, let it burn for 10 hours, keeping it full. I put it out, dumped the coals and scrubbed it out with brillo pads to clean out the paint residue.
Luckily I have a friend with a welder and a plasma cutter, so the assembly was cheap (ie FREE).
For the intake, the 90 degree exhaust elbow was cut off at the end so it extends about 3 inches into the drum. I put the 18 inch riser on that and welded a flange onto the end. Then I bolted a piece of steel as a damper. I used the holes that I drilled for the initial burn out as the intake, just made it slightly larger. It’s 2 inches from the bottom.
The exhaust is a 2 ½ inch exhaust pipe with a flange and damper on it.
I did this after seeing the video’s related to making a UDS. I found that because of the larger volume of the intake pipe related to the exhaust, I hardly have to open the intake (maybe ¼”) to get the proper temps. Not having to bend down to make adjsutments was a major factor also.
With the intake open a ¼’, and the exhaust open ½ way I can get 6hrs easy. The attached picture of the coal basket showed 75% of the coals still intact after a 6 hour seasoning of the barrel. Running it wide open I got about 325 degrees. It was easy to adjust to 225-250 degrees.
The top eye bolts are closer to the side. This had to be done otherwise you cannot remove the lower grate.
The fire box it 16 inches across and 6 inches high, and sits 3 inches off the ground. I used a riser from a barstool as the base, and welded the hardware cloth to it. I barely had it 1/2 full, so it could have been only 5 inches tall.
The thermometer is set so it’s just below the lower grate.
First cook it tomorrow. Still working on a paint scheme.
Attachments
-
 DSCF0073.jpg35.5 KB · Views: 726
 -
 DSCF0074.jpg58.8 KB · Views: 712
 -
 DSCF0080.jpg57.8 KB · Views: 716
 -
 DSCF0081.jpg50.4 KB · Views: 710
 -
 DSCF0082.jpg54 KB · Views: 709
 -
 DSCF0083.jpg49.9 KB · Views: 708
 -
 DSCF0084.jpg116.8 KB · Views: 699
 -
 DSCF0085.jpg53.6 KB · Views: 701
 -
 DSCF0090.jpg26.1 KB · Views: 695
 -
 DSCF0099.jpg45.2 KB · Views: 692
 -
 DSCF0100.jpg42.5 KB · Views: 694
 -
 DSCF0102.jpg61.2 KB · Views: 691
 -
 DSCF0104.jpg76.1 KB · Views: 695
 -
 DSCF0106.jpg84.8 KB · Views: 701
Last edited:


