Wampus
somebody shut me the fark up.
OK.....so I've been thinking, planning, dreaming and finally it's DONE!
I've got a friend who works at a large company and he's always bringing home STUFF. He offered one of the 3 Stainless 50 gal drums that he had been storing behind his mini-barn for a couple of years a while back, and that gave me on HELLUVA idea!
I told him the plan, and he also came up with some other SS parts that we put to use.
So finally.....yesterday was the big day! THE BUILD!!!
Here's how it went....
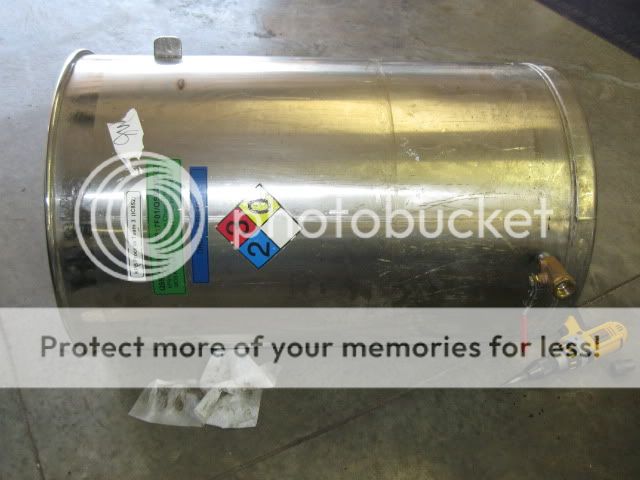
Here's the drum "as is":
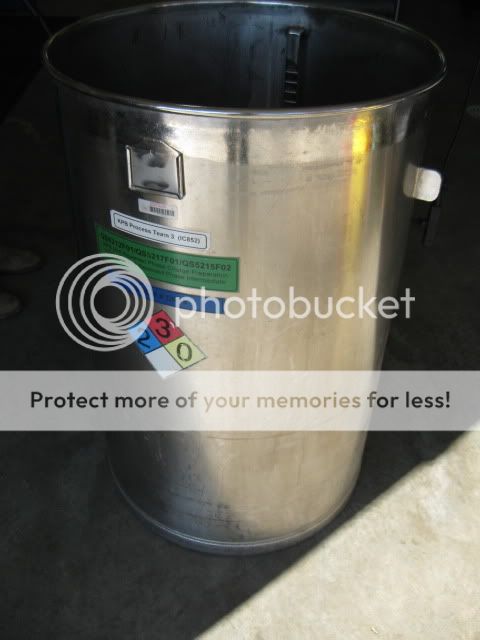
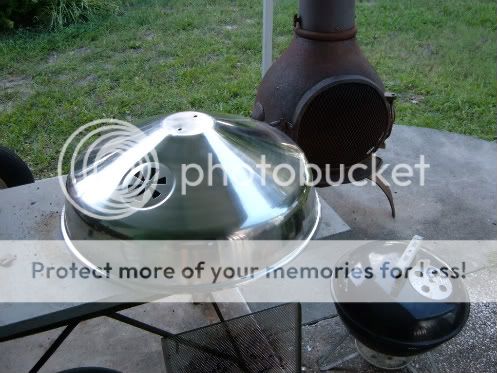
It had like a permanent "dipstick" in it...attached to the side. We just cut that out and used it for all the brackets to come. He also had a SS bucket (that he uses for an ash bucket) and this other, taller bucket (on the right) for me to chose from for the fire-bucket. I chose the one on the right. It had a heavier guage metal, so better to weld on.

Here's what I did to modify the bucket..... First, I cut the bottom off:

Second, I welded on 3 legs to the bucket from the "dipstick" material.

Then, I cut a new bottom out of some SS expanded metal that he'd also scored from work.
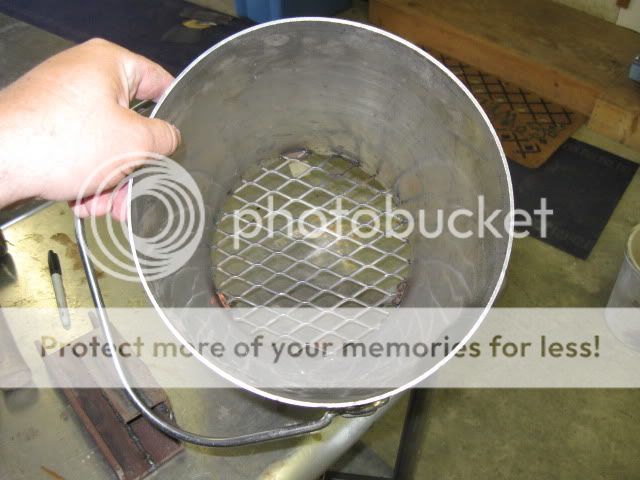
Finally....I used a step bit to put a bunch of holes in the sides of the bucket for better air flow....FIRE BUCKET DONE!
Now....the drum is the "standard" stuff.... We used a knockout/punch kit to punch out 1" holes 3 1/2" up from the bottom of the drum. We put 3 holes in total, all 3 holes were filled with 3/4" close nipples, and 2 were capped (from what I've read, I may never need the other 2). We threaded a 3/4" ball valve onto the front nipple for the main air intake.
I didn't take as many photos of the drum.....I was working on the bucket and my bud got it done quicker than I could snap photos, but you get the idea.
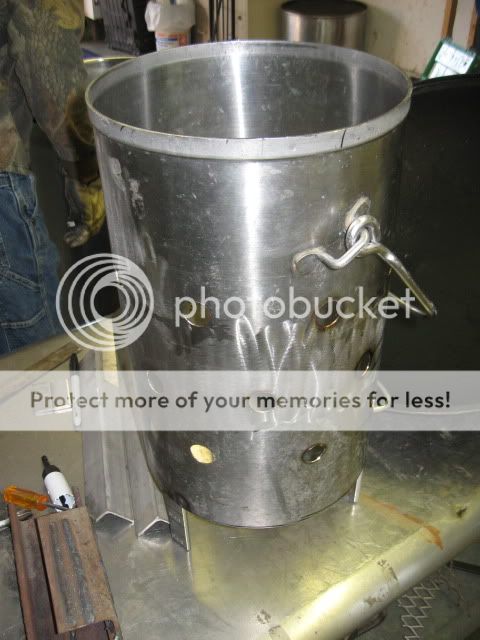
We welded on tabs for the upper and lower cooking grates. The "dipstick" was attached at 2" from the top, so we kept it and added 2 more tabs for the top grate. Then we added 3 other tabs at 8" down from the top (giving me 6" of space between the two). This photo shows the grate sitting on the lower tabs:
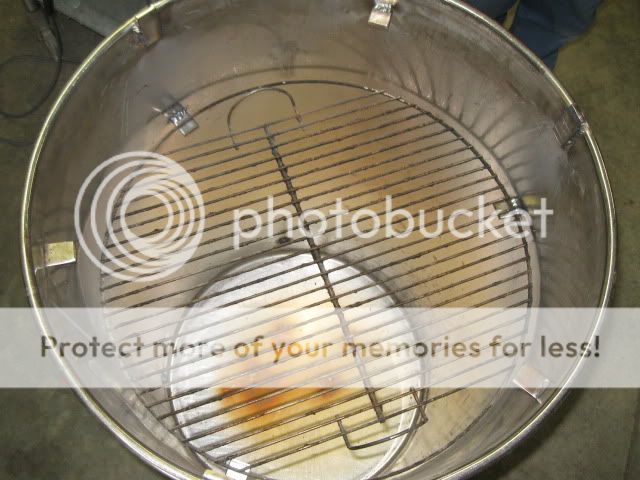
Notice, we put in 3 tabs for each grate location, to prevent rocking. JUST long enough to hold the grate, so it's easier to get the lower grate out past the upper tabs. I doubt I'll ever need to remove the lower grate with food on it, but just in case.....
This photo shows the grate in the upper position and the fire bucket in place:

If you'll notice, there are also 3 more tabs at the very top of the barrell. My OTS lid just sits on the rolled edge of the barrel. I didn't want to cut off the rolled edge for fear of weakening the barrel, so we just welded these other tabs on to keep the lid from slipping off. They hold the lid on snuggly with almost no gap at all between the lid and barrel.
I just realized....I NEVER TOOK ANY PHOTOS OF IT COMPLETELY PUT TOGETHER!!! DOH!
Oh well.....I'll be doing a test cook this week (I hope!) and there's lots of PRON in this thing's future, so there'll be more photo ops.
Just imagine the original drum photo with stickers removed and a black Weber OTS lid on top! There. 'nuf said.:mrgreen:
Anyway....I've been months thinking about this thing. I've PM'd several of you for advice. Specific thanks go to N8-Man, NorcoRedneck and Thirdeye for their great help and photos.
'QUE ON BRETHREN!!!!!!!
WOOOOHOOOOOOOO
Ooooops.....gotta change my sig.....just thought of that!
I've got a friend who works at a large company and he's always bringing home STUFF. He offered one of the 3 Stainless 50 gal drums that he had been storing behind his mini-barn for a couple of years a while back, and that gave me on HELLUVA idea!
I told him the plan, and he also came up with some other SS parts that we put to use.
So finally.....yesterday was the big day! THE BUILD!!!
Here's how it went....
Here's the drum "as is":
It had like a permanent "dipstick" in it...attached to the side. We just cut that out and used it for all the brackets to come. He also had a SS bucket (that he uses for an ash bucket) and this other, taller bucket (on the right) for me to chose from for the fire-bucket. I chose the one on the right. It had a heavier guage metal, so better to weld on.
Here's what I did to modify the bucket..... First, I cut the bottom off:
Second, I welded on 3 legs to the bucket from the "dipstick" material.
Then, I cut a new bottom out of some SS expanded metal that he'd also scored from work.
Finally....I used a step bit to put a bunch of holes in the sides of the bucket for better air flow....FIRE BUCKET DONE!
Now....the drum is the "standard" stuff.... We used a knockout/punch kit to punch out 1" holes 3 1/2" up from the bottom of the drum. We put 3 holes in total, all 3 holes were filled with 3/4" close nipples, and 2 were capped (from what I've read, I may never need the other 2). We threaded a 3/4" ball valve onto the front nipple for the main air intake.
I didn't take as many photos of the drum.....I was working on the bucket and my bud got it done quicker than I could snap photos, but you get the idea.
We welded on tabs for the upper and lower cooking grates. The "dipstick" was attached at 2" from the top, so we kept it and added 2 more tabs for the top grate. Then we added 3 other tabs at 8" down from the top (giving me 6" of space between the two). This photo shows the grate sitting on the lower tabs:
Notice, we put in 3 tabs for each grate location, to prevent rocking. JUST long enough to hold the grate, so it's easier to get the lower grate out past the upper tabs. I doubt I'll ever need to remove the lower grate with food on it, but just in case.....
This photo shows the grate in the upper position and the fire bucket in place:
If you'll notice, there are also 3 more tabs at the very top of the barrell. My OTS lid just sits on the rolled edge of the barrel. I didn't want to cut off the rolled edge for fear of weakening the barrel, so we just welded these other tabs on to keep the lid from slipping off. They hold the lid on snuggly with almost no gap at all between the lid and barrel.
I just realized....I NEVER TOOK ANY PHOTOS OF IT COMPLETELY PUT TOGETHER!!! DOH!
Oh well.....I'll be doing a test cook this week (I hope!) and there's lots of PRON in this thing's future, so there'll be more photo ops.
Just imagine the original drum photo with stickers removed and a black Weber OTS lid on top! There. 'nuf said.:mrgreen:
Anyway....I've been months thinking about this thing. I've PM'd several of you for advice. Specific thanks go to N8-Man, NorcoRedneck and Thirdeye for their great help and photos.
'QUE ON BRETHREN!!!!!!!
WOOOOHOOOOOOOO
Ooooops.....gotta change my sig.....just thought of that!