You are using an out of date browser. It may not display this or other websites correctly.
You should upgrade or use an alternative browser.
You should upgrade or use an alternative browser.
The Question Is.........
- Thread starter SmittyJonz
- Start date
SmittyJonz
somebody shut me the fark up.
It gonna be nice and seasoned by the 2nd? Can't wait to see the finished pics!
I Hope so - won't be insulated tho - not sure if I can insulate it yet but it's double walled(thin metal) with 1-1.5" air gap so that's better than single thin wall.

I gotta figure me up an exhaust - it has just a rectangle hole in top of back wall - thinking of plating that off and putting pipe in top but top is slightly domed/ curved and gotta figure out my intakes - probally 1 1" pipe nipples and ball valve on each side (2 total) - and make a charcoal basket (easy). :biggrin1:
SmittyJonz
somebody shut me the fark up.
FB? .........Oh, Fire Box! :doh:
.........Oh, Fire Box! :doh:
Last edited:
SmittyJonz
somebody shut me the fark up.
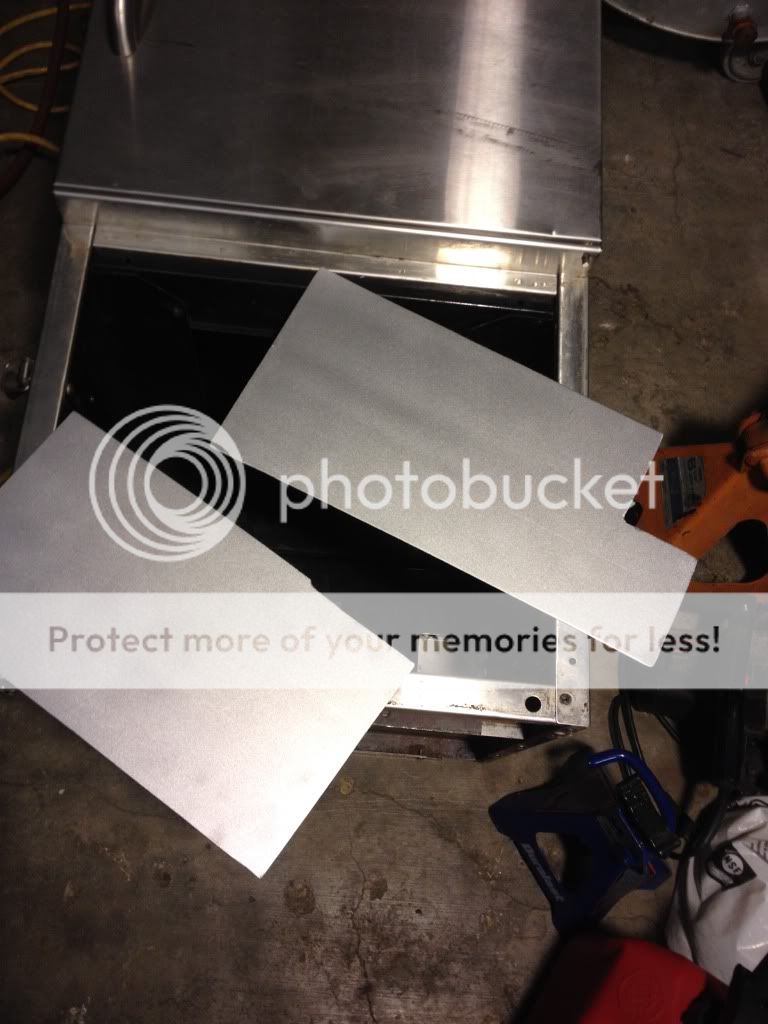
The bottom half of the firebox is not Double Walled and is Louvered for propane air intake and as you can see in the pics there is a 1" channel in back corners and 1" lip on front so the FireBox insert will have a 1" air gap around 2 sides and the back. So I cut some plate and painted the Louver side with High Temp Silver Paint and installed with Stainless bolts and High Temp RTV to seal off the Louvers. :wink:
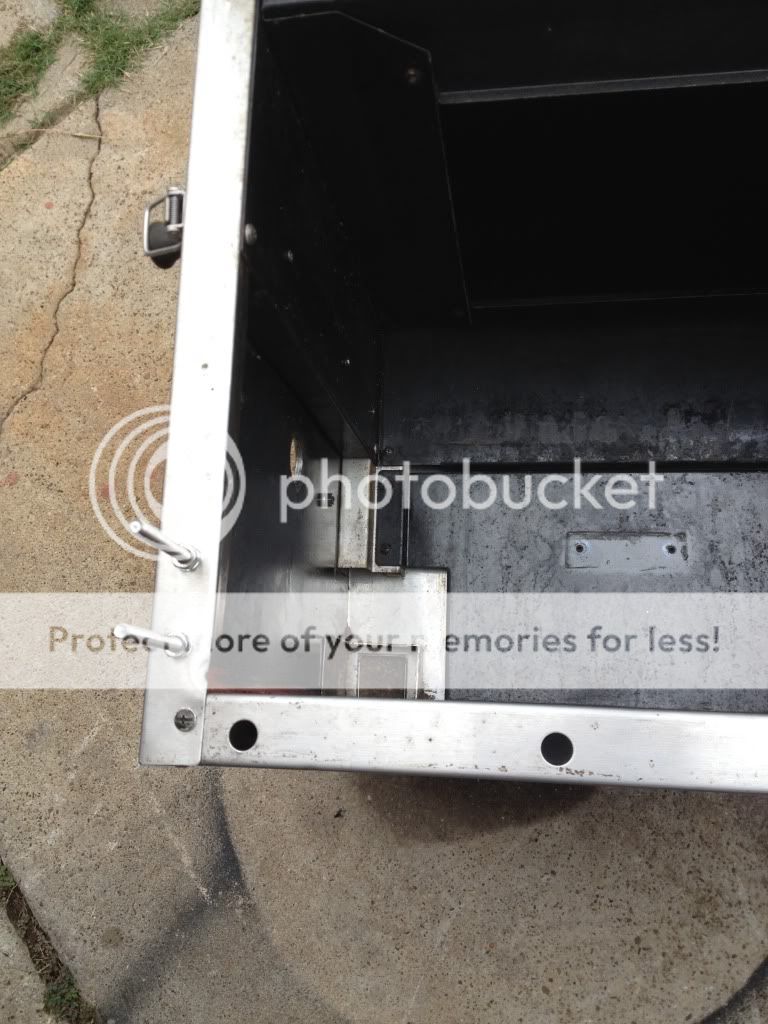
I tried to test fit the FB insert but it is a tight enough fit it would not go past the screw you see in the top right corner of bottom pic- which is a Good thing- I'll just have to take a few screws out and squeeze it in there!. :mrgreen: the insert is gonna be permanent anyways and I'll have a removable Charcoal Burn Basket.

I tried to test fit the FB insert but it is a tight enough fit it would not go past the screw you see in the top right corner of bottom pic- which is a Good thing- I'll just have to take a few screws out and squeeze it in there!. :mrgreen: the insert is gonna be permanent anyways and I'll have a removable Charcoal Burn Basket.
sliding_billy
somebody shut me the fark up.
Looking real good.
swamprb
somebody shut me the fark up.
It would be a good candidate to add a Pellet Pro controller to.
SmittyJonz
somebody shut me the fark up.
It fits - back corners were tighter fit -- since it has no top and short front wall the sides lean in a hair but atleast it's no too big and need trimming !

Diesel Dave
Quintessential Chatty Farker
Lookin real good my friend :thumb:
But really, slaps and metal work are never a good idea :laugh:
But really, slaps and metal work are never a good idea :laugh:
SmittyJonz
somebody shut me the fark up.
Well drilling 1 1/4 holes in 1/8" plate SUCKS! esp thru Stainless Skin then 1/8" plate then another 1/8" plate an inch in. Using a Step Bit and oil but Burned up my 2 Old Cheapo 3/8" Drills and had to go Buy a REAL Drill - 1/2" Rigid. Then Home Depot doesn't carry 1"x3" pipe nipples and 2" was too Short so I got 4" but they are too long so now I gotta find something to use as spacer behind conduit nuts. So between that and watching GBabys 2 Ballgames I didn't get a lot accomplished today!
UDS was MUCH Easier..........
UDS was MUCH Easier..........
Last edited:
grillinguy247
is one Smokin' Farker
I think mine is an older big brother to your score and just yesterday started measuring an sketching a remodel from a gasser to a charcoal/stickburner. Mine is a "Grand Hall" made in China for Sam's Club, marketed as a MembersMark product. I cooked on it for about 10 years and got pretty good results but since I build my reverse flow a couple years ago, I've just had it mounted to the trailer and used is as an oven, but I think it will make a nice insulated vertical. The top cooking chamber is already insulated.

The bottom chamber is not insulated but it is plenty big to let me add 2" of insulation and a 1/4" firebox, charcoal grate, etc. (I've been using the lower chamber to store my gas frier & stuff)

My plan is to keep the water pan but gut the wood chip drawers and burner & controls.


I'm thinking I'll be able to preserve the SS exterior pretty much in tact. Good luck on your build and I'll be watchin closely to try and learn something.
I might have a boner lol :shock:
SmittyJonz
somebody shut me the fark up.
MAde some progress today - skipping Cowboys game tho (DVR)- found. 1x3" pipe nipples at Lowes so got FB insert installed and bolted to floor of Cabinet. The front cover which has a pin for the FB Door was held on by 4 screws from inside but with FB insert I couldn't access screw holes. So I put 4 bolts with nuts as Studs sticking out, drilled out front cover and bolted it on and cut extra threads off. I didn't like where the exhaust was plus there is a handle just above the a Rectangle hole on back so I plated it off. Now I gotta drill hole thru Top for pipe Stack, install thermo thru Door and build a Charcoal Burn Basket.


SmittyJonz
somebody shut me the fark up.
It LIVES!!!!! And sucks air, leaks smoke and Runs HOT. I forgot to plate off two holes where recessed wheels where in back corners and I dumped a full chimney of flaming KBB - so that's 2 pretty big air holes but it is NOT and Won't be airtight - I'd of had to rebuild whole thing and if that was the plan I'd of just built one from scratch - but I should be able to get it manageable - my file cabinet smoker sucked air and leaked smoke everywhere and I got used to it. :mrgreen:
Still need to make a difusser plate, plate off two wheel holes, add Decent thermo and Add insulation at later date.


Still need to make a difusser plate, plate off two wheel holes, add Decent thermo and Add insulation at later date.
Diesel Dave
Quintessential Chatty Farker
Looking real good there buddy.
way to get er dun
way to get er dun
SmittyJonz
somebody shut me the fark up.
First Cook is at the N Tx Bash Tomorrow. I plated off the two wheel holes I had forgotten about so hopefully it won't run so Hot.

SmittyJonz
somebody shut me the fark up.
well I did my first cook in it Today- 10 lb Packer- did pretty well but I put too much Lit Charcoal in at first and it ran Hot 350-375 for first 1.5 hrs or so - its a keeper I think- still gonna insulate walls n top in near future. :wink:
dinosdeuce
Is lookin for wood to cook with.
Nice job there SmittyJonz!
Dino
Dino