
Finally, I get to grill something rather than being a grill repairman!
Tonite's dinner -
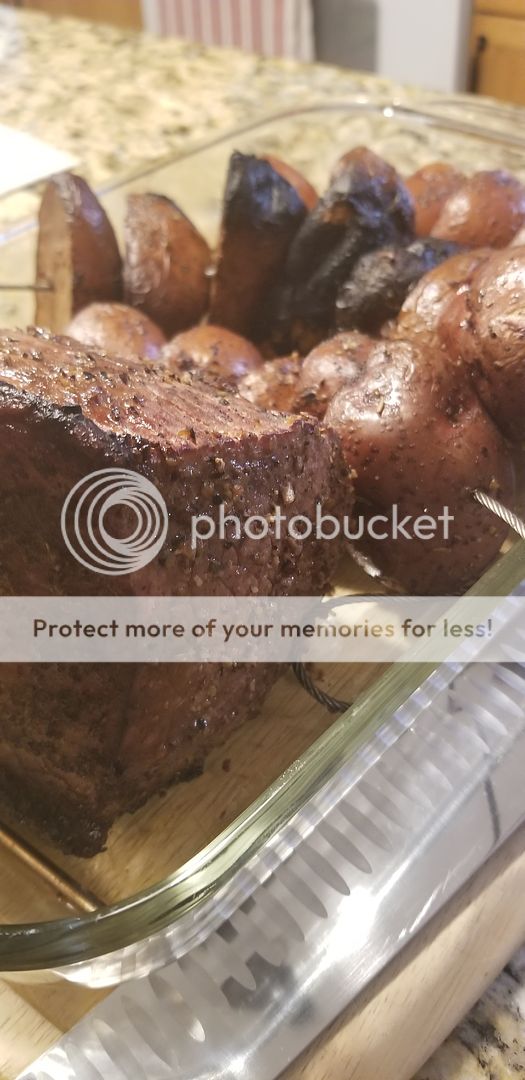
Roast Beef, Grilled Potatoes, Roast Carrots
All done out on the Weber Kettle using the Sear N Slow Charcoal Basket for the first time. I followed their directions for low n slow, lit a small section of charcoal, added unlit briquettes to the remainder of the basket and brought the Weber up to temp. I was trying to settle in around 250-275 F but was up around 300 or so. I'm still becoming accustomed to setting the vents on the Weber.
Roast was seasoned with Worcestershire and Weber Chicago Steak. To keep track of the potatoes I halved them, then skewered them onto the FireWire skewers which makes them easier to maneuver on the grill.
I set up the Smoke, ran the probe wires down through the vent holes and monitored temps while sitting back and relaxing. It's a tad difficult removing the lid to check things with the probe wires and the skewer wires but I managed. Had to move the potatoes onto the cooler side of the grill but things looked good.
Some pics -


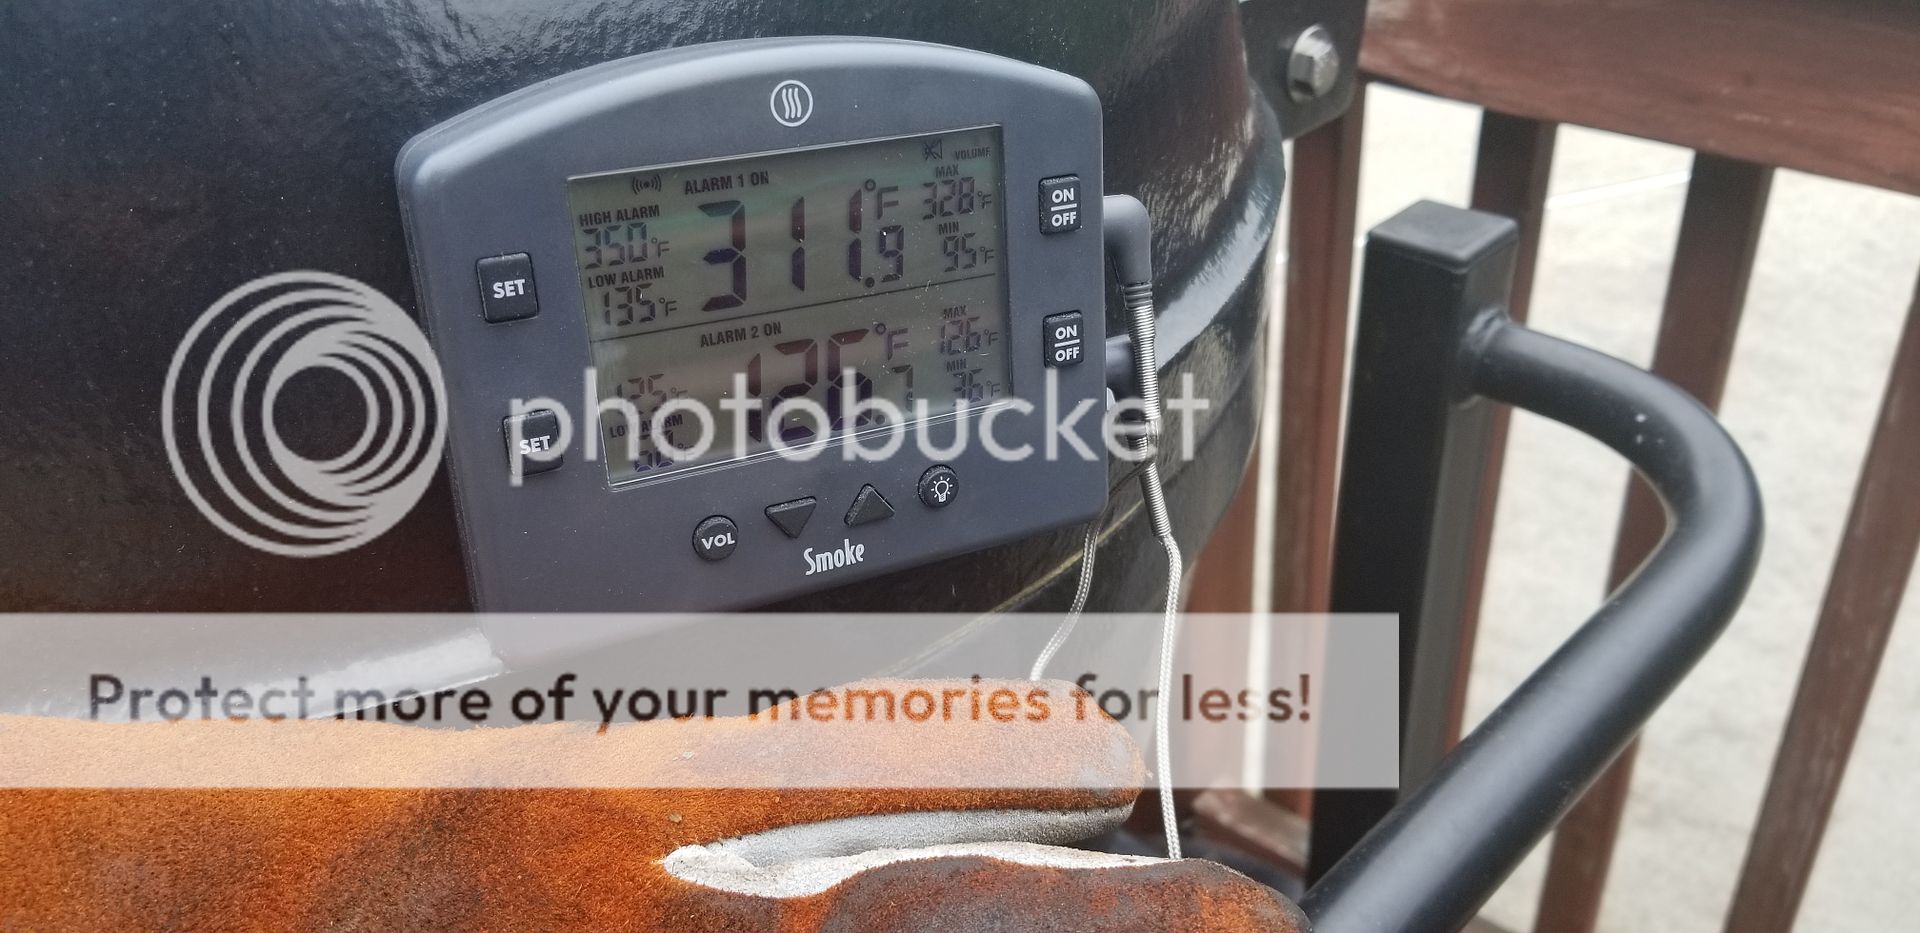
I wasn't expecting completion in an hour and 15 minutes, but the Smoke says we're at 125 which is where I like it. Good thing I have the Golden's next to it to mount the Smoke to!
Roast and Potatoes off the grill, resting -
The carrots are now out on the grill and we're waiting for Mrs. lunchman to arrive home for dinner. I had thoughts of roasting these in the oven but hey, I've got a nice hot grill with plenty of coals!
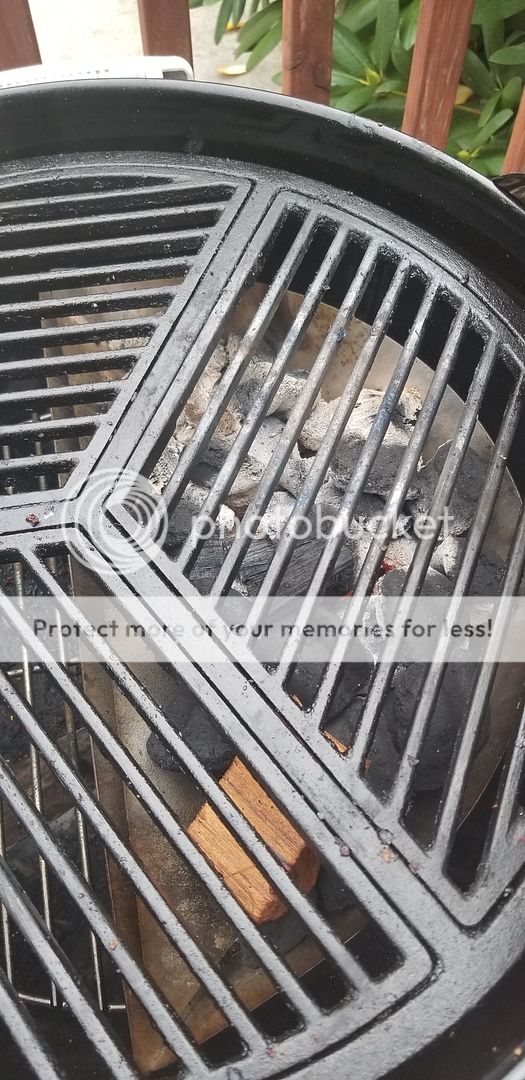
This is what's left in the Slow N Sear. Plenty! -
I'm sure I'll get the hang of managing even lower temps on the Weber to get some low n slow smoking done.
Plated pics will be coming.
-lunchman
Tonite's dinner -
Roast Beef, Grilled Potatoes, Roast Carrots
All done out on the Weber Kettle using the Sear N Slow Charcoal Basket for the first time. I followed their directions for low n slow, lit a small section of charcoal, added unlit briquettes to the remainder of the basket and brought the Weber up to temp. I was trying to settle in around 250-275 F but was up around 300 or so. I'm still becoming accustomed to setting the vents on the Weber.
Roast was seasoned with Worcestershire and Weber Chicago Steak. To keep track of the potatoes I halved them, then skewered them onto the FireWire skewers which makes them easier to maneuver on the grill.
I set up the Smoke, ran the probe wires down through the vent holes and monitored temps while sitting back and relaxing. It's a tad difficult removing the lid to check things with the probe wires and the skewer wires but I managed. Had to move the potatoes onto the cooler side of the grill but things looked good.
Some pics -


I wasn't expecting completion in an hour and 15 minutes, but the Smoke says we're at 125 which is where I like it. Good thing I have the Golden's next to it to mount the Smoke to!

Roast and Potatoes off the grill, resting -

The carrots are now out on the grill and we're waiting for Mrs. lunchman to arrive home for dinner. I had thoughts of roasting these in the oven but hey, I've got a nice hot grill with plenty of coals!
This is what's left in the Slow N Sear. Plenty! -

I'm sure I'll get the hang of managing even lower temps on the Weber to get some low n slow smoking done.
Plated pics will be coming.
-lunchman


