Newbie UDS build

Dlabrie

Is lookin for wood to cook with.
Joined
Jul 8, 2013
Messages
37
Reaction score
4
Points
0
Location
Campton, NH
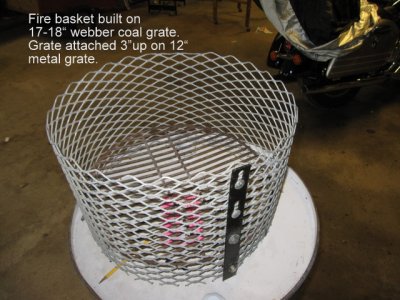
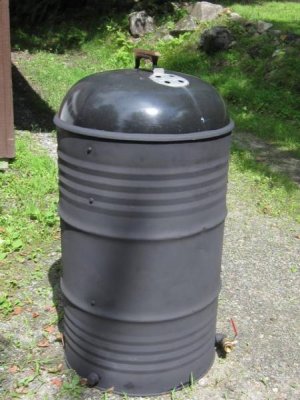
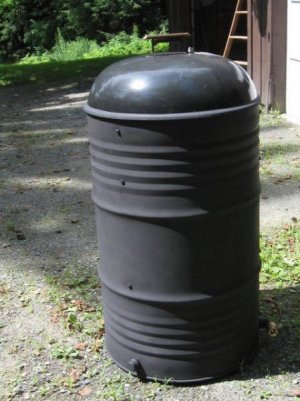
I am starting my first UDS build. I will post pictures as I go along. I started with the fire basket. It is 12" high with the 17-18" grate attached about 3" up from the bottom. I will tack weld it when I figure out how to use my welder.

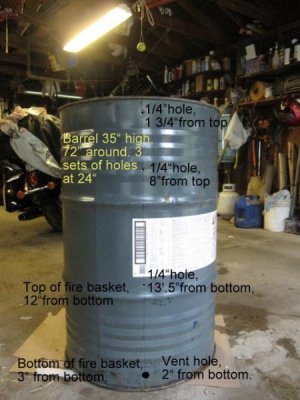
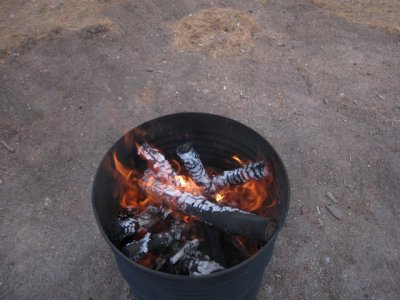
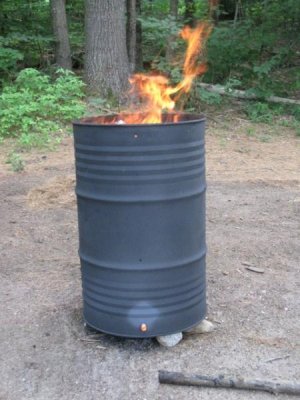
On the barrel, I have 3 sets of holes evenly spaced around the barrel. I used a step drill bit that I borrowed. It only went to 7/8th " and I need 1" for the vents on the bottom. So I ordered one from Amazon that goes to 1 1/8". It should be here Thursday. The barrel held non-toxic antifreeze. I plan to cut off the top and burn it tomorrow with a propane weed burner torch. I will post more picts as I progress. All comments and suggestions are welcome :grin:
 

Attachments

  • 1-IMG_3831.JPG
    1-IMG_3831.JPG
    159.7 KB · Views: 311
  • 2-IMG_3835.jpg
    2-IMG_3835.jpg
    43.6 KB · Views: 310
Looks like you're off to a great start. Looking forward to seeing the finished product! Get it finished and fired up.
 
Great, I will be watching. Building on myself.
 
I burned the drum with a weed burner and cleaned it up with a wire cup on my drill. I cut the top off with a jigsaw and smoothed the edge with a grinder. I will need to attach a 1X72"metal strip around the inside of the lip to accommodate my Webber dome. Can anyone give me some ideas on where to get a strip of metal like that?
 

Attachments

  • 1-IMG_3837.jpg
    1-IMG_3837.jpg
    34.6 KB · Views: 269
  • 2-IMG_3838.JPG
    2-IMG_3838.JPG
    126.5 KB · Views: 269
You can get something like that at Lowes. I used the kind with the holes pre-drilled in it. Made it easier to bend around the drum plus was a good place to weld to drum too.
 
You can get something like that at Lowes. I used the kind with the holes pre-drilled in it. Made it easier to bend around the drum plus was a good place to weld to drum too.

Thanks,
I'll take a look on my next trip there. I still haven't learned how to use my mig welder that I got over a year ago:confused:


I bought a strip of aluminum from Lowes that I used on my UDS. I used pop rivets to hold it in place, one every 8" or so.

Great Idea! I will have to decide on that or learning to weld first.
 
Great project to learn your welder with! Looks awesome .... I'm gonna go drill some holes in my drum right now :mrgreen:
 
You will be amazed at the quality of que that you can put out from such a simple contraption....... Welcome to the addiction
 
I've got the outside painted and am doing the inside burn today; finally had a couple of days without rain. I tried my hand a welding feet on my basket and let's just say it wasn't wonderful :mmph: So I will finish the construction without welding. Once my welding skills improve, I'll try again.
 

Attachments

  • 2-IMG_3858.JPG
    2-IMG_3858.JPG
    149.2 KB · Views: 150
  • 1-IMG_3862.jpg
    1-IMG_3862.jpg
    46.6 KB · Views: 151
Why are you burning the inside, cant you sand blast the inside like the outside?

I didn't sandblast the outside. I used a weed burner and a wire wheel. The weed burner kept going out when I tried to use it on the inside so I burned it out, then used a pressure washer on it. After it was cleaned out, I sprayed the inside with Pam and did a small charcoal burn, 4-5 hours.

I still need to get the metal strip for the top rim so the Weber cover will fit. the cover is just a tiny bit too small. Has anyone splayed out the rim of a Weber top successfully? I think I could actually grind down the circumference of the lip on the drum enough to allow the top to fit.
 
I used stainless steel zip ties to attach my grate to the expanded metal for the fire basket, 3 inches up into the fire basket. No need for welding, no need for feet on the basket. I got my stainless zip ties at Menards. Looks like you have really thought out your build - looking forward to seeing the final product and some 'que!
 
I used stainless steel zip ties to attach my grate to the expanded metal for the fire basket, 3 inches up into the fire basket. No need for welding, no need for feet on the basket. I got my stainless zip ties at Menards. Looks like you have really thought out your build - looking forward to seeing the final product and some 'que!

I had done the same thing, but with some heavy wire. I just wanted to try out my welder, It wasn't pretty :shocked:
 
I took an adjustable wrench to the lid and bent it out all the way around. The paint cracked and it still didn't fit. So, I took a grinder to the edge of the drum rim and shaved it down a bit. It fit pretty well. I took a rubber mallet to it and then painted the rim of the lid and the drum. I think it is all set. If it leaks, I will use some high temp gasket maker on the lid. Now I need a rack, some charcoal and a good recipe.
 

Attachments

  • 1-IMG_1.jpg
    1-IMG_1.jpg
    18.3 KB · Views: 53
  • 2-IMG_2.JPG
    2-IMG_2.JPG
    35.6 KB · Views: 53
  • 2-IMG_4156.jpg
    2-IMG_4156.jpg
    49.3 KB · Views: 53
  • 3-IMG_4151.jpg
    3-IMG_4151.jpg
    47.1 KB · Views: 53
I have used the UDS 3 times now. I had only put on one 3/4 ball valve thinking that should be enough to manage air flow with the other 2 nipples. But no matter what I did, the temp wouldn't stabilize. Today I put on a second ball valve and it made all the difference! I think it allows me to keep the fire burning slowly in 2 areas, or from 2 directions. I am not sure why, but it works :-D
 
Back
Top