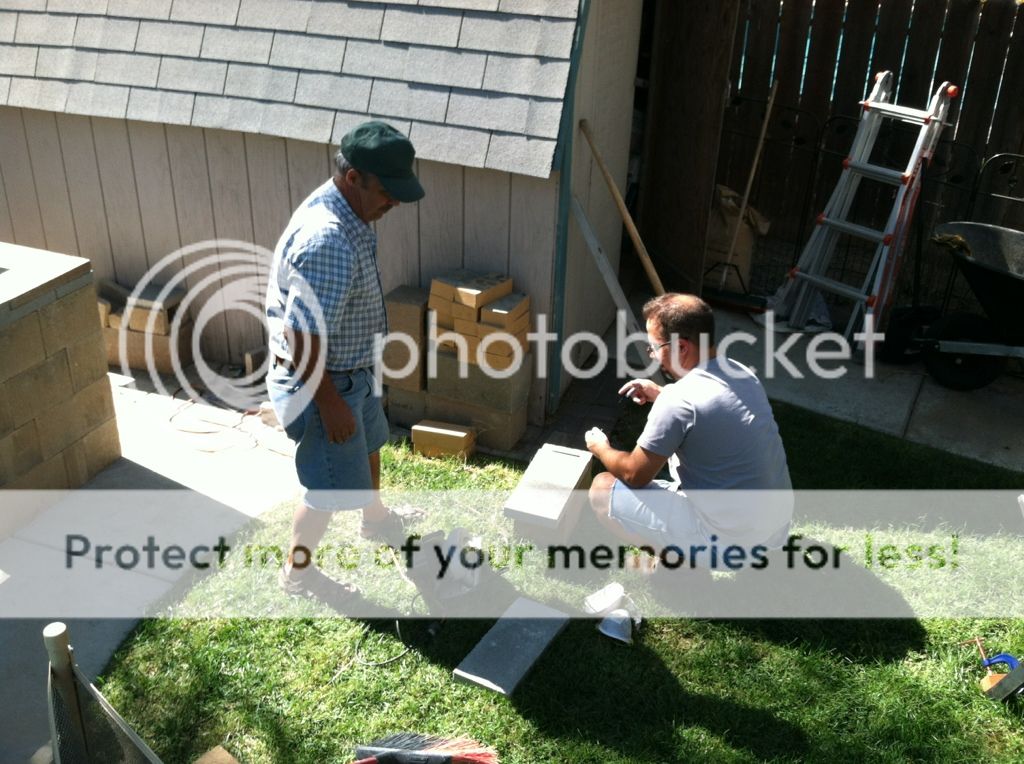
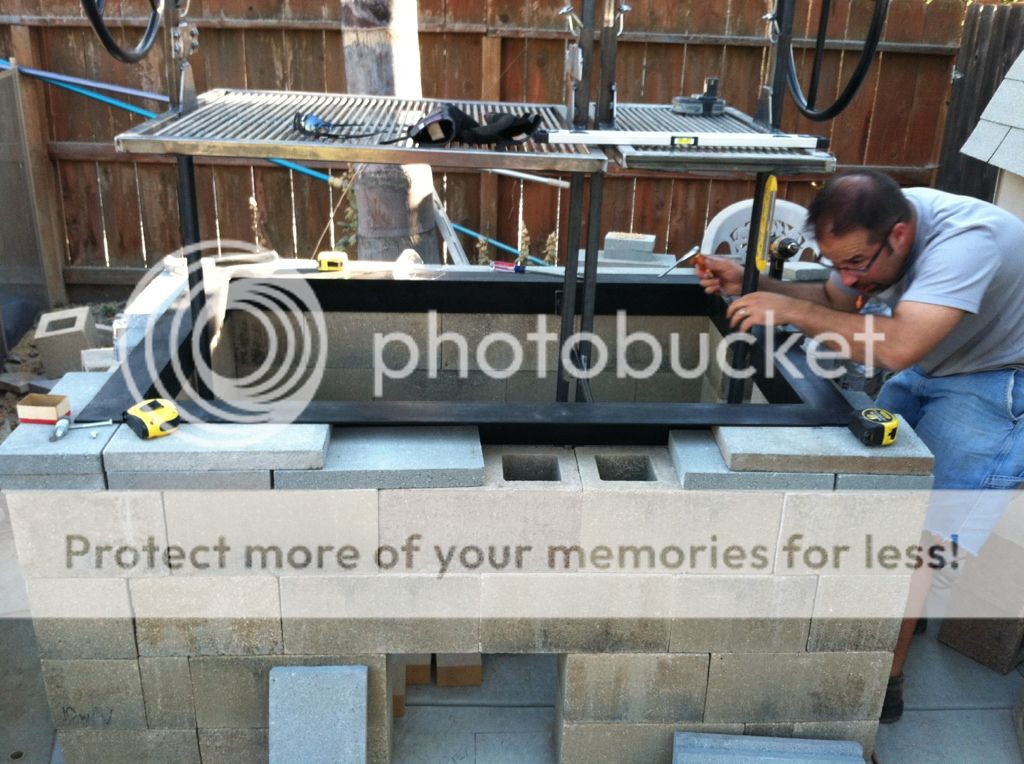
Ok all just about done with our Santa Maria build. Just have a couple welds to finish, fine tuning and dropping into the masonry box and of course paint a make a steel fire door for the masonry. As always thanks to all the Brethren for input and comments it's all appreciated......keep them coming and please feel free to critique.....we're always looking for ideas

My first weld job. Thanks to teacher Chad. No matter what, the snap, crackle, pop will always get me Chad lol.
ry%3D400


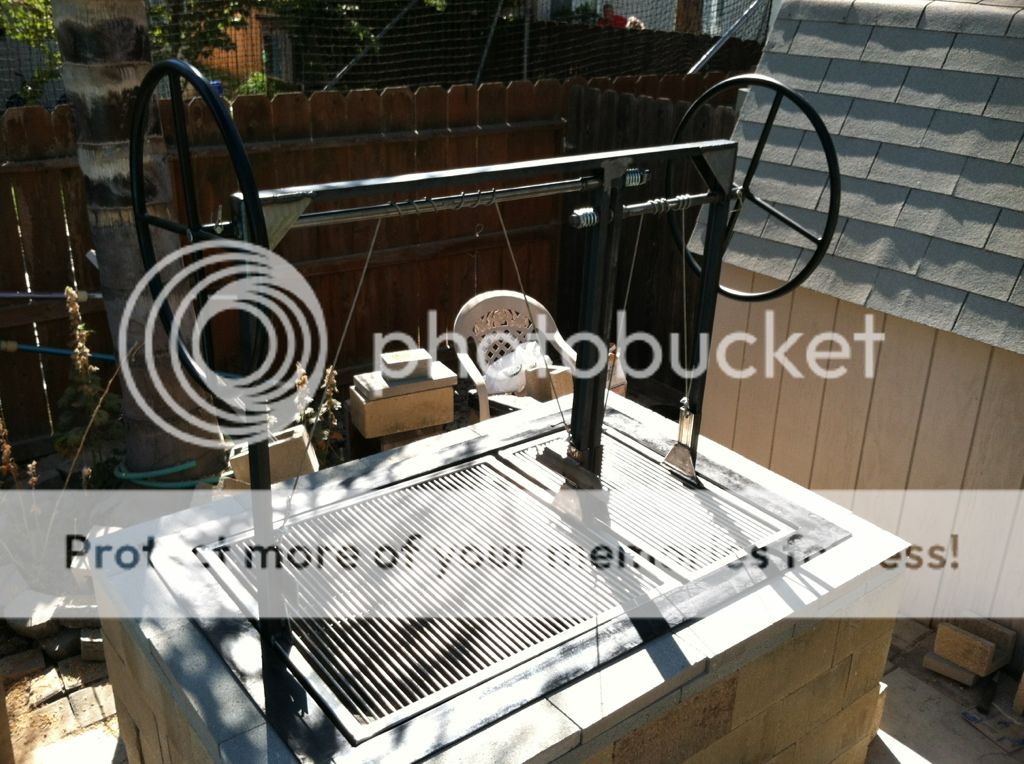
Our 24" wheel that we are getting to weld spokes on
ry%3D400


Wheels mounted to frame
ry%3D400


Close up of tension spring mounted to shaft
ry%3D400


Close up of SS aircraft cable . The holes are 1" apart
ry%3D400


Close up of cable mounting to grates
ry%3D400


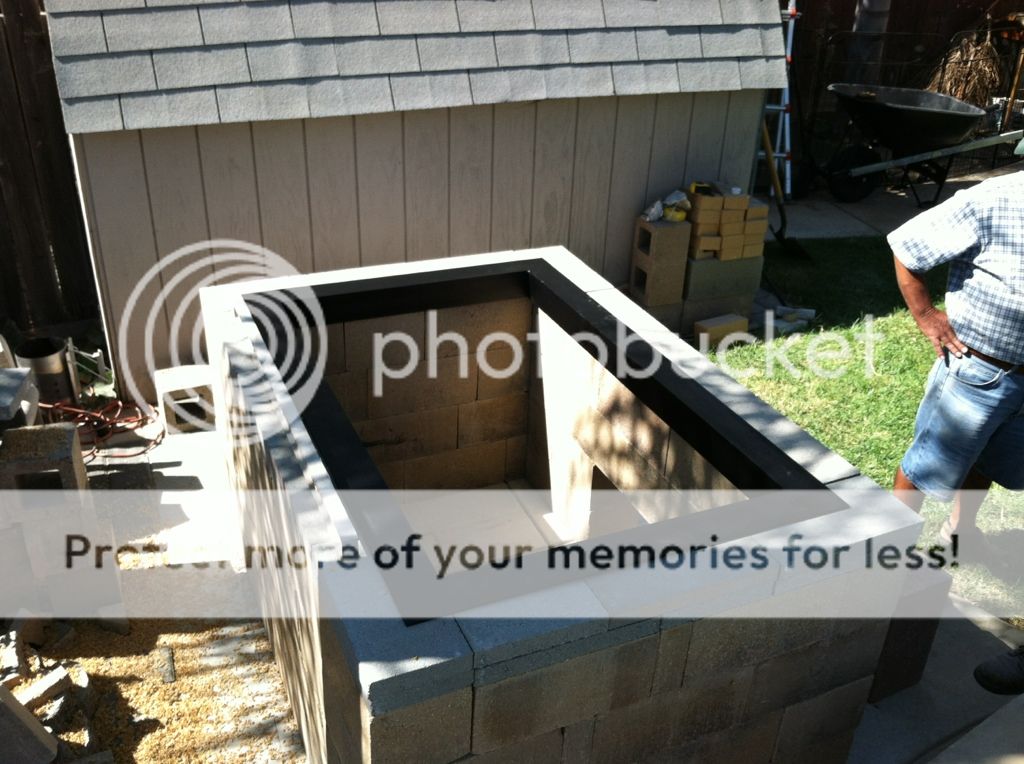
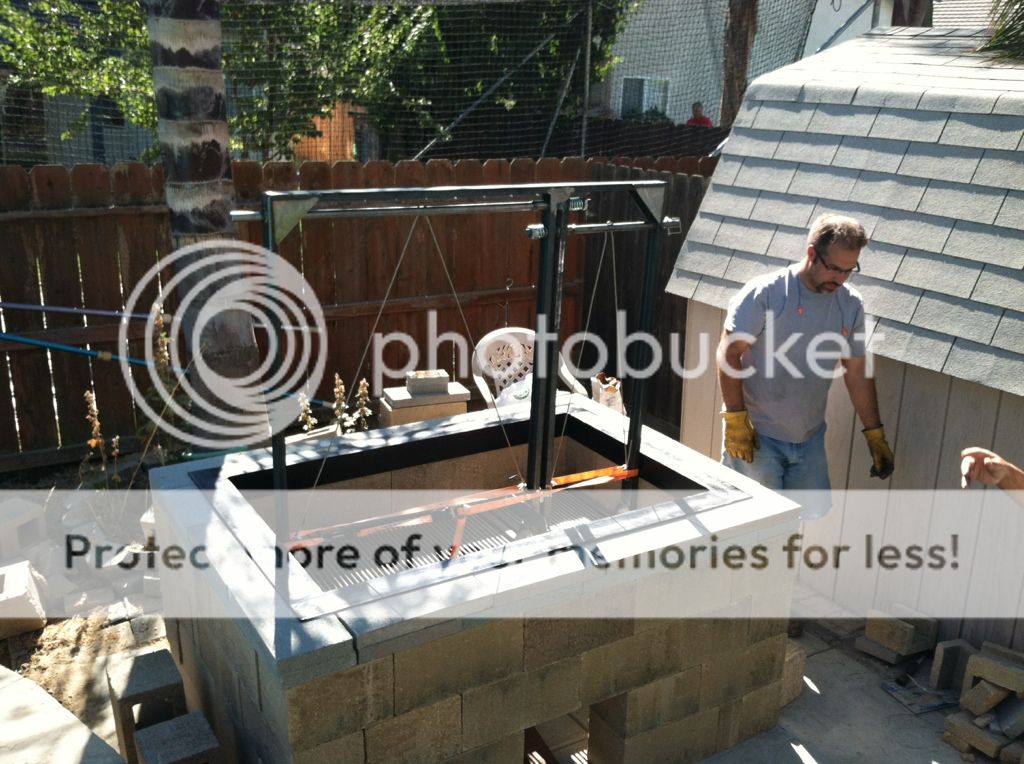
Here it is....Frame, Grates and 4" angle iron Masonry mount
ry%3D400


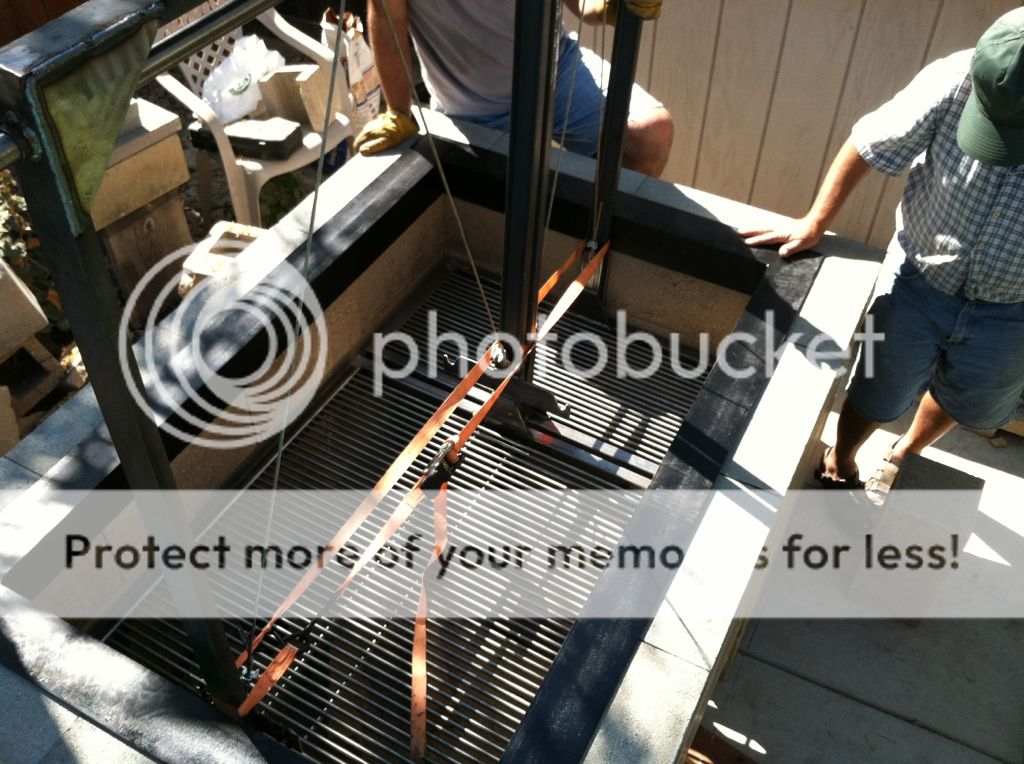
Both Grates raised at different heights and they move up/down so smooth
ry%3D400


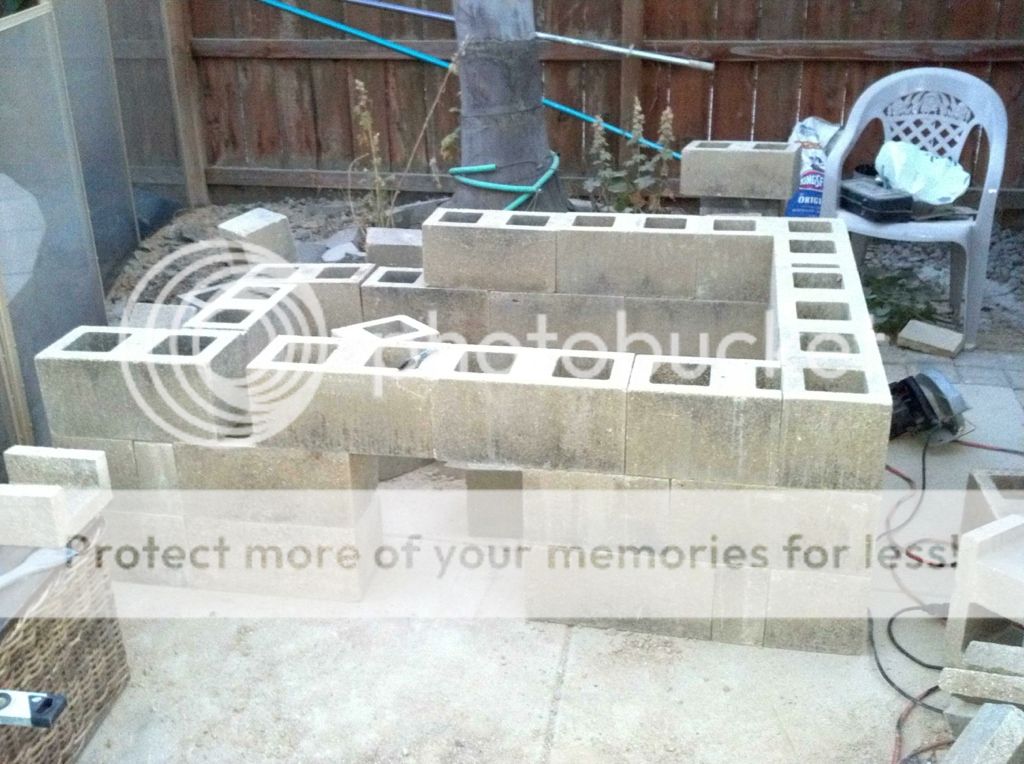
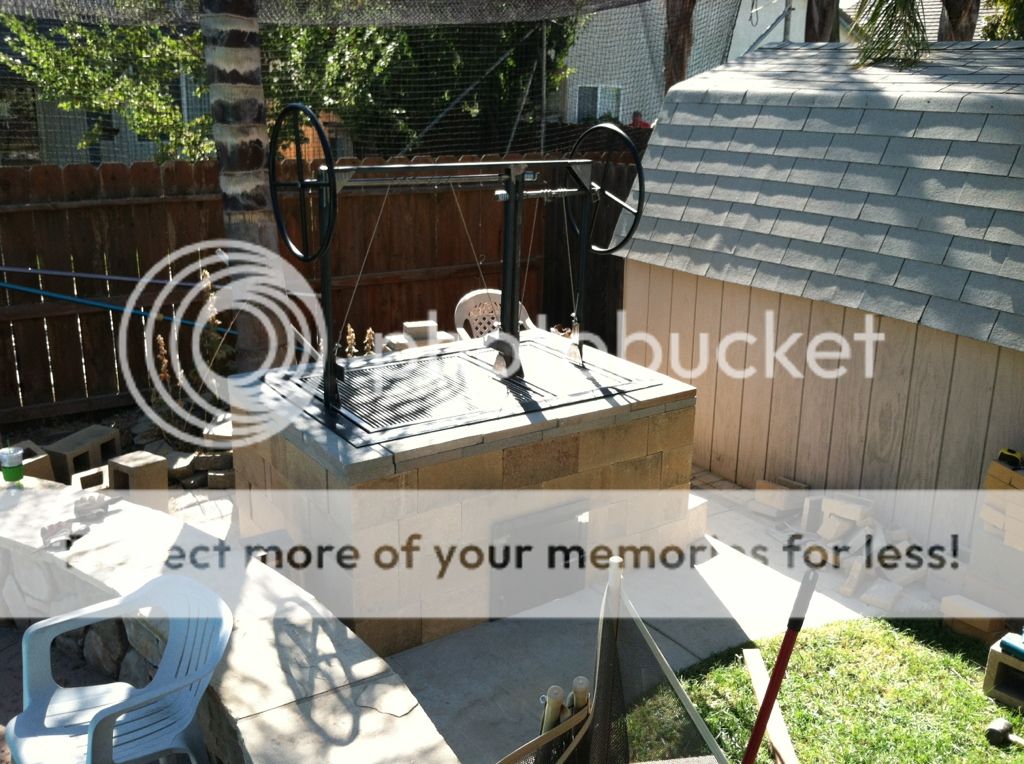
Masonry pit. It's my first time stacking cinder block so I hope it turns out good. I did a dry stack cause you never know....also deciding wether I should cover blocks with spanish tiles, travertine or leave it alone : )
Measurements ID - 55"w x 34.5"d x 33.5" h
ry%3D400


Again thank you to all especially Chad for the expertise and help in building this from scratch....I've truly learned a lot. The experience was priceless.

Mike
 
Awesome!

Do you think the opening for your pit is going to be big enough?

Have you considered adding a "work surface" next to it? I am sure you can bring in a table or something, but something permanent might look nice. Just a thought.

Did you factor in the 1/2" of mortar between blocks? That will add significant space difference. I am sure you did, but you also said it was your first time so I thought I'd mention it.

Are you going to make a steel plate/lid to cover the pit for smoking?

Thanks for sharing.
 
The end is near and it is almost time to eat off of this massive thing. We only have the rotisserie mount to finish and this thing is ready for some serious cooking. Mike has a few little things to finish up on the masonry and he just sent this pic with the fire door we made today in place. ImageUploadedByTapatalk1348803543.968313.jpg

Also I wanted to give a super thanks to Marty Leach for his help with this build. He was a huge help.
 
Wow! Not sure how I've missed this thread. Nice work guys! I'm really looking forward to seeing some cooking on that beauty.


Sent from my iPad using Tapatalk HD
 
Awesome!

Do you think the opening for your pit is going to be big enough?

Have you considered adding a "work surface" next to it? I am sure you can bring in a table or something, but something permanent might look nice. Just a thought.

Did you factor in the 1/2" of mortar between blocks? That will add significant space difference. I am sure you did, but you also said it was your first time so I thought I'd mention it.

Are you going to make a steel plate/lid to cover the pit for smoking?

Thanks for sharing.

No mortar on this set up. Mike just dry stacked thinking that if he ever moved it could all come with him. The main goal right now is to get it finished and installed. A "smoker" box will probably be in the future, but for now he will have to continue to smoke on his OTS:thumb:
 
Was gonna add some pics but I gotta switch to a different computer. Farking iPad.
 
Last edited:
Awesome Chad! I'm glad it finally came together!

Me too Marty. Thanks a million for your help with the tensioner. Couldn't have done it without you. Installing this weekend. Should have some more pics of the install Sunday or Monday.
 
Last edited:
Sooooo Mikeyd is camping with the famdamily this weekend so I finished the rotisserie mounts today. Mike wanted the ability to add a second rotisserie someday or for now be able to spin it on the back and grill on the front. So I took some 2 1/2 by 3/16 flat and drilled it to match the rotisserie on both ends, then I welded some 1/4 inch nuts to the plate so it would be an easier install. Mike was not planning to leave it mounted when he wasn't using it.

97A4EA60-1557-43DC-86B8-1B52BDED39FF-5409-00000DD389AD0FDA_zps097a025a.jpg


Then I took a plasma cutter and cut the other end of the rotisserie

11AEC694-A645-45A7-A3E2-B307C800B8D6-5409-00000DD392333C63_zpsbe74515f.jpg


Here they are fully welded

8DF4EBAB-8C65-4B35-9C3F-F8701E9A892D-5409-00000DD3C529F602_zps897535c8.jpg

8E56C666-0DD4-430D-B2EB-71BD51752674-5409-00000DD3CBA6C9E9_zps7adf8763.jpg


And finally , here it is mounted in the front. This unit is NOW ready for install!!!!!!:thumb::becky:

09B3729C-813E-449A-A11C-AA883F185378-5409-00000DD3B6A98AD8_zps118c4da4.jpg
 
That is really nice Very impressive Hard to belive it was your first time with some of it Looking forward to seeing it in action
 
When I finally get the chance to move I'll have to put a custom built Santa Maria on the list for the realtor...or neighbors like you guys. Great lookin work indeed. Can't wait to see her in action.
 
Here it is!!!!!!!!!!!!!!!!!!!!!!!

In Mike's Backyard leaning on a tree waiting for its final resting place.

F9E314C2-5CB7-42E1-9951-68AEDBC7905C-8290-0000137088CC0AB3_zps60a2db04.jpg


Mike and his Dad making a few final cuts for the masonary

70435B62-49C4-4FFF-8671-C556B79CF331-7498-000012648345D2B5_zpsd069edf5.jpg

F6D9A4AA-E76A-4D80-BB0D-94BDF5D483D2-7498-00001264AF3C5DD1_zpsa11617b7.jpg


Angle Iron Frame In Place

5427D356-C6F4-4E74-B1A8-8ACD508C7739-7498-00001264C8FC4A23_zps6c82a780.jpg

DF87F88C-0607-418F-B3FC-0AA144CF181F-7498-00001264D606859A_zps405c4dc7.jpg


Lifting it into place

2588C20C-BD68-4715-9F6B-2F45786252AC-7498-00001264E47CBE1E_zpsf1f8ae8e.jpg

682D0616-EFD7-4BB9-B045-3A96461BF935-7498-00001264F066BC6D_zpsabd7e1fe.jpg


And sitting in place

79C5EE29-2803-4C29-A432-C8CDEFDA53C9-7498-000012654AE6ACF8_zpsa564860b.jpg

70CC03F2-9E41-41CB-BFBA-D0F06C1417F0-7498-0000126555A7B591_zps2d97c2d8.jpg

6066FB71-A582-4DCB-9325-CCA57B5529BB-7498-0000126562297076_zps60b02a88.jpg

F09A276E-1F87-41DD-AF76-CCE6E2F6F0C4-7498-000012657DB0F530_zps7047940a.jpg


Attaching the grill to the angle frame

70A4D70E-4E38-42ED-A0E2-FC4AB3AFFEAB-7498-0000126588C912EC_zps492f6324.jpg

50E07CA8-20D9-44EC-B283-5B2DE6D70EEC-7498-00001265D1EB7469_zps20018726.jpg


You didn't think Lil Miss Igotgas wasnt involved did ya:becky:
B0C95DAF-D720-47BE-9791-E11DF652F9DF-7498-00001265948C5729_zps24e5c8f9.jpg


Now this install did NOT go as planned. We hit a few bumps along the way and a few unexpected problems. But the next day Mike's friend came over and helped finish the install. Me, I was at home sore as an old man (37) could be. But all worked out great and the official christening will be this Saturday for Lil Miss Mikeyd's 4th bday party.


All in all, We took This

d54ca852.jpg


And turned into this

B7E1CF9D-08D9-4225-B5A3-2651202405BE-8290-00001370954F97C9_zps22a83e1c.jpg


And a few good friends were made along the way.


1A91841B-2752-4E52-B877-619ACA0FB6A6-8290-00001370BC359AE5_zpsacc0e971.jpg


Hope you all enjoyed our build:thumb::thumb::thumb:
 
Back
Top