Phoney, I don't see what the problem with 4 x 3/4" holes for exhaust would be: the total area of your exhaust holes is: 1.77sq".
The exhaust in my drum lid (the Norcoredneck Edition) with 8 x 1/2" holes is 1.57sq".
 
I have started to read this entire post. I just bought a food grade used drum for $35 delivered. It contained apple juice. Was wondering if I should start the build before I do a couple of good burns in it? I was going to get all the holes drilled then do the burn so that the fire has some air at the bottom.
 
"Like a glove" must be everywhere! I like the cover too. The only solution I can think of for your basket may be to use a charcoal grate from a Weber and cut the bottom off your current basket. Then attach the grate to the bottomless basket. That might help the ash escape? But looks like your getting long burns? just me think out loud!
 
I have started to read this entire post. I just bought a food grade used drum for $35 delivered. It contained apple juice. Was wondering if I should start the build before I do a couple of good burns in it? I was going to get all the holes drilled then do the burn so that the fire has some air at the bottom.

Yup; you should do that.
 
My UDS journey starts this weekend! After reading the majority of posts in this thread I feel like I'm ready to build a uds. I can't wait to pick up my drum this weekend and get that first burn going. I'm seriously jonsein' for some BBQ cooked on something that I created. I'm going to take pics every step of the way and I'll post them as I do them. This is going to be an adventure for me! Let's see how this turns out.
 
My UDS journey starts this weekend! After reading the majority of posts in this thread I feel like I'm ready to build a uds. I can't wait to pick up my drum this weekend and get that first burn going. I'm seriously jonsein' for some BBQ cooked on something that I created. I'm going to take pics every step of the way and I'll post them as I do them. This is going to be an adventure for me! Let's see how this turns out.


Good luck. Really it's so simple even a cajun can build one. :biggrin:
 
My UDS Project...

OK, So I read the 300+ page UDS post and the information is invaluable. Awesome Ideas. Since mine is a work in progress and will probably take me a total of a couple of weeks to complete, I'll post updates as I go (hope this is OK). Sorry haven't figured out how to type between images yet so they are all at the bottom.

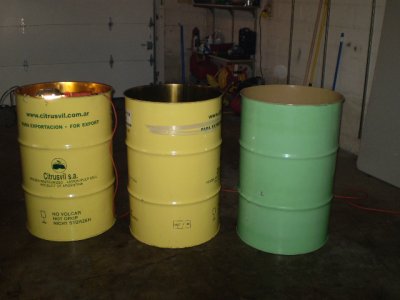
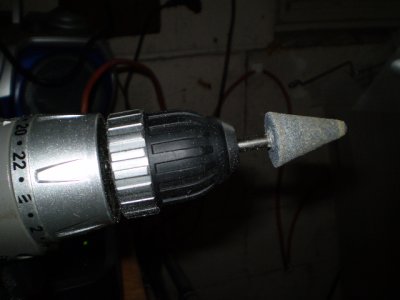
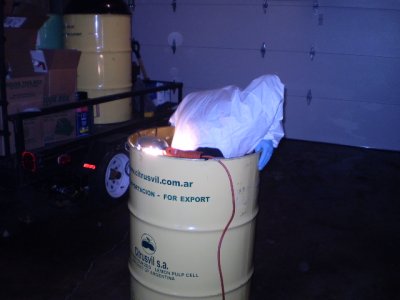
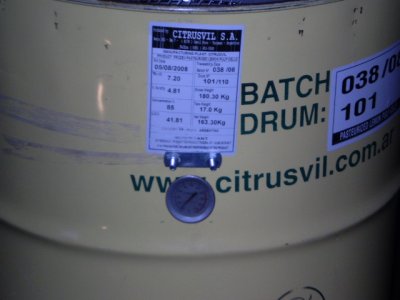
I drove 2 hours 1 way to get my 3 barrels with no lids for $10 ea. I was so excited to get the barrels since I couldn't find any local, I just grabbed what he had avaialable. As you can see 2 are the same and had Lemon Pulp in them, I initially thought they were unlined, but decided to take my drill will a sanding bit to them and sure enough they were coated with a finish. The green one was obvious as it was tan inside.

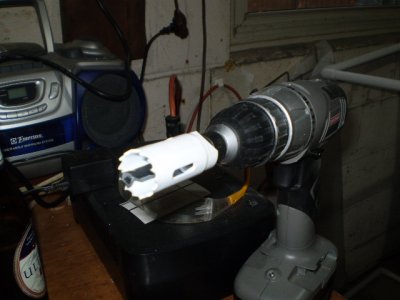
So, I'm not a shop guy and don't weld or have the general metal shop tools, but I do have some wood working tools and auto tools. I decided to build my first UDS with what I want from the wealth of knowledge I have found here. So I went to the store and grabed a 1" Metal whole saw for my drill, 3 3/4 nipples, 2 caps, and a Ball Valve. Figured this would get me started on my project.

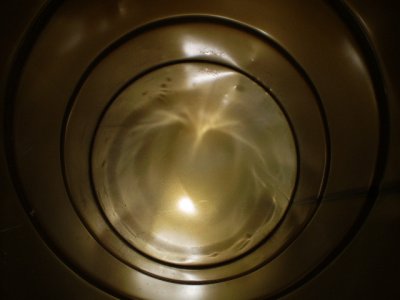
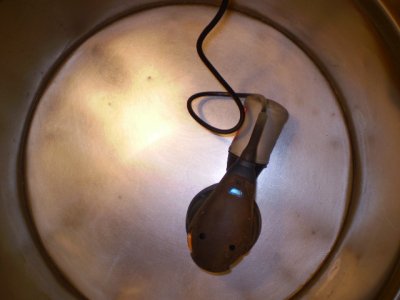
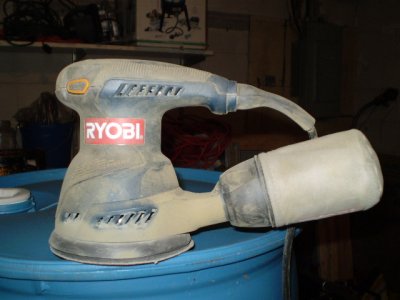
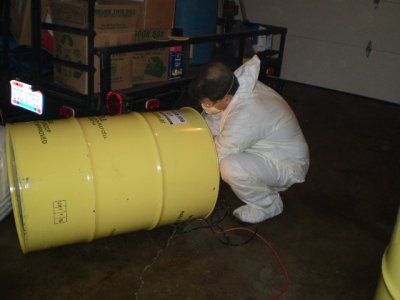
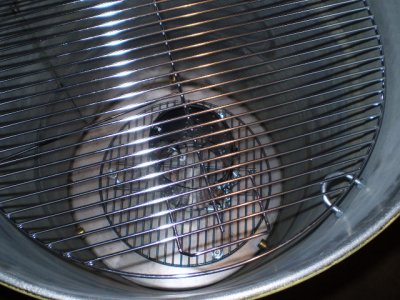
Had seen many folks using steel brush wheels to clean the inside and some posted pics of what they looked like after. The wife mops the garage floor so I knew that was not going to work. I had purchased a nice little orbital sander for wood working that had a built in vacuum to a catch attachment. So I grabbed some 60 grit and went at it... also had a drill bit for sanding to get the cracks. Here are some pics of the process from raw barrel through the sanding process to nice clean and shiney.

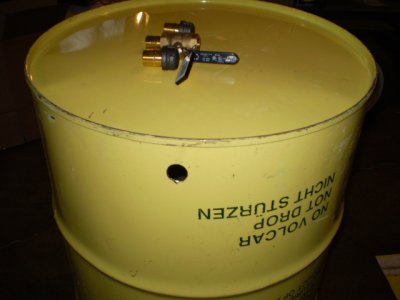
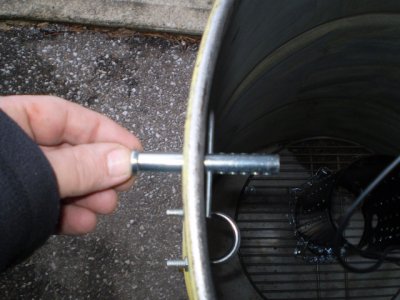
Once completed with the sanding, I drilled my intake holes 1.5" on center from the bottom. Install 2 3/4" nipple with caps and 1 3/4" nipple with a Ball Valve. I regret not purchasing the unibit now, the hole saw made the 1" hole oblong with the drill and I believe it would have been more precise with the unibit. When installing my nipples, they were really loose. I decide to use loctite to get them set and figure the burnout would take care of that later...

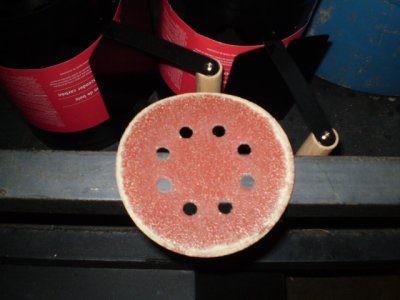
Note the pics of my sanding pads, they have a lot of life left. Since the barrel is round, I was only able to use the edges, I ended up going through about 3 pads for the whole inside of the barrel.

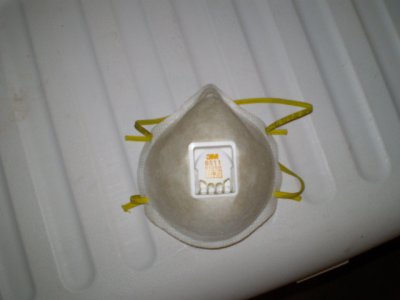
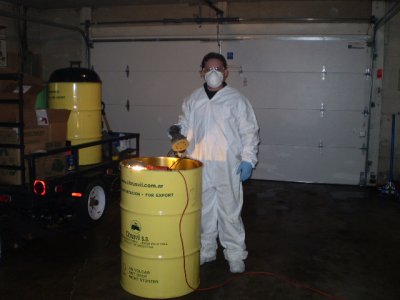
I'm uploading what I personally felt comfortable wearing (and what the wife felt was funny enough to snap a few photos of) while doing this. The first few minutes I sanded with no protection, I started coughing like crazy...Note the color of the mask I wore, I put it on the cooler for a reason as that was the original color. I wore the overalls because they are cheap and easy to take the grime off with having to scrub my clothes.

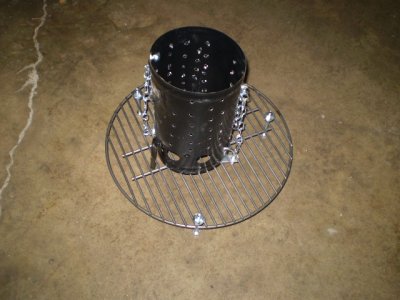
So now, after getting the nipples and ball valve installed, I have the final pics. This is as far as I was able to get tonight after about 3 hours worth of solid work with a drink break every now and then. I'll be working on plans for the charcoal basket, maybe a heat damper and as you can see in a couple of photos, the Weber that will be the lid and top cooking grate.
 

Attachments

  • PC310010.JPG
    PC310010.JPG
    155.2 KB · Views: 979
  • PC310002.JPG
    PC310002.JPG
    157 KB · Views: 972
  • PC310007.JPG
    PC310007.JPG
    157.5 KB · Views: 968
  • PC310017.JPG
    PC310017.JPG
    165.1 KB · Views: 965
  • PC310005.JPG
    PC310005.JPG
    160.9 KB · Views: 971
  • PC310019.JPG
    PC310019.JPG
    158.7 KB · Views: 963
  • PC310018.JPG
    PC310018.JPG
    154.9 KB · Views: 960
  • PC310016.JPG
    PC310016.JPG
    169.1 KB · Views: 956
  • PC310013.JPG
    PC310013.JPG
    154.9 KB · Views: 956
  • PC310009.JPG
    PC310009.JPG
    161.2 KB · Views: 956
  • PC310008.JPG
    PC310008.JPG
    156.9 KB · Views: 958
  • PC310024.JPG
    PC310024.JPG
    159.5 KB · Views: 956
  • PC310022.JPG
    PC310022.JPG
    159.3 KB · Views: 955
  • PC310027.JPG
    PC310027.JPG
    153.3 KB · Views: 963
Last edited:
Very nice work! I like the hazmat suit, although it runs contrary to the redneck agenda. I recommend doing a high-temp burn-out, since there's still probably liner in the seams. I'd take the ball valve out if you do a burn-out- it might melt the plastic on the handle, and the ball itself might be nylon.
 
Yeah, I'll definitely do a burn (late at night when all the neighbors are sleeping so the cops don't show up) and take the caps and the ball valve off for a full hot burn out... I wanted to do the sanding just for my own piece of mind. Thanks for the feedback.

Edit: Oh yeah forgot to mention I did wipe the inside down with rubbing alchohol to get the particales out and figured it would all burn out with the initial burn.
 
question on temperature gauge.

I am hoping to be done with my build tomorrow so I can season it on Sat then make some bbq for the games on sunday. I purchased a Grill Care temperature gauge from walmart (only one they had). I have read some reviews one said good the other said inaccurate.

any advice on this unit or one you would recommend.

Porcine Pirate

" Pigs are our Tasty Friends "
 
Nice work!! I'm glad to see that sanding discs worked decently on the liner as the HOA would have a fit if I did a big burn here...looking forward to seeing your end result. I will be out looking at a few drums this weekend crossin my fingers that they are good enough to get me started!
 
Only 3 60 grit pads to do the whole inside? I must say, I would expect more pads.
OBTW, you can get an adapter and small hose, hook the sander right up to a wet/dry vac.
 
I have 2 of the $5 thermos from Wal-Mart, and they are both right on the money. Get some water boiling; it should read 212. That will give you an idea if it is off, and by how much.
 
i cant believe i read the whole thread, thanks to all for the great info , its has taken me months to fin read, work keeps getting in the way, i am building my smoker now will post pics when fin, iam kinda sad to be at end of thread , enjoyed reading after a hard night of stealing cars lol
 
almost there

drum cleaned inside and out and painted - Check

outside-smoker.jpg


Air Flow controls installed, hardware installed - Check

air-ball-valve.jpg
flap-valve.jpg


all that is left is to pickup Webber grill parts this afternoon, then I will season it and then be ready for maiden smoke tomorrow.

Here it is with season smoke going. it has worked out great less then 10 minutes to 240 F, and holding over an hour once vents were adjusted. I used the bottom of the webber, it has more vent holes.

smoker-with-top.jpg


here is the temp gauge

smoker-top.jpg


Porcine Pirate

" Pigs are our Tasty Friends "
 
Last edited by a moderator:
Diggin' the upside down Gril for the lid Porcine. I goofed my weber up trying to may a lid collar. So I went to plan B with a hitch pin, I need a washer on each side to make it work, but they will allow me to pul the top rack adn pull the hitch pins to pull the bottom rack easily.

Install my thermometer, 1 handle ( I need more bolts), built my basket, but I don't think it is big enough. I couldn't find the expanded metal around her so I grabbed a charcoal chimney, knock the bottom and handle off and drilled a bunch of holes in it. Attached it to a charcoal grate with 2 U bolts.

For my first rack I used 3 U bolts, but it seems unstable, May need to add a fourth.

Removed all of the hardware and doing my burn tonight while the neighbors sleep :grin:
 

Attachments

  • P1010008.JPG
    P1010008.JPG
    157.8 KB · Views: 941
  • P1010007.JPG
    P1010007.JPG
    164.8 KB · Views: 943
  • P1010004.JPG
    P1010004.JPG
    166 KB · Views: 947
  • P1010002.JPG
    P1010002.JPG
    164.8 KB · Views: 948
  • P1010005.JPG
    P1010005.JPG
    154.2 KB · Views: 940
  • P1010003.JPG
    P1010003.JPG
    153.1 KB · Views: 937
Ron, I like your hitch pin idea. It can be tricky getting the botton grate in and out with stationary bolts for the top grate. Nice idea bro. I would be very leary of only using three points to hold any grate. From experience, it may surprise you how easy it is to dump a brisket into the bottom of your barrel. Four points would be a lot safer. Keep us posted as it looks great so far. Hope the fire basket works out. It might make a real hot spot in the center of the grate. Let us know.
 
I posted this already in it's own post but thought it was better suited for here...Im picking up a drum tomorrow and need to get the lid cut off of it for a UDS. Two questions on that, should I keep the top and make a lid out of it after it is cut off or should I throw it away and get a Weber lid...and if so, how should it be cut off??

2nd question is where can I get it cut off near Atlanta? Anyone know or can anyone here do it for me?

I wanna be cooking in this baby next week.

Thanks Guys!!
 
This UDS threat has a lot of information about cutting the barrel and various ways to make the lid. You might want to take some time and read through it. It will answer your questions. Good luck.
 
Back
Top