Ufo8mycow
Knows what a fatty is.
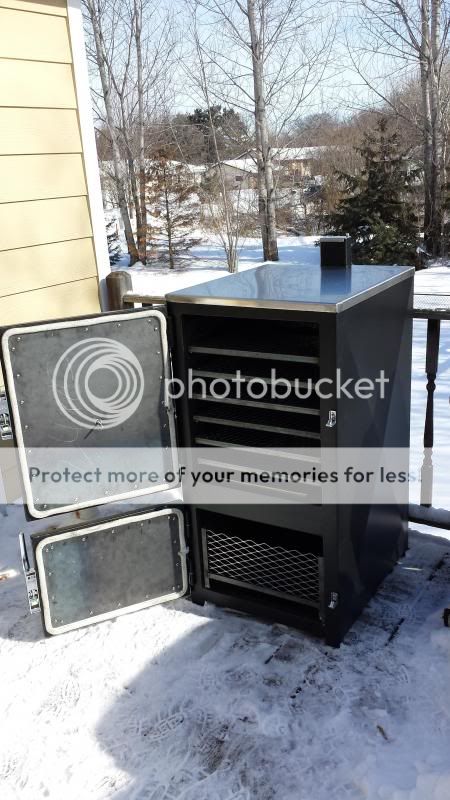
My current smoker is a UDS I built a few years ago and I love it but it just doesn't have the capacity I wanted so a few weeks I got a wild hare up my butt about building a new smoker and after leaving some drawings laying around for the wife to conveniently find she gave me the approval I decided on a backwoods style because this year has been colder than I can remember here in Minnesota so I wanted something insulated and efficient. So after scouring the web for as many pics and build threads that I could find and set about at drawing up my own plans.
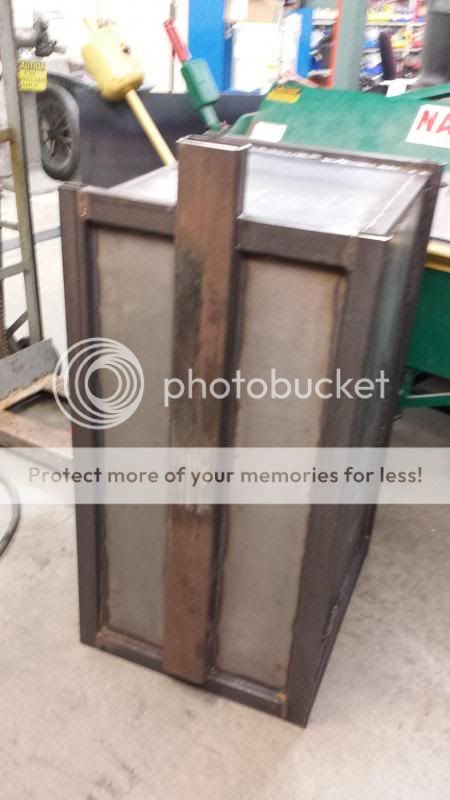
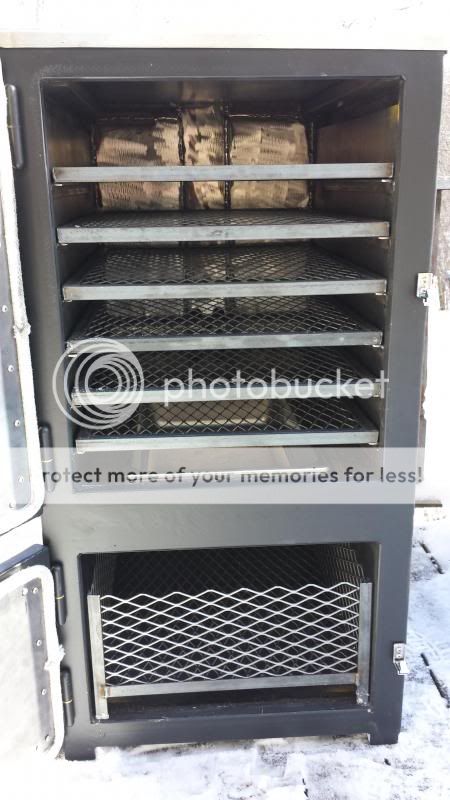
The cook chamber dimensions are 18" wide by 24" deep and 22" tall and currently has 6 racks spaced 3" apart. the firebox is 12" tall the charcoal basket is 16"x22"x8" and will hold about 35 lbs of Kingsford because I wanted to hold as much charcoal as possible so that I could smoke while I am at work for 12 hours and not have to ask the wife to refill the charcoal
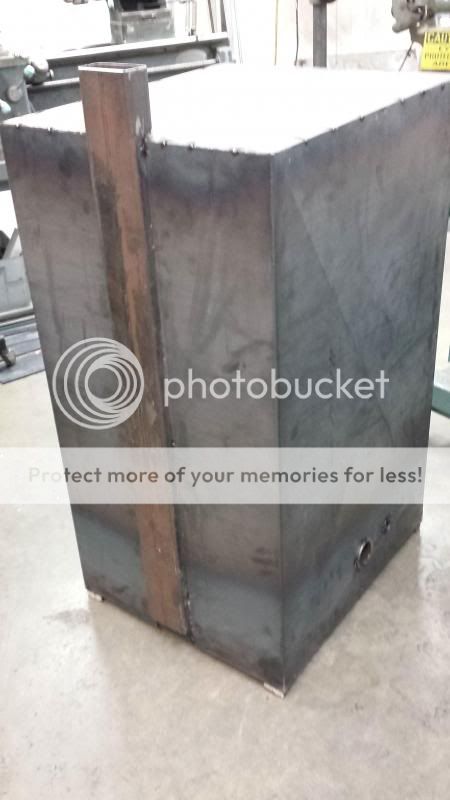
The main framework is 2"x1" 14 gauge tubing the smoke stack is 4"x2" 11 gauge and the sheet metal is 16 gauge hot rolled (I should have spent the extra $5 on cold rolled) the rails, grate and charcoal box frame are all 3/4" angle iron all the material added up to 3 sheets of 16 gauge sheet 28 feet of 2"x1" tube 4 feet of 4"x2" tube and 90 feet of 3/4" angle and about 4 feet of 1"x1" tube. total cost for the build including steel,hardware, gaskets, and insulation came to about $500. Make sure you call around to check prices for youre steel the two places I checked were about 40% diffrence on cost.
I wasn't the best at remembering to take pics to document the build but i did take some. Sorry for the blurry pics but my phone is a POS.


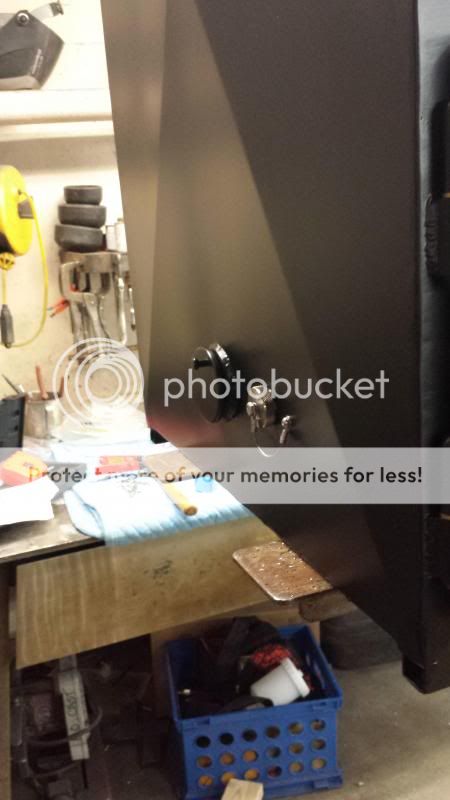
Here you can see the intake and the guru port I wanted to build in. the intake is a 2-1/2" coupling cut to 1-1/2" long and tack welded some flat bar to the back side and threaded to accept the 1/4-20 bolt on the back of the damper. Everybody told me to just use a 2" ball valve with an adapter but that would have added quite a bit of cost to the build and I also didnt want stuff sticking out the sides. I machined the inside of a pipe to 1.22" and welded it in to the side next to my other intake and made a kill plug for it and sice I dont have a guru yet I mad an adapter that will stay in my pitmaster iq110 and fit into the guru port.


The cook chamber dimensions are 18" wide by 24" deep and 22" tall and currently has 6 racks spaced 3" apart. the firebox is 12" tall the charcoal basket is 16"x22"x8" and will hold about 35 lbs of Kingsford because I wanted to hold as much charcoal as possible so that I could smoke while I am at work for 12 hours and not have to ask the wife to refill the charcoal
The main framework is 2"x1" 14 gauge tubing the smoke stack is 4"x2" 11 gauge and the sheet metal is 16 gauge hot rolled (I should have spent the extra $5 on cold rolled) the rails, grate and charcoal box frame are all 3/4" angle iron all the material added up to 3 sheets of 16 gauge sheet 28 feet of 2"x1" tube 4 feet of 4"x2" tube and 90 feet of 3/4" angle and about 4 feet of 1"x1" tube. total cost for the build including steel,hardware, gaskets, and insulation came to about $500. Make sure you call around to check prices for youre steel the two places I checked were about 40% diffrence on cost.
I wasn't the best at remembering to take pics to document the build but i did take some. Sorry for the blurry pics but my phone is a POS.


Here you can see the intake and the guru port I wanted to build in. the intake is a 2-1/2" coupling cut to 1-1/2" long and tack welded some flat bar to the back side and threaded to accept the 1/4-20 bolt on the back of the damper. Everybody told me to just use a 2" ball valve with an adapter but that would have added quite a bit of cost to the build and I also didnt want stuff sticking out the sides. I machined the inside of a pipe to 1.22" and welded it in to the side next to my other intake and made a kill plug for it and sice I dont have a guru yet I mad an adapter that will stay in my pitmaster iq110 and fit into the guru port.


Last edited:


