Thx Wyely. You'll want to keep your mini UDS even after making your next 2, they are like a drug, take your first hit and your never the same. Just ask Swamprb, he has a UDS for every occasion and one in every size.
 
OK, so I didn't commit everything to memory. :roll::oops:

I have a question for the experts... I received my free drum last night from my brother.:biggrin: It's new with a painted lining (not the dreaded epoxy liner):biggrin::biggrin:. But the lid that he brought me was not from that drum. Either it didn't come with a lid, or he just couldn't find it. This lid is from a barrel of contact cement. I plan on cleaning/scraping/burning/wire-brushing the hell out of it until it is clean.

So here's my question: The lid is the one with the two bung holes, so should I use those for the exhaust, or keep them sealed and drill the 8 1/2" holes?

Thanks for any feedback the UDS experts can provide!
 
The two I have both had the removable bungs, so I just use one of those. Makes it real easy to shut down at the end of a cook, put in the cap and close the vents. Cold in less than an hour.
Try the bung as exhaust first. If you don't like it then drill the exhaust holes in the lid.
 
The two I have both had the removable bungs, so I just use one of those. Makes it real easy to shut down at the end of a cook, put in the cap and close the vents. Cold in less than an hour.
Try the bung as exhaust first. If you don't like it then drill the exhaust holes in the lid.

Do you have any issues with hot spots? My lid has one bung in the center and one on the side... which one is recommended for better heat distribution?
 
I use the bung and a clip from a ratchet strap as a lid clip.

2lu2zvb.jpg
 
marbles

Just a quick note, wanting to shut it down after cook, I just put 8 marbles on the 1/2" holes and fire goes out. My grandson was out there playing with marbles and there was the answer.
 
Do you have any issues with hot spots? My lid has one bung in the center and one on the side... which one is recommended for better heat distribution?

I don't know. My lid had the bung on the side so it works for me. I would try the one in the center first, more symmetrical cuz that's the way I like to be. Also if there is a slight domed effect to the top, the center bung might help remove more of the moisture so there will be less accumulation of condensate at the end of the cook. Purely conjecture here.

With the side bung, I do keep the exhaust opposite where the open valve is.
 
I think I'll give it a try with the bungs before I drill. Now all I need is a step bit and a weed-burner.


...and charcoal grate, expanded steel, cooking grate, thermometer....
 
When I mentioned my temps earlier, I meant that I can get above those temps with 4 intakes open. Is the because the barrel is thin?
 
When I mentioned my temps earlier, I meant that I can get above those temps with 4 intakes open. Is the because the barrel is thin?


Can or can't???
Before you couldn't now you can?
Same question you were asked before- what do you have for intake and exhaust?
 
Burning out my Mini UDS

So I guess tis how it all starts...anybody have any specific info on an 18" mini? I have ordered an 18" Cast Iron Big Green Egg grate, but am still looking for a lid. Does the 18" Weber lid fit? Other suggestions? I do have the flat lid that I will use, but like the idea of more clearance for the 3 tier smoke rack from BGE.
 

Attachments

  • IMG_1701.jpg
    IMG_1701.jpg
    15.2 KB · Views: 1,178
Tim, funny you should ask about a mini UDS. I just finished one this past weekend to the point of being able to use it. I still need to paint it and get a proper grate for it but it worked to perfection on an 8 lbs boston butt. Because it isn't as tall as a 55 gal drum you'll need to save some space anywhere you can. I drilled my intake holes as far down the drum as I could, at this point I'm just using magnets to cover them to restrict airflow. I made my charcoal grate out of a perforated pizza pan which sits 1" off of the bottom of the drum. My grill grate sits 21 3/4" above the bottom of the charcoal grate. That gives me 5 1/2 " to the lid which I pounded into a slight dome shape, so i've got maybe 6 1/2" clearance in the dead center of the smoker. I drilled eight 1" holes for exhaust although I think this might have been a bit much as I had to run it with all of the intakes almost completely closed. I suspect that with that many large holes in the lid it was letting some fresh air into the drum. Having said that though it kept temps between 230-240 all day until I shut it down which was about 9 hours and only used about half of the maybe 7 lbs of lump charcoal that I put in it.

Some of my decisions on where to drill and how big were made because of some small gashes in the sides and lid of the drum that I was given, but I can't argue with the product that it turned out and it was only my first smoke on it. I did do a long practice smoke with nothin more than a couple of pieces of bacon on it the afternoon and evening before and it kept the temps exactly where you'd want them for 10 hours using cheap Wal-Mart briquettes from a bag that had been standing open for a month or so.

Hope some of that helps.

Paul
 
Last edited:
Can or can't???
Before you couldn't now you can?
Same question you were asked before- what do you have for intake and exhaust?

I Can't. I have (2) 3/4" intakes with caps and (2) 3/4" ball valves on 24" risers. I have a flat lid with (8) 1/2" holes in it.
 
I Can't. I have (2) 3/4" intakes with caps and (2) 3/4" ball valves on 24" risers. I have a flat lid with (8) 1/2" holes in it.

I only have 3 3/4" intakes (no risers) and the same exhaust and I have no problems getting the temps up.

It sounds like there isn't enough inlet air getting to the coals. What is your basket made of? How many inches off the floor is it? Can air go through the bottom and all sides of the basket?

If it's not your basket then you might want to remove one of the risers on the inlet. Having two 24" risers might be too restricting. Some people have had trouble with only one riser.

IMHO I don't think the walls of the drum have anything to do with your problem. It's an airflow issue.
 
I did it. I read 3416 posts on 228 pages. I have no questions. I have no eye balls. I have no functioning brain. I'll be back later.
 
The initiation is over now. Once you recover you may proceed to building your own UDS. Welcome to the club. We will teach you the secret hand shake later.
 
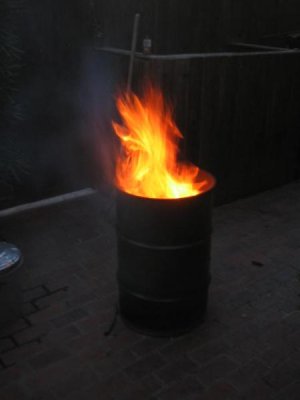
Thank you. A hand shake with a beer in it might be just what I need right now. Back at page 50 or so, I decided I needed a UDS and started my quest for parts. I found a guy that had some food grade barrels. He wanted $10 each for them so I bought 3. One to screw up, one to think I had a better plan and screw up and one to do it the right way. All three of the drums had the "red liner". I am now burning the first drum. I got a good burn in it today, will get another burn tomorrow and hopefully Sunday will get another burn in the barrel. I went to city hall and got a 3 day burn permit so no problems with the fire department. After the third burn I will see what is left of the "red liner". Oh yes, I cut the three 1" holes in the bottom to help with the burning process before I started the project. Have any of you got a 55 gallon barrel that had a plastic lid? These did and so I am looking for metal lids for the completed project, unless someone whats to tell me that plastic lids will work. Anyway, I too will take pictures of this build and hopefully do it right the first time and have the extra drums for friends to use.
 
I too will take pictures of this build and hopefully do it right the first time

Skip all the creative stuff and build a clean KISS drum first and you will have no problems. Later you can start with risers, dampeners, heat shields, vibrating baskets, rotating grates, lint rollers, forced induction, laser lights, so forth and so on. Just get it up and running first.
 
Back
Top