chicagokp
Babbling Farker
I've been baking bread for a while. Whenever I'm Q'ing something that deserves bread. Steaks, roast chicken, chops, whatever... This is what you do with the oven when it's sitting lonely in the kitchen....
1 - Get your ingredients. You need flour, All Purpose or bread, doesnt' matter. Brands? They are all different. King Arthur, Gold Medal, Pillsbury, again, doesn't really matter. Water? I use tap. My water is from Lake Michigan, so it's relatively soft already. We don't have a softener. You may need bottled? Salt, Kosher, Mortons. Yeast, I used Red Star, but I don't think the brands make much difference.
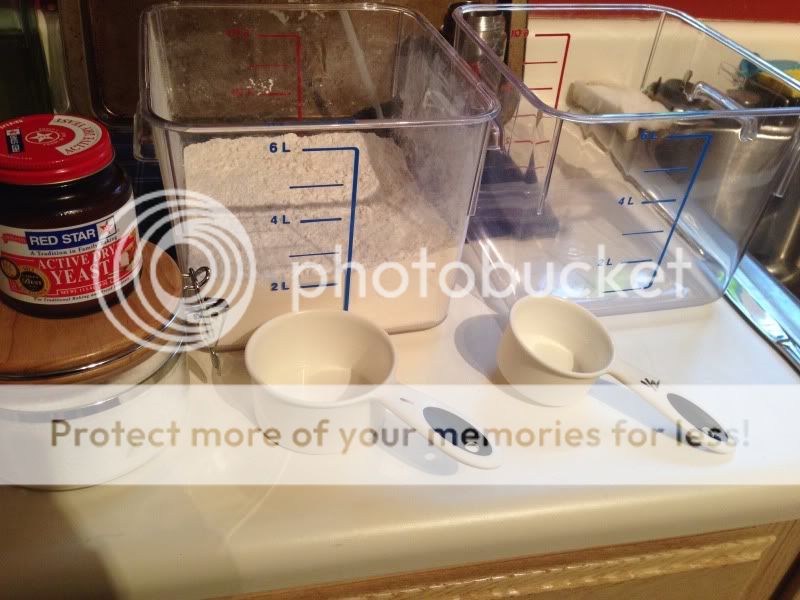
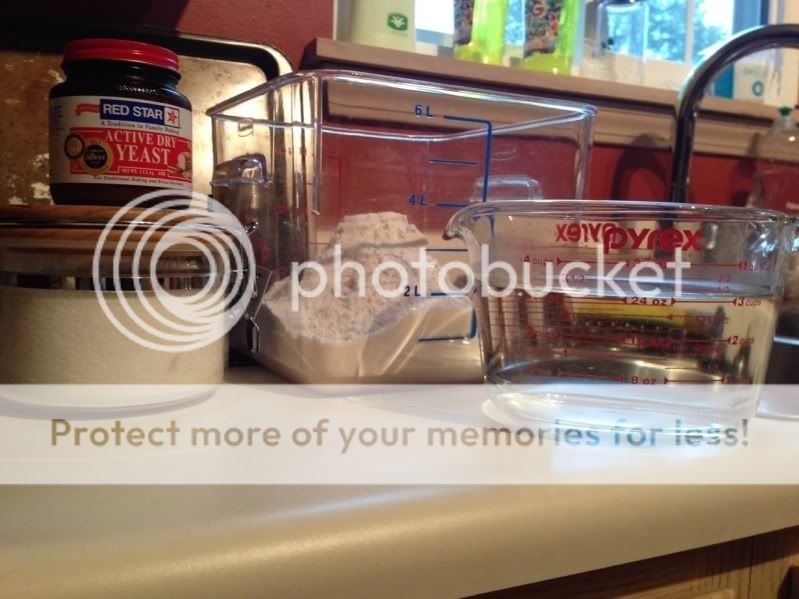
2 - Get your container. At minimum, you'll need a container that will allow you to keep 6 1/2 cups of flour and 3 cups of water. I got these from Sam's Club. They are 6 Liter containers.
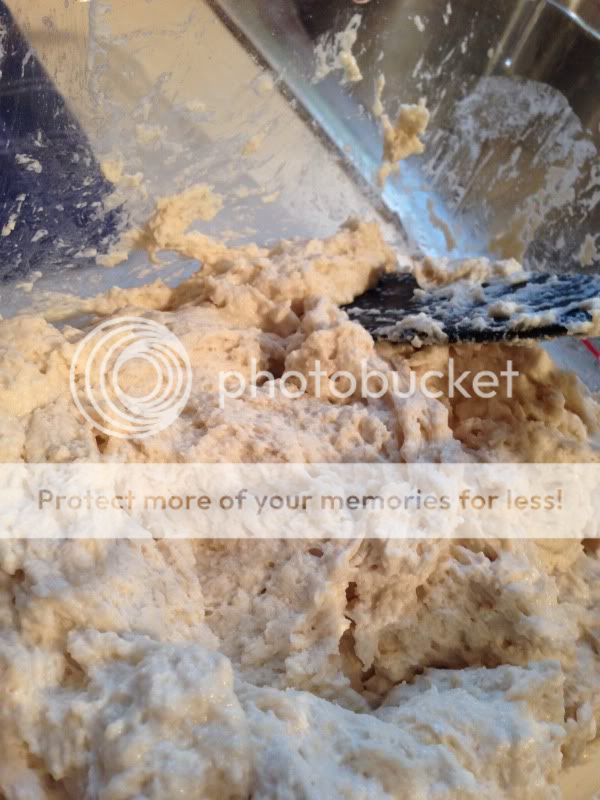
3 - Mix it up. Add in 6 1/2 cups of flour, 1 1/2 tsp yeast and 3 cups of water. Make sure the water is not over 100 degrees. Mix with a spoon, spatula, or whatever. After 1 min of mixing, add in 1 1/2 TBSP of Kosher salt. Make sure everything is incorporated. If this entire process takes more than 5 minutes, it's taking too long. It should be quick, just make sure it's not too liquidy on the bottom and any dry flour that may stay in the corners has been incorporated. It should look like this.
4 - Let it sit on the counter or semi warm place for 4-6 hours, until it doubles in volume. Then stash in the fridge. You can make a loaf after 4 hours, but it really need overnight. This dough will keep in the fridge for up to 2 weeks, but it's ideal in the 2-7 day timeframe.
Here is my dough after doubling.

5 - Time to make bread. Take out the contain of dough.

6 - Take out about 1/3 of the dough and put on a floured cutting board so you can minimally work the dough. It will be sticky, that's fine. Best to use floured hands. Also, take out a peel or whatever you will finally rest your bread on. Add on some semolina or corn meal to keep your loaf from sticking.

7 - Coat the top with flour, notice, I haven't worked the dough at all....
8 - Now, pick up the dough, make sure it's coated with flour all over, and fold the outside edges underneath the dough to form a ball. It should look like this. And don't mess with it too long, this should only take 1 minute at maximum. Place it on your peel or whatever you have coated with corn meal/semolina.

9 - Preheat your oven to 450. Make sure you have a baking/pizza stone in the oven. I put in on lowest rack. In addition, I have my broiler pan on the oven floor.
10 - After the oven is preheated and my bread has been resting for 30 min or so, it's time to cook. Use a wet bread knife and cut the top of the bread about 1/4 - 1/2 inch deep with some slits across the top. I like to scallop mine. It should look like this, except, honestly, I probably cut these too deep.

11 - Put it on your hot stone. As soon as you get it on your stone, add 1 cup of hot tap water into your broiler pan. You want a very moist environment to get a good crust on your bread.

12 - Cook for 35 minutes or so, or until the bread gets to 200-210 degrees internal.

If your dough is too wet, it could cook for 45 minutes and still be ok. I usually get 3 loaves per batch. The round loaf is a boule, but you form into whatever shape you want.
After 3 loaves, I usually don't clean my dough container. I just scrape down the sides and make a new batch. The old dough has good yeasty flavors that add to the overall bread character.
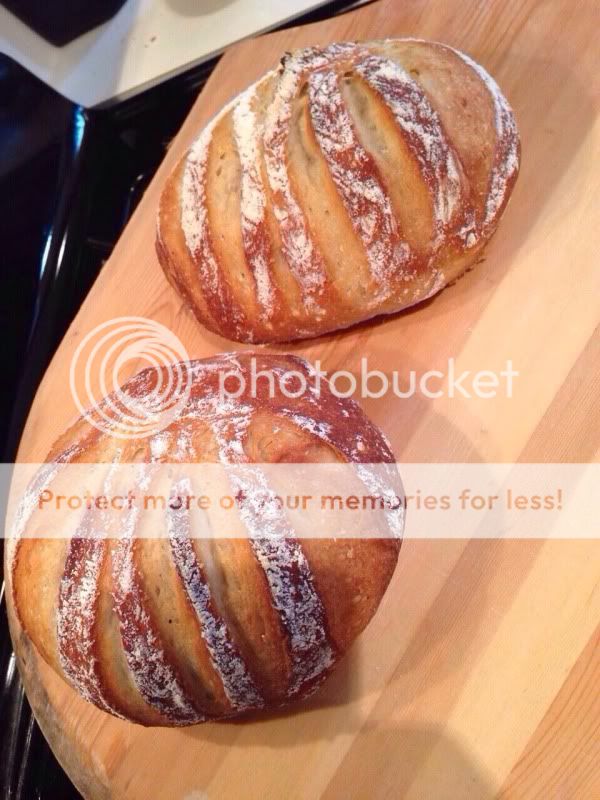
The first finished loaf was the one I cooked yesterday. I made these 2 today.

Hope this is enough to get someone to try! Enjoy!
1 - Get your ingredients. You need flour, All Purpose or bread, doesnt' matter. Brands? They are all different. King Arthur, Gold Medal, Pillsbury, again, doesn't really matter. Water? I use tap. My water is from Lake Michigan, so it's relatively soft already. We don't have a softener. You may need bottled? Salt, Kosher, Mortons. Yeast, I used Red Star, but I don't think the brands make much difference.
2 - Get your container. At minimum, you'll need a container that will allow you to keep 6 1/2 cups of flour and 3 cups of water. I got these from Sam's Club. They are 6 Liter containers.
3 - Mix it up. Add in 6 1/2 cups of flour, 1 1/2 tsp yeast and 3 cups of water. Make sure the water is not over 100 degrees. Mix with a spoon, spatula, or whatever. After 1 min of mixing, add in 1 1/2 TBSP of Kosher salt. Make sure everything is incorporated. If this entire process takes more than 5 minutes, it's taking too long. It should be quick, just make sure it's not too liquidy on the bottom and any dry flour that may stay in the corners has been incorporated. It should look like this.
4 - Let it sit on the counter or semi warm place for 4-6 hours, until it doubles in volume. Then stash in the fridge. You can make a loaf after 4 hours, but it really need overnight. This dough will keep in the fridge for up to 2 weeks, but it's ideal in the 2-7 day timeframe.
Here is my dough after doubling.
5 - Time to make bread. Take out the contain of dough.
6 - Take out about 1/3 of the dough and put on a floured cutting board so you can minimally work the dough. It will be sticky, that's fine. Best to use floured hands. Also, take out a peel or whatever you will finally rest your bread on. Add on some semolina or corn meal to keep your loaf from sticking.
7 - Coat the top with flour, notice, I haven't worked the dough at all....
8 - Now, pick up the dough, make sure it's coated with flour all over, and fold the outside edges underneath the dough to form a ball. It should look like this. And don't mess with it too long, this should only take 1 minute at maximum. Place it on your peel or whatever you have coated with corn meal/semolina.
9 - Preheat your oven to 450. Make sure you have a baking/pizza stone in the oven. I put in on lowest rack. In addition, I have my broiler pan on the oven floor.
10 - After the oven is preheated and my bread has been resting for 30 min or so, it's time to cook. Use a wet bread knife and cut the top of the bread about 1/4 - 1/2 inch deep with some slits across the top. I like to scallop mine. It should look like this, except, honestly, I probably cut these too deep.
11 - Put it on your hot stone. As soon as you get it on your stone, add 1 cup of hot tap water into your broiler pan. You want a very moist environment to get a good crust on your bread.
12 - Cook for 35 minutes or so, or until the bread gets to 200-210 degrees internal.
If your dough is too wet, it could cook for 45 minutes and still be ok. I usually get 3 loaves per batch. The round loaf is a boule, but you form into whatever shape you want.
After 3 loaves, I usually don't clean my dough container. I just scrape down the sides and make a new batch. The old dough has good yeasty flavors that add to the overall bread character.
The first finished loaf was the one I cooked yesterday. I made these 2 today.
Hope this is enough to get someone to try! Enjoy!
