MisterChrister
Quintessential Chatty Farker
OK, you've (mostly) all seen alot of these. But the way I figure, someone new will see enough of them to realize they CAN do one; they're pretty easy, cheap, and tasty. Plus, your guests WILL be wowed!
The Cast and Characters:
24 oz. Thick Sliced Bacon
16 oz. Roll of DECENT TO HIGH QUALITY Pork Sausage - The cheap stuff will leave you regretful in the end.
Mozzarella Cheese
Green, Red, Yellow, and Orange Sweet Peppers, sliced julienne
Onion sliced julienne
Your Favorite Pork Rub


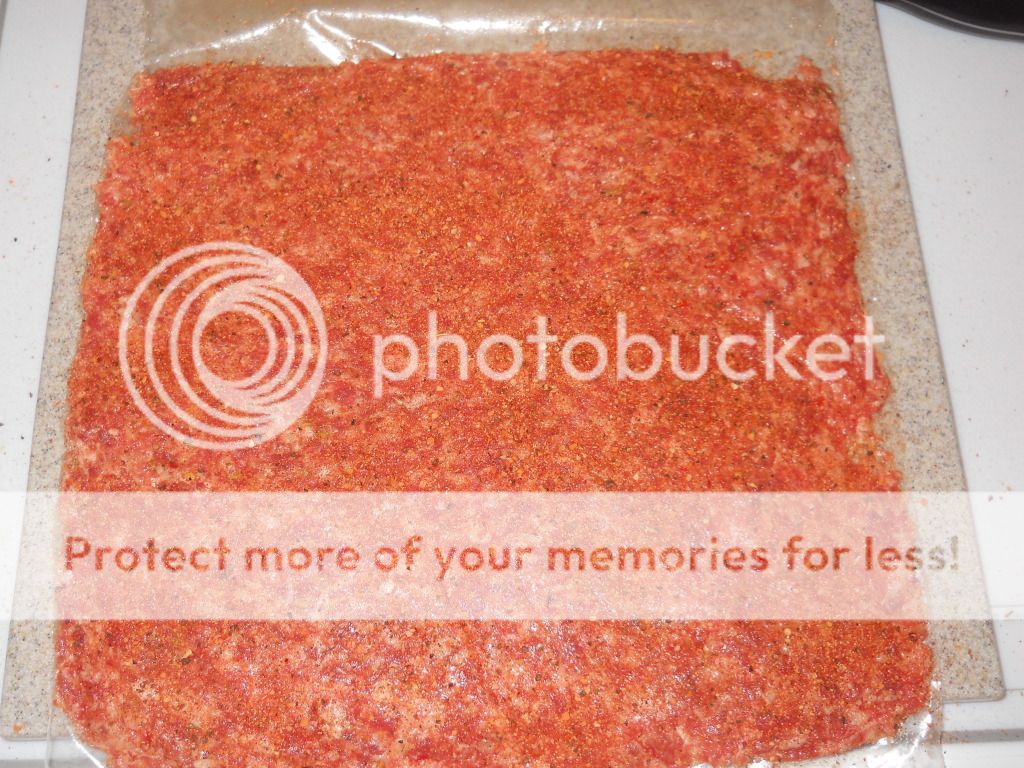
Put your sausage into a 1 gallon size ziploc and zip it shut (lol!). Roll it out flat with a rolling pin or whatever you have while occasionally opening and closing to allow the excess air to escape. Then, slice the sides of the bag open to expose the sausage but leave it on the bottom side of the bag. Dust with your favorite pork rub; you don't have to go nuts with the rub since you are going to apply it a couple of more times in the process.


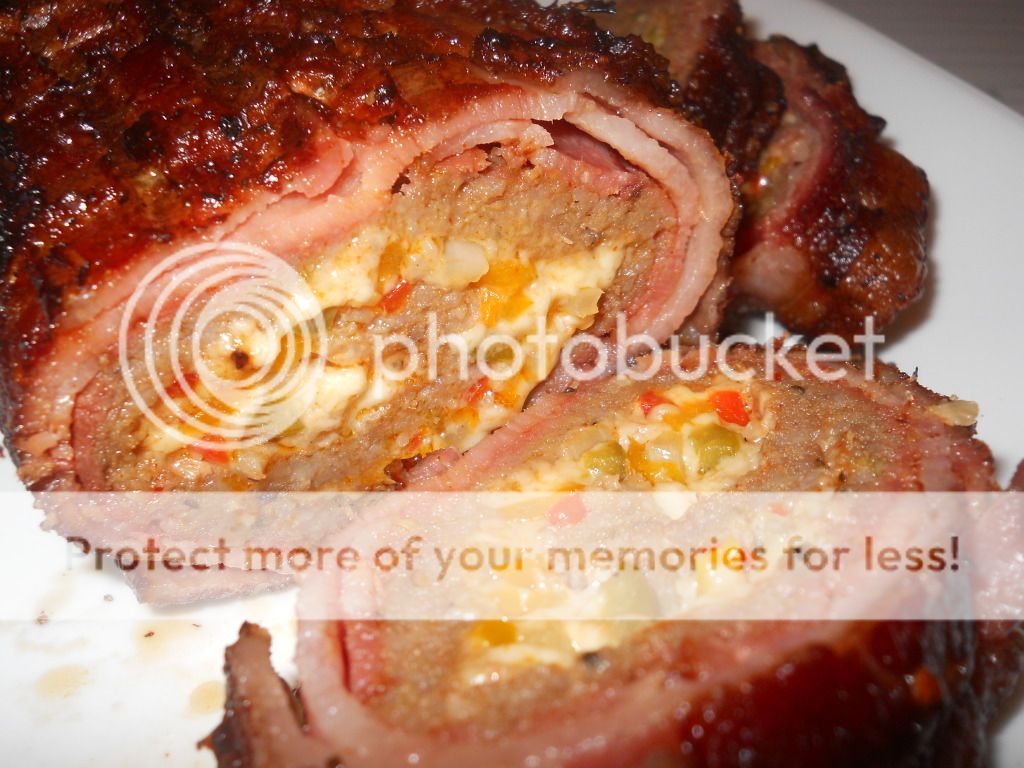
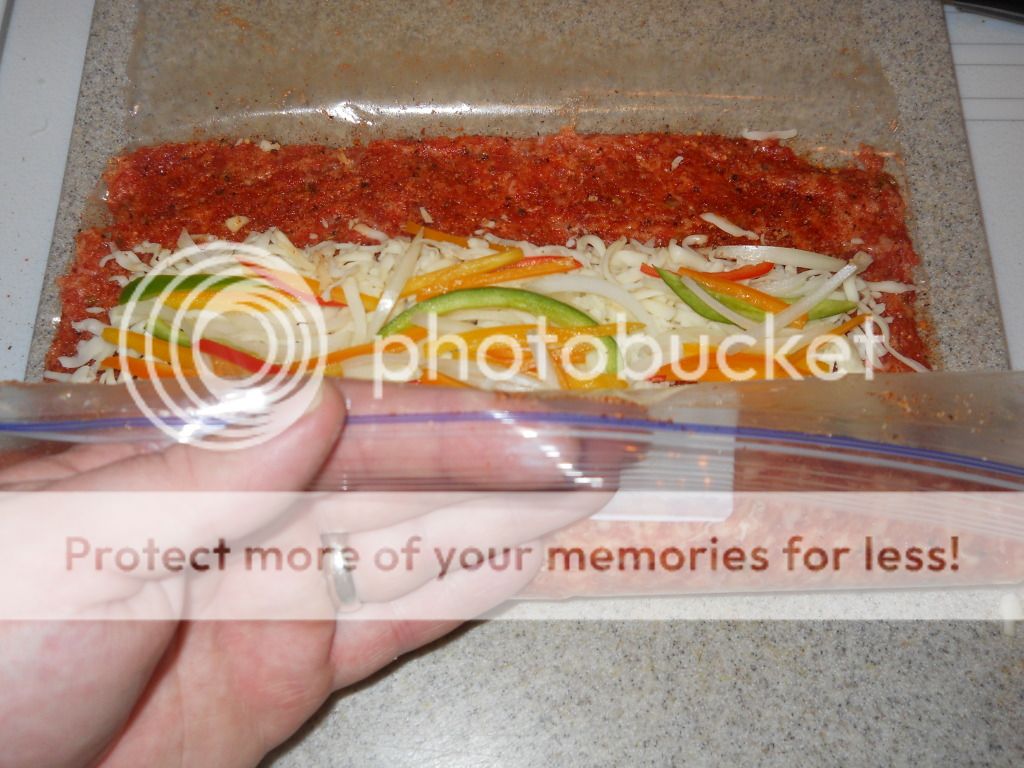
Cover with a solid but thin layer of cheese and your peppers and onions. I like to slice my peppers and onions fairly thin so they are al dente - not too crunchy, but not too mushy like from sauteeing them first. I want the onion and pepper flavor to cook into the fatty, not out into the air while sauteeing. Just my personal opinion - they are also yummy carmelized in a pan too if you like them that way. Pick up the front edge of the bag and roll the fatty up in a log using the bag to assist you. Notice how I pulled the fillings away from the last inch or two of the far side of the fatty? That's to allow a meat-to-meat seal while finishing the roll. It keeps all of the yummy stuff inside!


When the roll is finished and sealed, crimp the ends together and roll gently back and forth to compress and make the roll nice and symmetrical. Then dust with another dab of your favorite rub.

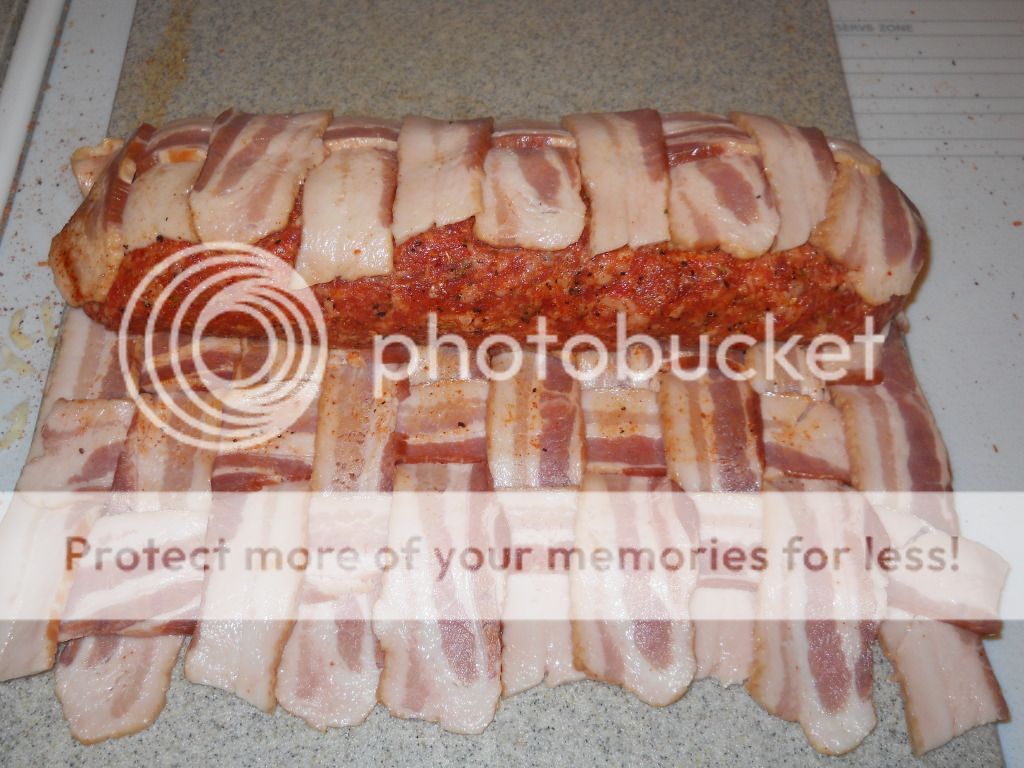
To make the bacon weave blanket, lay out 9-10 strips right next to each other going toward/away from you. Then fold every other strip back halfway and lay one strip crossways left to right. Unfold your folded back strips and proceed to fold back your OTHER alternating strips and lay down another piece crossways left to right. Keep going back and forth until your blanket is finished and looks like this.

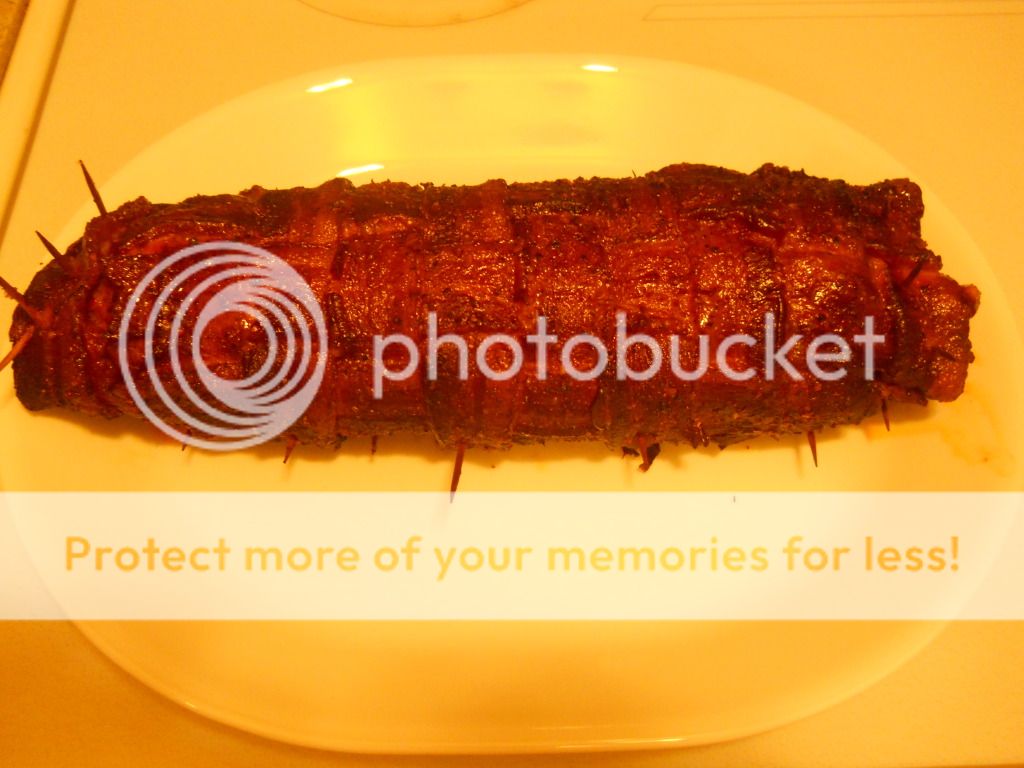
Then place your sausage log on the far end of your bacon blanket and roll towards you like this.
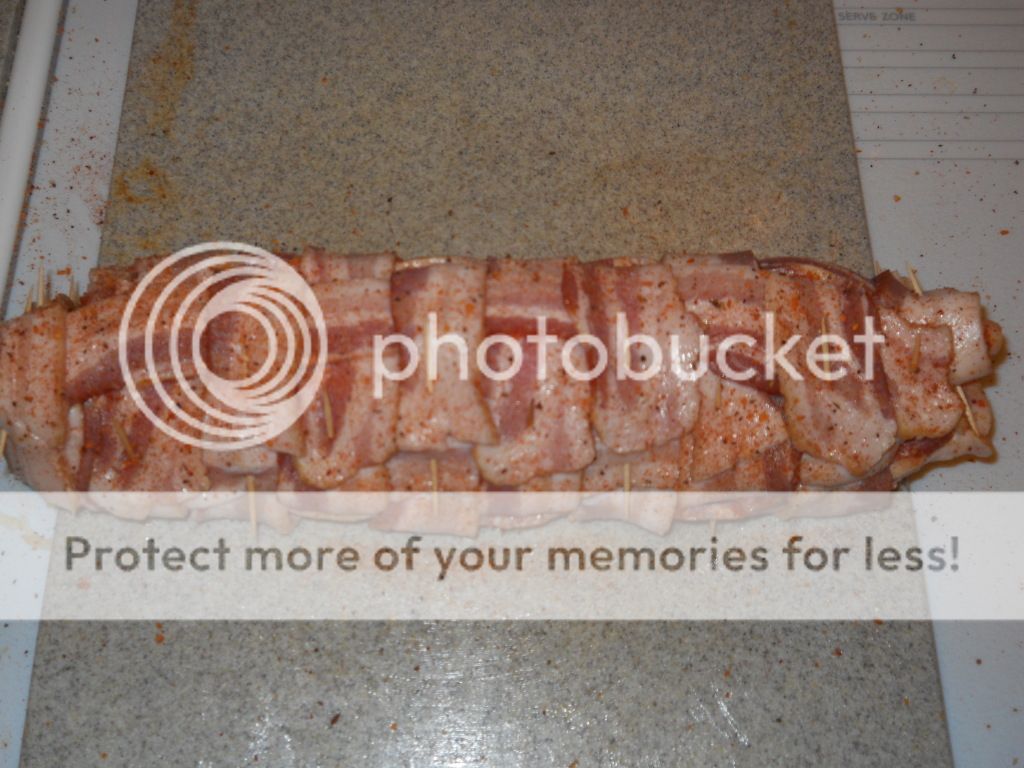
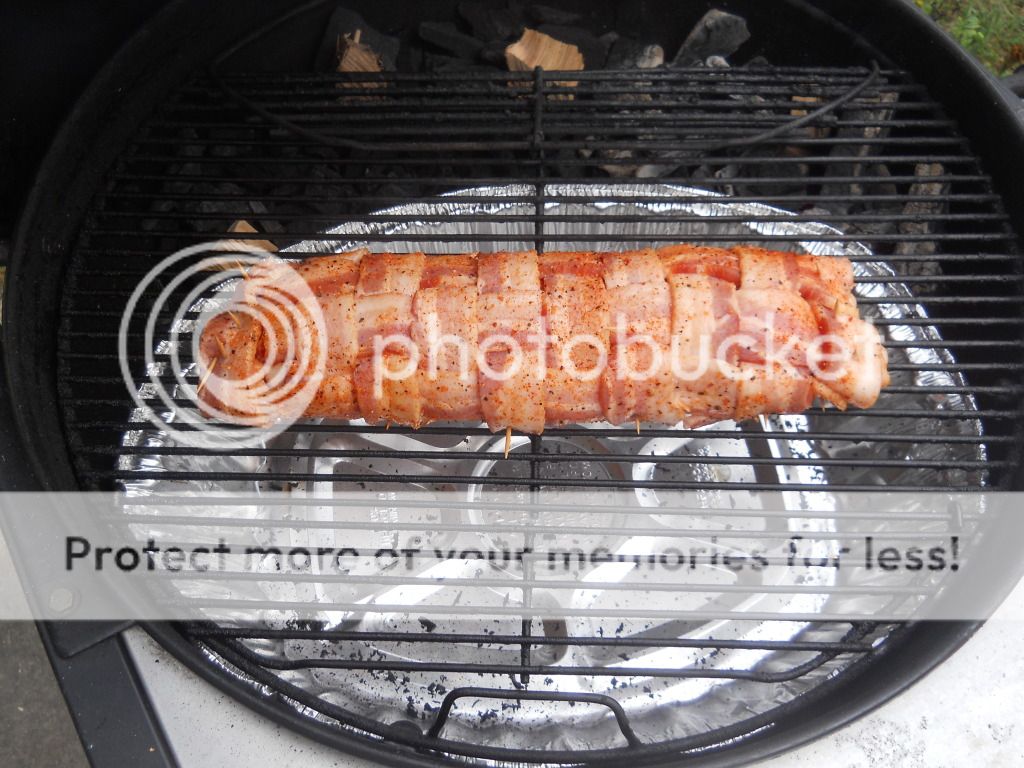
I prefer to pin mine shut along the bacon seam and ends with toothpicks. It seems to keep things snug while handling and cooking, and less cheese spills out.
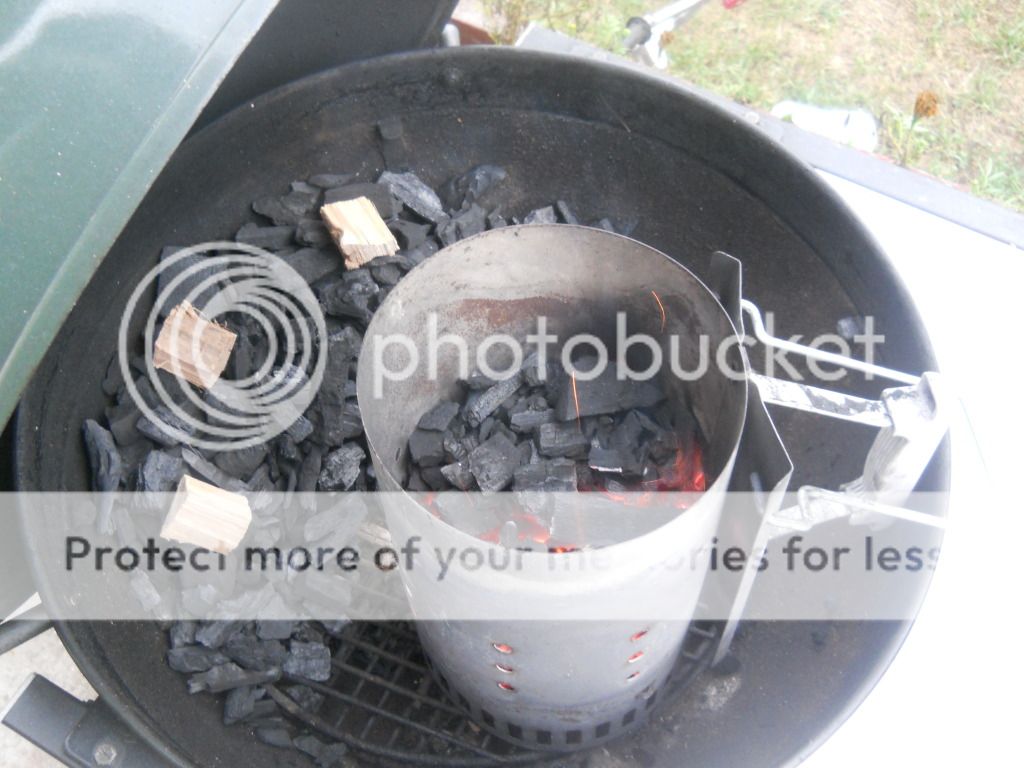
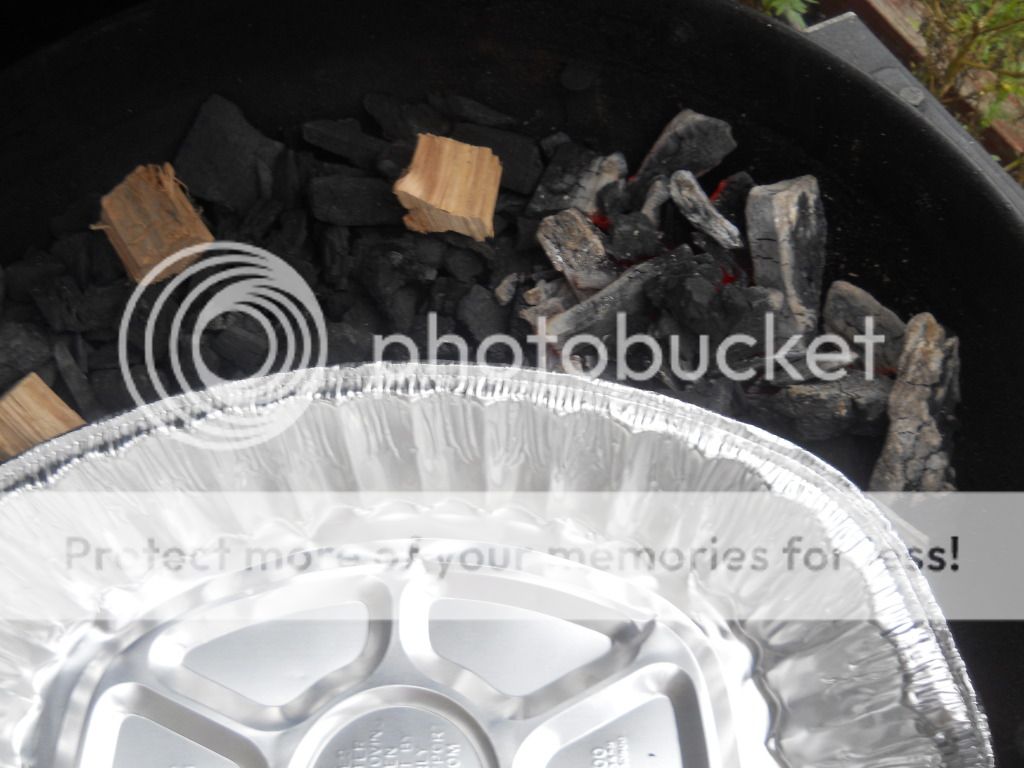
The fire setup. Indirect over a dry foil pan to keep your cooker clean as the fat renders out. I prefer a whole chimney of unlit lump with some chunks of hickory throughout. I use about 1/4-1/3 chimney of glowing lit coals at one end of my unlit to do a fuse or ring of fire type gradual burn. This will get me PLENTY of burn time with leftover coals for a base for next time.
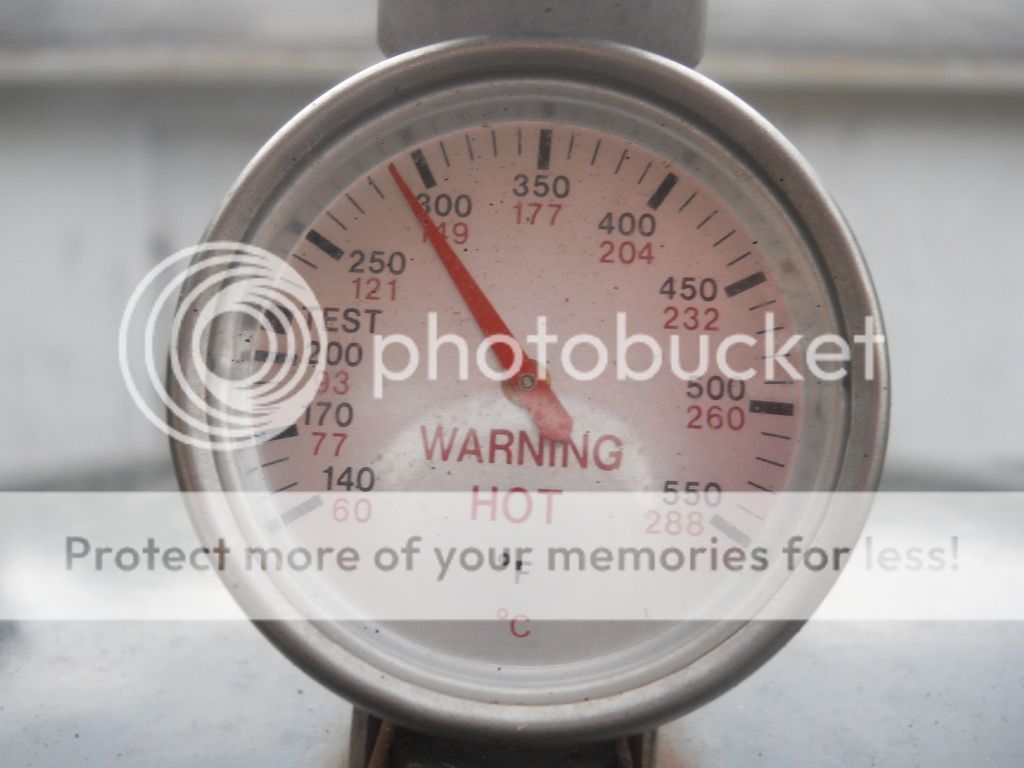
I will cruise along at 250-300 degrees for about 2-1/4 to 2-3/4 hours. This temp gives enough chance for the smoke to get in the fatty but also warm enough to sweat out alot of the fat. Not that anyone here is a complete health fanatic!
More pics to follow!
The Cast and Characters:
24 oz. Thick Sliced Bacon
16 oz. Roll of DECENT TO HIGH QUALITY Pork Sausage - The cheap stuff will leave you regretful in the end.
Mozzarella Cheese
Green, Red, Yellow, and Orange Sweet Peppers, sliced julienne
Onion sliced julienne
Your Favorite Pork Rub
Put your sausage into a 1 gallon size ziploc and zip it shut (lol!). Roll it out flat with a rolling pin or whatever you have while occasionally opening and closing to allow the excess air to escape. Then, slice the sides of the bag open to expose the sausage but leave it on the bottom side of the bag. Dust with your favorite pork rub; you don't have to go nuts with the rub since you are going to apply it a couple of more times in the process.
Cover with a solid but thin layer of cheese and your peppers and onions. I like to slice my peppers and onions fairly thin so they are al dente - not too crunchy, but not too mushy like from sauteeing them first. I want the onion and pepper flavor to cook into the fatty, not out into the air while sauteeing. Just my personal opinion - they are also yummy carmelized in a pan too if you like them that way. Pick up the front edge of the bag and roll the fatty up in a log using the bag to assist you. Notice how I pulled the fillings away from the last inch or two of the far side of the fatty? That's to allow a meat-to-meat seal while finishing the roll. It keeps all of the yummy stuff inside!
When the roll is finished and sealed, crimp the ends together and roll gently back and forth to compress and make the roll nice and symmetrical. Then dust with another dab of your favorite rub.
To make the bacon weave blanket, lay out 9-10 strips right next to each other going toward/away from you. Then fold every other strip back halfway and lay one strip crossways left to right. Unfold your folded back strips and proceed to fold back your OTHER alternating strips and lay down another piece crossways left to right. Keep going back and forth until your blanket is finished and looks like this.
Then place your sausage log on the far end of your bacon blanket and roll towards you like this.
I prefer to pin mine shut along the bacon seam and ends with toothpicks. It seems to keep things snug while handling and cooking, and less cheese spills out.
The fire setup. Indirect over a dry foil pan to keep your cooker clean as the fat renders out. I prefer a whole chimney of unlit lump with some chunks of hickory throughout. I use about 1/4-1/3 chimney of glowing lit coals at one end of my unlit to do a fuse or ring of fire type gradual burn. This will get me PLENTY of burn time with leftover coals for a base for next time.
I will cruise along at 250-300 degrees for about 2-1/4 to 2-3/4 hours. This temp gives enough chance for the smoke to get in the fatty but also warm enough to sweat out alot of the fat. Not that anyone here is a complete health fanatic!
More pics to follow!