Heres where I got my info for ECB mods 4 years ago, even before I knew of the brethren.
http://www.randyq.addr.com/ecb/ecbmods.html
ECB Modifications
Now, before we get into this section, let me state for the record that you CAN make some very good barbecue with this unit, or any unit for that matter, fresh out of the box as it comes from the factory (but you're going to have to mess with it every 30 minutes or so). The purpose of these mods is just to minimize the hassle and "babysitting" required and hopefully give you time for what barbecue is all about, which involves a lot of relaxation, maybe some drinking of your favorite beverage, and a lot of socializing with friends and family (see the Barbecue Experience page); the food is just the EXCUSE for the gathering.
OK, enough disclaimer crap, introducing..........................
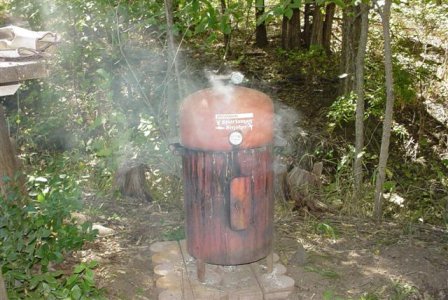
THE SUPERMODIFIED ECB!
These are the parts you'll be working with, and most of the supplies you'll need. From top (clockwise):
ECB Cooking chamber (notice the legs on backwards and on the outside)
Charcoal grid from a "Smoky Joe cooker" or something similar, about 13" across (measure your charcoal pan first)
ECB Lid (notice the pivoting vent cover, the vent holes, and the strip of paper for drilling guide)
Some drill bits (you'll need to start small and drill bigger until you reach the desired size vent hole)
Pliers, for crimping pie tin covers and tightening screws/nuts/bolts.
Pie tin, with STAINLESS STEEL nuts, bolts, washers, and threaded rods (which have been already cut).
ECB charcoal pan, with threaded-rod legs, vent holes, and pivoting vent covers.
Gloves, safety glasses, drill, kitchen shears.
Let's Review (you DID read the BBQFAQ ECB mods section, didn't you?)
* from the FAQ OF THE INTERNET BBQ LIST, version 2.0
Modification 1 - Improve accessibility to the firepan.
Modification 2 - Improve firepan airflow
Modification 3 - Improve accessibility to the water pan
Modification 4 - Improve temperature indication
...and some of my own mods:
Modification 2a: - Improve fireplan airflow even more (charcoal rails).
Modification 2b - Add vent covers.
Modification 5 - Improve cooker airflow (top vent & foil).
Modification 1 - Improve accessibility to the firepan (putting legs on it)
Parts List:
(3) 1/4" x 1' threaded rods, stainless steel* if you can find it
(6) Stainless steel* nuts that match the thread on your rods
(6) Stainless steel* washers that match the thread on your rods and nuts
* everything you use on this cooker should be STAINLESS STEEL and NOT GALVANIZED. Stainless will resist corrosion and will not emit toxic fumes when burning. Galvanized, means it's coated with Zinc, which DOES emit toxic fumes when burning. When I made my mods, the rods didn't state what they were, so I torched them well with a blowtorch to burn off whatever was around the charcoal pan.
Tools List:
Hack Saw or Bolt Cutters
Table Vice (recommended if cutting with hack saw)
Drill
Drill bits
Wrenches or pliers to tighten nuts.
Instructions:
Refer again to the picture above. We're going to have you put new legs on the charcoal pan and mount the existing legs on the outside. (I know the 1/4" rods don't look too sturdy, but they work fine, even with a whole load of charcoal and wood.) The easiest way to do this mod would be in this order:
First, before you start messing with the existing legs, put the charcoal pan in the unit and mark the pan where it hits the legs. We're going to use these marks for drilling holes.
Now, with your pan still in the cooker, get out your 1/4" threaded rods and figure out where you'll want to cut them, based on their position in the cooker. Put 'em in the vise and hacksaw them off (I took off about 2 inches)
Get out your handy-dandy drill and put a small bit in it for a pilot hole. (Safety tip: We will be drilling through porcelain-coated metal. As we drill, you will be accumulating a lot of porcelain shavings.....think GLASS SPLINTERS. Keep that in mind and wear eye and hand protection. Also, don't get any on your exposed skin or you'll get all scratched up.....I did, DOH) Use your bits to make larger and larger holes in the rim of the pan until you can snugly thread your (ahem) rod through the 1/4" hole (hehe) and apply your stainless steel nuts (giggle) and stainless steel washers to lock it in place.
Done......See, that wasn't so bad. Now to the next section:
Modification 2 - Improve firepan airflow
Back to Home Page