Restoring a 1987 Weber Kettle

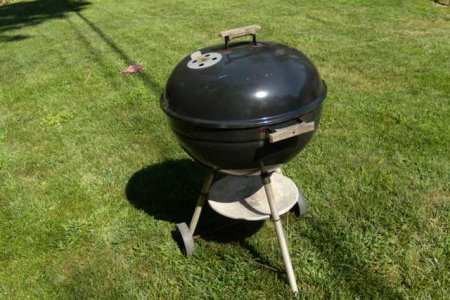
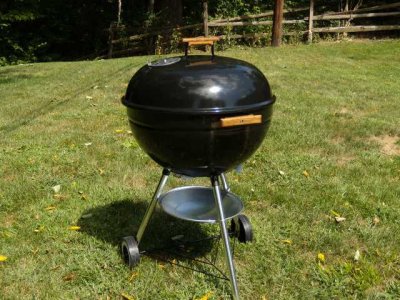
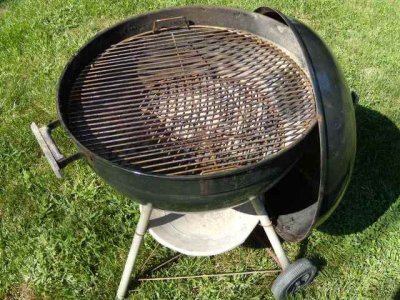
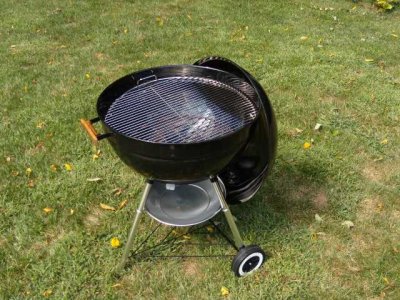
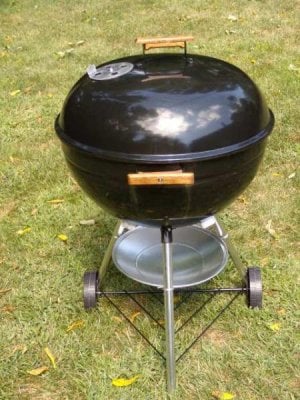
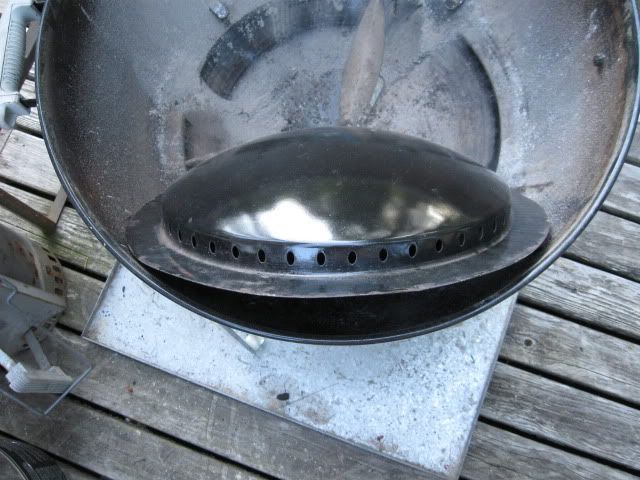
The Weber kettle has been completed! Below are some before and after photos. I will make a second post that contains any knowledge that I received from all of you <thank you very much>. I will also list the things that I tried both for better or worse and what I would do going forward. Yes I did say forward. Last night when I told my wife that I had finished the grill she said "that's great, but you have enjoyed working on it so much it is a shame that it is done." Then she proceeded to ask if I had checked CL for any for sale in our area & that she could see me buying them, restoring them and the reselling them. Well that is all I need to hear. I'll put any money toward a smoker. I would welcome feedback either positive or negative as to what I might have done better. Keep in mind the photos are from a distance and admittedly if you were right over the grill the spots that were previously rusted can be detected by a difference in the sheen of the paint vs. the enamel that Weber uses and in some cases a dimple where the enamel was chipped. Thanks again for all the help and encouragement.
 

Attachments

  • Weber to Email 1.jpg
    Weber to Email 1.jpg
    67.8 KB · Views: 729
  • Weber to Email 2.jpg
    Weber to Email 2.jpg
    105.7 KB · Views: 731
  • Weber to Email 3.jpg
    Weber to Email 3.jpg
    80.1 KB · Views: 729
  • Weber to Email 4.jpg
    Weber to Email 4.jpg
    108.8 KB · Views: 729
  • Weber to Email 5.jpg
    Weber to Email 5.jpg
    62.4 KB · Views: 729
Here is the process:
To clean the enamel kettle. I first cleaned it with a degreaser (Mr. Clean) and warm water, followed by wiping it down again with plain water . For those "baked on spots" I used a ScotchBrite pad and on really nasty stuff I lightly used a wire brush in a very cautious fashion. I did not use a wire brush on the aluminum pieces.
To clean the vents I first tried a polish. It didn't dent the caked on ash that had mixed with water at some point and turned that ash to concrete on the 3 bottom vents. I tried a wire brush but was afraid it was too aggressive and it would be too easy to miss small spots. To my horror I ended up sanding the vents with 220 grit sandpaper. It worked the best out of anything and cleaned them up in a short amount of time. Doing this DID scratch the aluminum but since they are on the bottom I could live with that. I posted photos earlier in the process showing the vents before and after if you are interested in seeing those. After sanding the vents I then used aluminum polish on them to make them shine a bit. The lid vent need nothing more than the polish and a great deal of elbow grease.
I made any needed repairs to the kettle. There were some bent edges on the lid that needed fixed. I then sanded any of the rust spots. I tried 220 grit sandpaper and it was too big and bulky for 95% of the spots that I was trying to sand. I tried 0000 steel wool but found it very labor intensive. Finally I ended up using a toothbrush size wire brush that I have had for years. The bristles weren't soft but certainly not stiff. Definitely softer than the run of the mill hardware store wire brush. This worked great. The bristles could reach down in the spots that were pitted but the bristles didn't scratch the enamel on the kettle. Next up was the masking tape. I believe it was swamprb on here that said you need a chitload of masking tape. I am here to tell you that a chitload equals one full roll of 1" wide roll of 3M masking tape that is 60 yards long. I masked anything that wasn't getting painted. When I came to some areas that had say 8 small spots of rust all clustered together I masked around the group and painted with Rustoleum Engine Enamel good to 500 degrees. I wanted to use the Rustoleum High Temperature Paint since that is good to 1200 degrees but that only comes in flat black. Next time I will take a small artists brush and spray in to a small cup and dab the paint in to those tiny spots. Those "groups" of spots now show a difference in shine compared to the enamel so I think the artists brush is the key on the small spots. Larger spots, well they are what they are, tape around them as close as possible and do the best you can. Once you remove the tape (I waited 2 days) I used 0000 steel wool to blend the transition from paint to enamel. Only sand that immediate edge, not across the entire painted surface since the steel wool will take the gloss finish off the painted area making it stand out from the enamel even more. Next up I cleaned the entire kettle again to get any foreign substance off. Then came the application of the polish... which was WD-40. I (carefully) sprayed a little on at a time and rubbed it in with a paper towel. I applied WD-40 to the entire OUTSIDE of the kettle a total of three times. Each time I would spray, wipe off any excess, let it sit for about two hours and then lightly wipe it down again. After the final application I let it sit overnight and then wiped it down and buffed it by hand with a clean cloth.
Next in the process was to make any repairs to the wood handles. I sanded the pieces using 220 grit sandpaper being very careful to not change the shape of them (photos posted earlier in the process). With the wood so dry removing large volumes of handle in each pass of the 220 was easy so be sure to take your time. A little wood putty on cracked wood on the underside of the handles, a little in the slightly stripped out screw holes and the handles were ready to be finished. I experimented on the backs of the handles with lemon oil, teak oil, a leftover oak stain and some leftover satin polyurethane. The poly gave me the color I liked so I put on three coats with a light sanding before applying a new coat.
All of the hardware was replaced with stainless.
I bought two major pieces for this grill. One was the cooking grate. I replaced the rusted one with a new Weber grate with hinged sides. The old charcoal grate I kept and used after a wire brush attached to my drill had a good long go at it. The second purchased piece was the Weber kit for the entire bottom structure. Below the kettle is all new. It was about $27 with shipping and after having the kettle come out nice I knew I had to spend the money. I am so glad I did, it was worth the money spent. All told I spent $50 but the fun I had researching and restoring this grill was well; priceless. The real fun will be this Sunday when I toss some lump in the starter and cook some fresh corn on the cob (without the husks & later sprinkled with chili powder and a wedge of lime squeezed over top) and some Mexican Spiced rubbed ribeyes that will be topped with a disk of lime butter while resting.
 
Great work, and thanks for the full write-up. It looks fantastic! (Post some pron of that first meal when it's done, will ya?)
 
Are you sure that is a Weber? I have one like that but I don't think it is a Weber. I don't think Weber used an indent molded into the bottom half to hold the grate in position. Can others look closely at his picture and verify? I will be glad if I actually do have a Weber as it was just given to me and is immaculate.

I'm no Weber expert, but that looks identical to my Weber. And I mean identical. Think the rust spots even look identical
 
Nice restoration Dave, can't wait to see some of the cooks you turn out on that baby :thumb:
 
Looks great. I think maybe I outta start hitting Craigslist or some Rummage Sales for a five dollar grill....
My wife's gonna kill me.
 
Awesome job! The Weber Kettle Appreciation Society thanks you.
 
First meal off the newly restored Weber Kettle. Grilled corn (no husks) seasoned with Chili Powder & fresh lime squeezed over top along with Mexican Spiced Ribeye Steak topped with a Lime Butter. That isn't steak sauce on the plate, that is juice from my Ribeye that is resting before being consumed. There was also a salad...but who wants to see that! There might have been some cold adult beverages to help wash it all down too.
 

Attachments

  • Dinner.jpg
    Dinner.jpg
    74.6 KB · Views: 450
For the "brushed" aluminum....it can be buffed. Try a mcGuires brush ball and some fine scratch remover. The drill will make it easy. I;ve seen folks take brushed aluminum forks on MC's and make them shine!
 
No pron photos but I am happy to report that the restored kettle is fully broken in. On Saturday that 22.5" kettle was loaded with 10 Burgers, 7 Brats, 3 Big Red Smokies and 6 Hot Dogs; just enough room left on it to shuffle things around as needed.
 
I scored some wooden handles that I put on my WSM. They have the weber logo imprinted on them. Should i stain them, or will that make the logo look worse? Also if you recommend to staining them, what brand, type of stain? Never stained anything.

DSCN4701.jpg
 
I scored some wooden handles that I put on my WSM. They have the weber logo imprinted on them. Should i stain them, or will that make the logo look worse? Also if you recommend to staining them, what brand, type of stain? Never stained anything.

DSCN4701.jpg

I stained mine after I sanded them, and used an oil based stain with a reddish tint to it. It was some stain that my neighbor used on his fence, that was the right color. I dipped the handles into the stain and let the stain soak in, then let them dry.

My Weber logos were long gone, if they were ever on there to begin with.

I had an extra handle, so I put it on my new WSM.

CD

Do you think the staining would have a negative affect on the logos?
 
scottfry11: My kettle does have an indent for the grate. I can share with you what I have been told and what I have read online as those are my only sources of info thus far. Hopefully someone on here with more Weber knowledge than I can verify or debunk that info. The grill came from my mother in law where it has sat in her basement for years. She said it doesn't say Weber on the grill (and it doesn't) but the orginal box said Weber and she was told when she purchased it that it was a "second" so sold without logos. The vent has a "J" stamped on it and it looks like a Weber (except I will now check out this indent you noticed - thank you). Anyway I read online that Sears sold grills for Weber as did other stores that sold grill under the dept. store brand but they were made by Weber. Hopefully all that info I was basing my claim on is true as I would love to add this 22.5" to my squad.

I have had a couple of Sears Economy grills that were sacrificed to the UDS gods!

Does yours have an ash pan that sits under the charcoal grate like this one??

IMG_1166.jpg


IMG_1164.jpg


IMG_1165.jpg


This addition turns the kettle into an effortless low n slow cooker.

Sears Economy Kettle
http://www.weber.com/publicschematic/view.aspx?model=1343

I have also had one like yours with the indented grate holder, and I had cut it off to make a UDS kettle lid flange.

Nice rehab.
 
Back
Top