• working on DNS.. links may break temporarily.

The *OFFICIAL* Throwdown Photography Tips Thread

I've got on DSLR and getting a new one (Canon 7D). I was a professional sports photographer, but STILL subjects is new to me. I just need to cook on weekend and practice some photos.

Trying to work through:

1. When (like never) I can/should use the flash on camera?
2. Lighting. Direct light vs Flash vs Freestanding lights
3. Composition. Looking at getting more layout effort into the end shot.
4. OFF of the Automatic mode. I'm lazy, it's easy to use the auto settings, but I need to put more time/effort into changing Apeture, ISO, etc.

Appreciate all the help. I was one of the ones that asked for this thread and it's VERY helpful.

Russ

1. If you can use your flash off-camera, with a cord or wireless device, you can do a little "studio " set up.

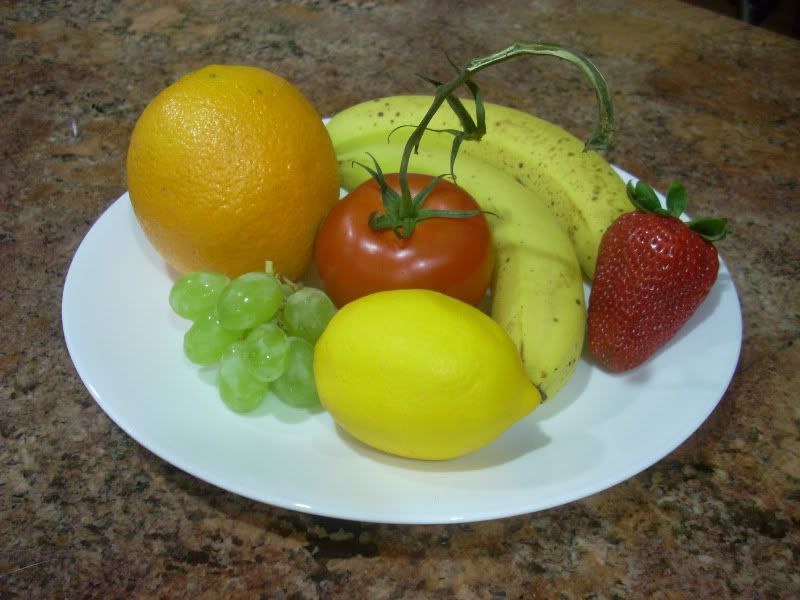
2. I have a 24X36 lightbox I use for food, but a good source of natural (indirect) sunlight works fine. Given the choice on all of my photography, I like to work with Mother Nature, if possible. I only break out the strobes when I need to.

3. Look at professional food photographer sites and mimic what they do. After a while, you will "get it" and start composing better shots automatically.

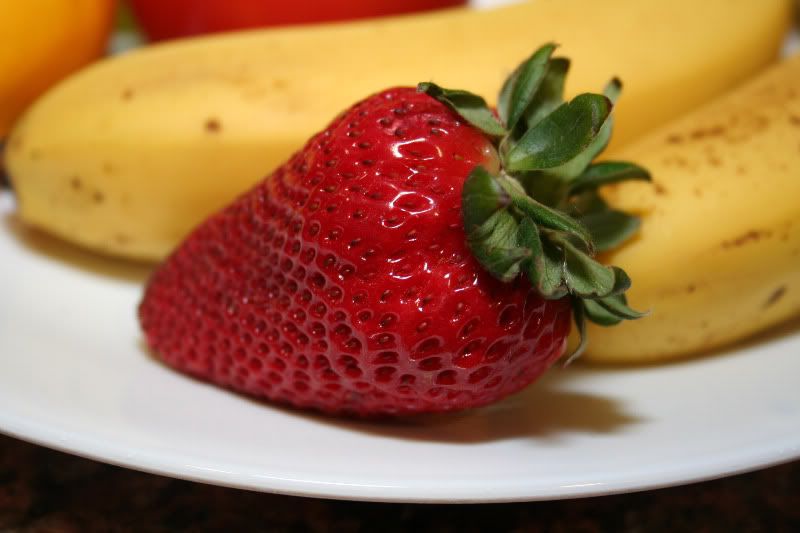
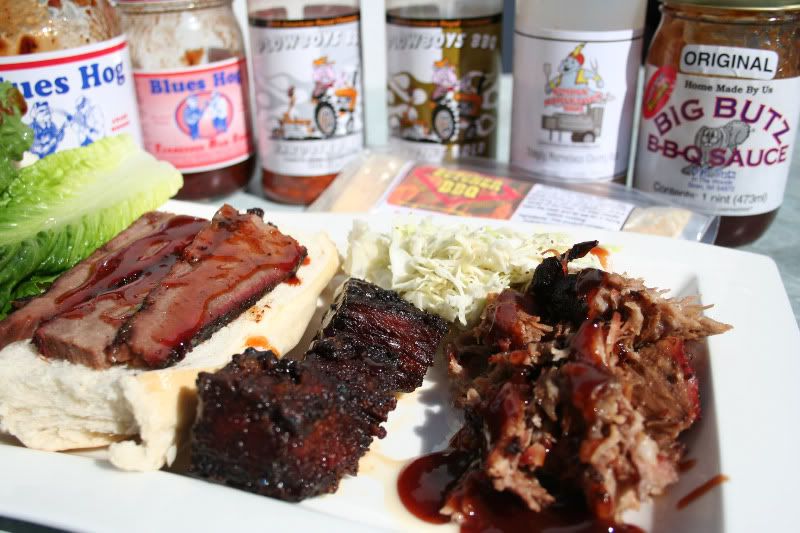
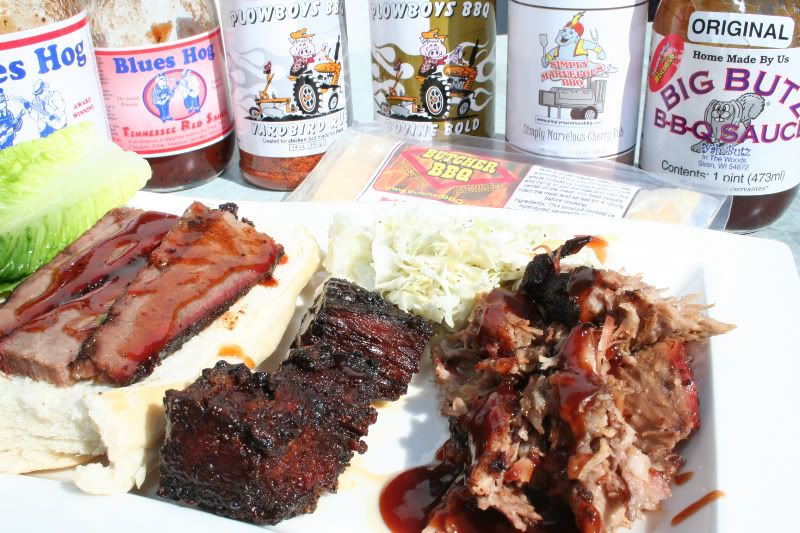
4. If you are going to use automatic, as I often do, then use aperture priority, and let the camera choose the shutter speed. That way, you can get creative with your depth of field -- choosing to go all sharp to highlight several courses/beverages, or focus on the main ingredient, letting the "supporting cast" go soft.

Be careful how much you change your ISO. Expensive professional cameras can handle 3,200 ISO and still make a nice image. Most consumer cameras can't... yet. Experiment to find out how far you can push it without too much noise.
 
I think there’s some really great tips on this thread. So many that I’m having a hard time trying to think of how I might contribute here.

After a couple of Throwdown wins I figured I might be doing something right with the pron so maybe I can give a little back to the Brethren here. Please keep in mind that I’m not a professional photographer but rather an amateur photographer who spent a couple of years shooting pics back in high school as a yearbook photographer and later took a class in college.

One thing that no one seems to have touched upon here is focusing (probably because it seems so basic). I know several people that don’t know how to properly focus or have no idea that their cameras need time to focus properly. The other day my friend told me that he wants to replace his 2-year old point & shoot because it doesn’t take clear pictures. I asked him if he just aims and pushes the button down fully in one motion. He confirmed that is exactly what he does.

I proceeded to tell him how to focus his camera properly by only pressing the shutter down halfway and looking for some indication in the viewfinder or display that should indicate it is focused before pushing it the rest of the way.

Here’s a shot of the display on my relatively cheap 4 yr old Nikon Coolpix L11 point & shoot:

IMG_7584.jpg


When it’s locked in-focus, the AF (Auto-Focus) indicator is green and the brackets in the center are solid.

I asked him if he pays any attention anything blinking or flashing on his display or viewfinder (answer “no”). Now I know he is not alone as someone who lives under my roof and who shall remain nameless (hint: not me or the dog) has these exact same habits.

Before I say anything else that could get me in trouble, let’s move on to another area. Let’s talk about lighting. Now like most people here, I think food looks great in natural light. Unfortunately, many of us find our throwdown entries are for dinner and come off the cookers when the sun has set. At that point we’re taking the dish inside and subjecting it to overhead lighting, built-in flashes, mounted flashes, etc… Once you’re inside it helps to have multiple options and to take a lot of different pics using the different options so you can see what looks best.

To illustrate some different lighting options, here’s some examples using of a plate of fruit I assembled:


Using my Point & Shoot


No flash (but on a tri-pod - no way this shot would have been this clear without the tri-pod):
DSCN4201.jpg


Built-In Flash (looks a bit overexposed at this distance):
DSCN4202.jpg


After a quick exposure compensation adjustment (there’s a +/- button on my point & shoot):
DSCN4203.jpg


Using the normal flash settings but stepping back a couple of feet and simply zooming in:
DSCN4205.jpg


Using my DSLR (Canon Rebel XT – 6 yr old entry level DSLR)


Built-In Flash:
IMG_7578.jpg


Mounted Flash (speedlite 430 EX):
IMG_7579.jpg


Mounted Flash with a diffuser (softens the flash) angled at 45 degrees:
IMG_7581.jpg


Mounted Flash – no diffuser but light bounced off the ceiling:
IMG_7583.jpg


Now the differences in the DSLR shots above are pretty subtle but having a mounted flash gives you many additional options over the built-in flash.

While on the topic of equipment, I’ll focus more on what I use for my throwdown pics:

DSCN4214.jpg


Canon Rebel XT with EFS 18-55 mm lens
Canon Speedlite 430 EX flash
Sto-fen omni bounce diffuser
Slik Pro 714 CFII tripod

As others above have posted, most food pics look best when shot with the camera at low number apertures and using the Macro program mode – usually a little flower symbol on the point & shoots and DSLRs I’ve used, is one way to set it. If you want to see the minute details this is one way to get it.

IMG_7589.jpg


However, the low number apertures have a shallow depth of field which causes things further or closer away than what you’re focusing on to blur. More often than not, I’d say this is a desired effect but sometimes when you’re so close you could be blurring out parts of your dish that you’d like to be sharp.

Here’s some examples to illustrate:

Taken at f/4.0 – my lunch and dish prepared for the By Brethren For Brethren throwdown – the burnt ends in the center and the slices of the flat look pretty sharp but I really wanted to show off the great Brethren products in the background.
IMG_7347.jpg


F-Stop f/22 – my TD entry – I closed down the aperture which allowed for a greater depth of field and a more uniform sharpness.
IMG_7345.jpg


F-Stop f/4.0 – some burnt ends I cooked the other day, the camera appears to have focused on the right side and many of the ends are blurred.
IMG_7815.jpg


F-Stop f/9 – I closed the aperture somewhat increasing the number of clear ends yet still allowing for some blurring effect.
IMG_7817.jpg


Now in the first shot of the burnt ends, I mentioned the camera focused on the right side. If don’t think I had intended that and apparently didn’t pay attention to which focal point lit up upon focus. As far as I know all DSLRs have many points at which they can focus and in the right modes (I can’t specify a focal point on my Canon when set for full auto), you can specify which focal point to use rather than allowing the camera to decide for you.

In this shot of a flower in my yard, my first picture focused on one of the petals when I really wanted the stamen to be sharp so I selected the center focal point and reshot this.
IMG_7612.jpg


I would imagine there’s other topics that could be expanded upon but I think I’ve rambled on long enough. Hope some of this may be of some help.
 
Good advice. I just use my Iphone camera when I take the pix and use medium file size. it works great for me. I dont break out my pro gear.
 
Never underestimate Photoshop. I love Photoshop.

To illustrate some different lighting options, here’s some examples using of a plate of fruit I assembled:

Using my Point & Shoot, no flash...
DSCN4201.jpg

After a five minute trip to Photoshopland...
 

Attachments

  • DSCN4201.jpg
    DSCN4201.jpg
    97.9 KB · Views: 345
BTW, I wasn't dissing R2Egg2Q's photo, I just don't have a point and shoot, so I had to use someone else's point and shoot photo as an example.

If you can't afford a digital SLR, or the full Photoshop software, Photoshop Elements will do everything I did on the above image, and the software costs less than 100 bucks.

CD

Wow, that looks great CD! I should really invest some time into learning how to use Photoshop Elements for more than just cataloging my photos.
 
Another bump. My compact digital decided to permanently malfunction, so it is time for a new camera. I think I have narrowed my research to the Cannon G12 and the Olympus XZ-1. Both received good reviews, and are priced the same, but I was hoping that some of you photography buffs might give some advice.
 
Another bump. My compact digital decided to permanently malfunction, so it is time for a new camera. I think I have narrowed my research to the Cannon G12 and the Olympus XZ-1. Both received good reviews, and are priced the same, but I was hoping that some of you photography buffs might give some advice.

Phil has a thorough reviews with photo samples of both of those cameras at www.dpreview.com. While I'm a big fan of Canon, the Olympus appears to produce better images at that camera level.
 
NOTE: Try to avoid, if at all possible, shooting your food under fluorescent lighting.

I'm seeing throwdown photos being posted that were obviously shot under fluorescent lights. Fluorescent lighting, unless it is pricey color corrected fluorescent lighting, just doesn't make food look appetizing. It has a narrow, and very green color spectrum.

Your food will come out with a green cast, and the contrast will probably be pretty flat if you shoot under fluorescent lighting. And, even if you correct your photos in Photoshop, your results will not be as appetizing as your food is.

Indirect sunlight would be my first choice. Direct sunlight (from the side) would work, too, although your contrast my be a bitt to high.

Flash works, although it is best for food if you can move the flash off the camera, and point it at the food from the side, and somewhat above the food. That gives you nice highlights and shadows, which gives your food more depth. If you use a flash on top of a digital SLR, Gary Fong's Lightsphere system really does a good job of improving your flash photos. Really, I use it for some of my professional photography, and it works. http://www.garyfongestore.com/flash-accessories.html

Incandescent light will work, but your food may look too yellow, but that is preferable to too green, by a long way. Plus, you can EASILY correct for incandescent light in Photoshop.

Again, avoid fluorescent like the plague, unless you like flat, green food. :tsk:

CD
 
OK, all I have is flourescent lighting in my house (either tubes or CFL). So it sounds like late night cooking (like the SPAM loaf) is not going to work any more!

Although...for SPAM, green isn't really such a bad thing is it?
 
I think from now on I'm going to do all my shots under fluorescent lighting and then send it to CD to fix. Those are some fine skills and I'd hate for them to go to waste. :thumb:

I sharpen, adjust contrast, and color correct for free at first, then I charge stupid-high prices to keep doing it. I call that Crack Dealer Marketing. :cool:

CD
 
Hey CD, Great info in this thread!

How about some discussion on proper methods of how to sharpen, adjust contrast, and color correct, or is it simply to just keep messing with it until it looks good?
 
I can't really add anything to caseydog's excellent advice, but seeing that this thread has come back up, I'll add a snapshot of my lighting mock up. CD is right in that you DO NOT want to use fluros for food unless you know how to deal with them. I don't shoot food, but just the same, here's the lighting rig I made up.

11mb1i9.jpg

Interesting... what are you using for bulbs in those lights?
 
OK, all I have is flourescent lighting in my house (either tubes or CFL). So it sounds like late night cooking is not going to work any more!

I too have come to the conclusion that late night photos just do not look as good as the ones I can take outside during the day. :tsk:
 
Back
Top