• working on DNS.. links may break temporarily.
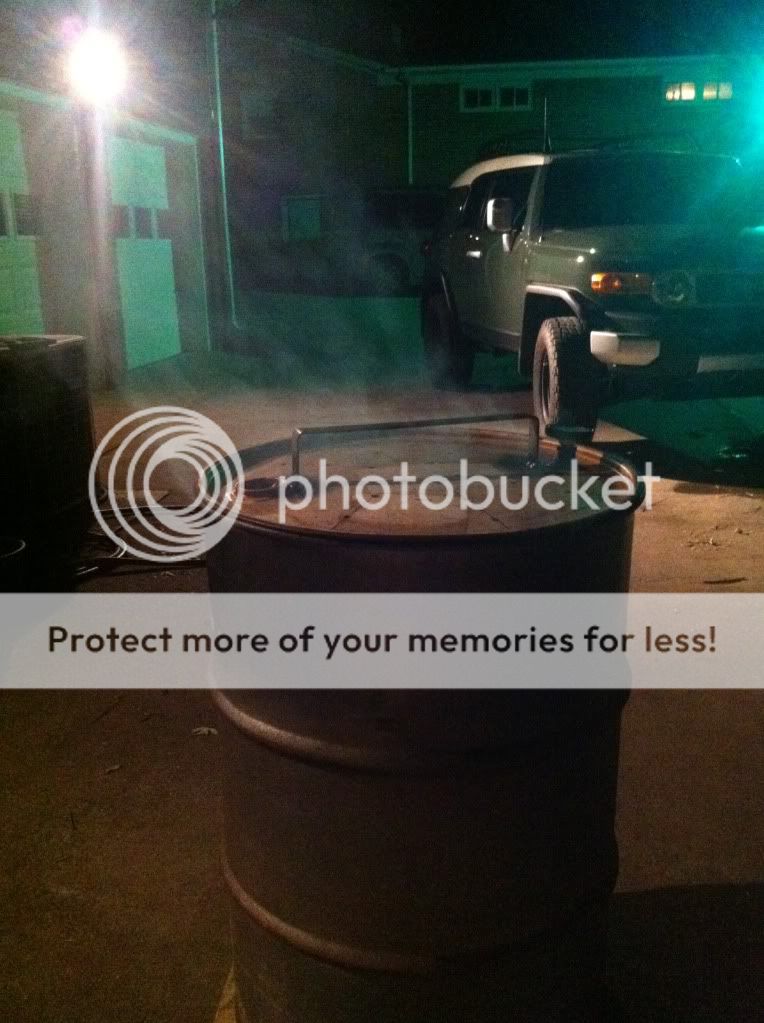
Well I couldn't let it sit without some meat on it.

Threw some hot Italian sausages on for dinner, had a little trouble keeping the heat regulated and it seemed to take forever to get the sausages cooked (3 hrs???).

Found two problems with my thermometers.

#1 The small thermometer I was using to measure internal temperature of the sausages reads low when you just stick the tip into the side of the sausage, jam it in from the end a couple of inches and it reads much higher.

#2 The thermometer I was using in the drum is from my turkey fryer. Decided to see how accurate it was and boiled some water, I didn't know water boiled at 250 degrees. :tsk: If I was running the UDS at 250 on the thermometer it was more like 212 degrees. That might be why it was taking longer then I thought it should have. Good news though the small thermometer I use to check the temperature of the meat was spot on.
 
Well learning more as I go.

Yesterday it was ribs on the UDS. Unfortunately I had tickets to the Redskins vs Vikings game so I tried talking my 19 year old son through the process. Thought I had him started before I left for the game, figured I would have ribs ready for me when I returned. Son left the vents wide open, melted the stick on fridge magnets, got the drum up to at least 350 for a couple hours, then asked me when he should put the ribs on. Finally got him sorted out over the phone and the ribs at the right temp. I'm guessing because of the high starting temp he ran out of charcoal. Ended up finishing the ribs in the oven. But they tasted great.

Today went a bit better. I had a package of 2 pork shoulders from Costco. Woke up about 7:00 got the meat out, had the #2 son inject some apple juice and put the homemade rub on the meat while I got the fire started. Had the meat on the fire before 8:00. Got the UDS settled down between 225 and 250 where it stayed nicely all day.

But even after 12 hours the meat thermometer was showing only 170 internal temperature. It was smelling too good and I was getting hungry for a late dinner so I pulled them off the grill, let them sit for a little while and started chopping one up. Made some awesome sandwiches with some basic Carolina vinegar sauce and just a touch of Sweet Baby Ray's.

Family was happy with the results of all three cooking attempts so far.

Here is the pron of the pork shoulders on the UDS.

utf-8BSU1BRzA1ODcuanBn.jpg
 
Nice PRON!
My first attempt on the UDS with Boston Butt went kind of the same as yours. Didnt give myself quite enough time and everyone was staving so off it came early and little or no rest but was still great.
 
Last edited:
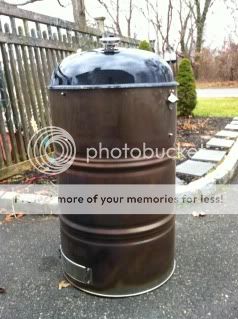
Here's the UDS I built about 5 months ago. I've done about 50 cooks on it since then. It makes the best BBQ I've ever had...well except for my favorite BBQ place so I won't name it because I don't want to start a battle.

Here's a pic from the first burn/smoke test.
GDS.jpg


pics from first smoked tenderloin
securedownload-9.jpg

securedownload-8.jpg


and the first brisket
securedownload-7.jpg

securedownload-11.jpg
 
I started a thread in Q-talk about this but also wanted to share it here too.

In the UDS thread and other places people have mentioned getting expanded steel from Amazon. The prices always looked good but based on the description of the items, it was hard to really tell what you were getting unless you know metal and take the time to compare the specs. So anyway, I bit the bullet and chose one that I thought sounded similar to what a lot of people get from the local hardware store in the 2'x2' cuts like the photo below that usually run around $20.

expandedmetal_lg.jpg


This is a 3/4" (the open space) as opposed to the 1/2" many stores also carry which is much smaller. So back to Amazon I found the following which I was guessing was pretty close. Now the best part is it is 4'x4' and only around $30 with free shipping. So, you get 4 times the metal for 1.5 times the price. :clap2:

Carbon Steel Expanded Metal Flat Sheet, 2.1" LWD Diamond Openings, 0.075" Thick, 74% Open Area, 48" Width, 48" Length
Amazon.com: Carbon Steel Expanded Metal Flat Sheet, 2.1" LWD Diamond Openings, 0.075" Thick, 74% Open Area, 48" Width, 48" Length: Industrial & Scientific@@AMEPARAM@@http://ecx.images-amazon.com/images/I/415BlkVVzTL.@@AMEPARAM@@415BlkVVzTL

It arrived the other day and I finally had a chance to compare it to what I have used in the past. Granted, is is no where close to the heavy duty stuff you can get from a metal fab shop but I think it will do nicely for charcoal boxes, reinforced grates/racks, and any number of other applications.

It comes shipped between two pieces of cardboard that are stitched together around the edges.

009-1.jpg


Here are some close-ups of the sheet.

010.jpg

011.jpg


I happened to have a little bit of scrap from one of the old sheets from Home Depot. I clamped it on so you can see some of the slight differences. Overall it is pretty close to the same size and spacing.

012-1.jpg


Not the best pic but the Amazon sheet does seem to be a tad thicker in gauge.

014.jpg


This photo does illustrate the slight difference in spacing. Notice at the top the two are lined up pretty well. However, as you move down, the alignment is off dramatically.

016.jpg

017.jpg


Overall though, I am not that worried about the slight differences. I just wanted to show it in case anyone wondered. Hopefully this will be helpful to future UDS builders as well as many others that may be in the market for expanded metal and want a good deal.
 
That looks like it will work fine. By comparison, I use #9, which is about .110 thick, but I haven't seen any deterioration in two years of use. I grill a lot with my UDS, which means the fire basket is exposed to higher temps, but it doesn't seem to bother it.
 
Finally finished her.

I was surfing CL and found a Stainless Steel Drum about 2 yrs ago. I bought it for $50, knowing it was probably worth close to that in scrap.
It held Tea-Tree Oil that said cosmetic grade (?), no liner. The process has taken about a year, you can see snow from last year on the ground in the lid removal exercise... Side note: A drum deheader will not work on a SS drum. The steel just stretched.
IMG_0372.jpg

2 Blades Later:
IMG_0375.jpg

Burn out last summer
IMG_1265.jpg

IMG_1268.jpg

Fire basket, the Expanded metal is too light for any longtime use. I was able to get this scrap for free.
9ab1041c.jpg

All hardware it stainless
7abcd5f3.jpg

Themometer, I need to make a spacer to increase space between the vent holes and the dial.
b0bb465e.jpg

This is a SS BGE air vent I bought on ebay.
bded837c.jpg

A neodymium magnet will be installed on the lower nut to catch caps.:thumb:
b87f0dea.jpg

I need to get the enamel off the lid so I can repaint it.
80836401.jpg

I have a course cup brush for my cutting wheel, I may go over the outside to make it look more consistent and try to use that to get the enamel off the lid. The discoloration is from the burn out, I used a leaf blower to stoke the flames.
I'll taking it out for a spin later on, a simple cook. sausage.
I'll post pics.

Thanks for all of those that have posted in this thread. There are some seriously talented people here sharing knowledge and experiences.


IMHO you are not going to get an accurate temp with your thermometer that far from the grill. But then again, i've been wrong before. I would put an oven therometer on the grill and compare the two temp's.
 
IMHO you are not going to get an accurate temp with your thermometer that far from the grill. But then again, i've been wrong before. I would put an oven therometer on the grill and compare the two temp's.
Thanks, going through the side would have been a real PITA when it come to moving grates. I'm using it for a benchmark.
I'll use a digital thermometer to figure out the differential until I get used to it. On all of my WSMs I have one on top, and the grates are usually -15 to 20 degrees cooler.
4c626d7f.jpg

ddd1bf16.jpg
 
Baffle

Has anyone got any pictures of a baffle they made for your UDS? Was thinking of trying one. Trying to figure out how to make and how to put it in the cooker.
 
IMHO you are not going to get an accurate temp with your thermometer that far from the grill. But then again, i've been wrong before. I would put an oven therometer on the grill and compare the two temp's.

I built my UDS 4 months ago and put the thermometer on the lid. My first smoke was not what I had hoped it would be. I had a tough time getting it up to 250. My next time around I added a oven thermometer that sat on the grate and learned there was a 60 degree difference. The main problem was I needed to open the lid to check the temp. Luckly Santa brought me a wireless dual thermometer for Christmas. One probe checks the meat, the second measures the temp on the grate...life is good!
 
I was using the dome lid vent hole for the thermo for a while but decided to just permanently mount the short stemmed thermo opposite the vents. I realize the actual reading is not accurate depending on how far you're into the cook but I've learned to 'gauge' the thermometer so I know where I'm at during the cook.
 
Has anyone got any pictures of a baffle they made for your UDS? Was thinking of trying one. Trying to figure out how to make and how to put it in the cooker.

I just wrap a 16" pizza pan in foil and lay it across the charcoal basket. I'm sure there are better and fancier ways to do it, but it works really well and suits my extremely lazy disposition.
 
Has anyone got any pictures of a baffle they made for your UDS? Was thinking of trying one. Trying to figure out how to make and how to put it in the cooker.

I don't have my picture handy, but let me see if I can explain my version which works great.

I use a cooking grate and attach to it pieces of angle iron (or aluminum).
(https://www.google.com/webhp?source...sb&fp=a1bc1589ec616832&biw=1590&bih=965&ion=1)

I used the pieces that are about 1.5 inch wide measured from the corner on each side. If you lay it down in the shape of the "A" it would measure almost 3 inches wide. I used about 4 feet and cut it into 4 pieces to place on the grate.. the 2 middle pieces of course are longer than the 2 on next to them. The lengths I made to go as long as possible to not go past the diameter of the grate. The larger size is good for this; fewer pieces to use, however you need a serious saw blade to cut this unless you can get your hardware store to cut it. Grab a grate to try to imagine how to lay them down to determine how much you need.

Then I placed the pieces almost next to each other, leaving a little bit of space between. What this does is make most of the heat come up along the sides of the barrel rather than straight up. And because of the "A" shape and slight spacing between, it allows the meaty goodness drip into the fire which is very important in a UDS. Finally, using iron makes it retain the heat and helps make a nice even overall cook. Aluminum will work fine too, just won't retain the heat as long but not sure how much that matters.
 
What to do with UDS Spare Parts??

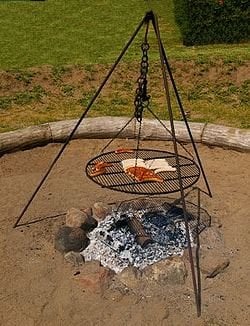
Drum heads...my wife got me the Planet Barbecue book for Christmas. I did a quick scan and found my next project. Only problem is that I will have to officially change my name to the Schwenkermeister!! I've got enough spare parts lying around to fab up a German Schwenker Grill to go along with my UDS. I'm going to do it right by adding the airfoils below the grate to get constant rotation from my fire pit in the backyard. I've included a pic below of what a basic one looks like. Seems like the perfect portable grill/smoker.
250px-Schwenkgrill_neu.jpg
 
Last edited:
Drum out of round.

After all the work, my drum top is a bit out of round. Think I can squeeze it with a clamp the other way to get it to stay round?
 
Well mostly finished my first UDS. Put in some pipe nipples and caps as well as a ball valve on the inlet holes.

Cooked some boneless chicken thighs wrapped in bacon last night for dinner. Worked very well. Only took 1 1/2 to 2 hours had them up to 180 IT. Tender and juicy inside.
 
Back
Top