• working on DNS.. links may break temporarily.
UDS Testimonial

Hi all,

I started re-reading the last 30-40 pages of this thread to review some of the new ideas, and I have to say that this thread has become an amazing source of information. If only someone could create a master cross-reference to the designs, and modifications. A monumental task, no doubt.

I built my first of 6 UDS's about 2.5 years ago using elements of Norcoredneck's picture plan, circa page 3 of this thread. That thing is the epitome of KISS. I was too a doubter of this simple plan, but I have to say that 3 years later, my original is still going strong. I have built and sold the other 5 over the last summer and fall, and people love them.

Maybe I just got lucky in my implementation, but I have most recently done a couple cooks of pork butts, with virtually no tinkering whatsoever with temp or intake settings. These things work rock-solid. I use a expanded metal charcoal basket (15 inch diameter) wired on top of a weber charcoal grate. It is 12" tall. If I fill it 3/4 full, and use 12-14 red-hot coals to start my minion method, I can obtain 225-250 in my UDS for as long as 14-16 hours depending on outside temp. I most recently went 13 hours with the temp hovering between 25-30 degrees F, in Minnesota. It's amazing.

I have also built a intake blower using a design from righteousdog, and that thing works awesome too. It maintains my temps overnight within 5 degrees, and I don't have to check on it AT ALL, while I am peacefully sleeping. I think I have spent about $175 total out of pocket on my original UDS, including the more recent blower attachment. And to think, 3 years ago I was wanting to drop $1200+ on a XL Big Green Egg. No way.

Best of luck to you all.

SmokinDave
 
Thanks all for the replies. I was just at Harbor freight and I wish I knew about the clamp. Will have to snag that on my next visit.

I'm racking my brain about this diffuser thing. I know I could easily drill some more holes, add another grate for a diffuser and figure out something to use if I want to. But what are most people doing?? Does the meat taste that bad with the fat dripped smoke? I have read so many post on so many different forums and I'm indecisive.

My other 2 smokers are an offset and a char broil fat boy water smoker; like a 18.5 WSM and I use the water bowl filled with sand for a heat sink. I'm not a smoking newb but I have never done a UDS direct heat smoke. TIA

no diffuser needed. I have a weber kettle style lid, so I run two cooking grates one is about 17 inches above the top of the charcoal basket, and the other is 6 inches higher, roughly. I cook with no diffuser, no water pan, nada, and it all works great. Look on page 3 of this monster thread for Norcoredneck's design plan. If you stick to that, you will not be disappointed. I have not read your original posts, so pardon me if I missed on some of your earlier points. But my opinion, is NO diffuser needed. Just let the drippings help flavor the meat.
 
Last edited:
Thanks Dave. Yes I just built my first one using the KISS method and I'm about done. Just trying to decide about the diffuser. I really dont want to but I will do a few cooks and see what I think. This thread is awesome.
 
A quick question for the UDS pros: lets say that your UDS is running at 300 and you wanted it to run at a lower temp. How long would it take you to lower the temperature to 250 degrees?

I am asking this because last night I completed my UDS but when I was doing some trial runs, It took forever for the temp to drop even with all intakes closed but when I closed the exhuast, then the temps when down in like 30 minutes. Is this normal or do I have a leak somewhere?

No expert, (my dad always says X is a mathematical symbol used to denote an unknown quantity and a spurt is a drip under pressure).

By my UDS will continue to run about 175 with the intakes closed and the exhaust vents open. If I plug the exhaust vents it cools down in about 45 mins.
 
I think the time it takes to make temp changes is also affected by the number of actively lit coals you have going.
 
Two weeks ago I smoked 3 Boston butts totaling 31lbs. I was on a frozen lake in the middle of our town where we hold our annual winter festival. I got to the lake at 4am it was -33/-39 windchill I put up a plastic tarp as a windbreak and fired up the UDS. at 5am I had the drum temp stabilized @270 and put on the butts. I put two on the bottom rack and one on the top rack. Not ever having cooked on a UDS in these extreme temps, I decided to keep it at 270. I looked at the butts once at 12noon. The temp stayed rock steady all day @270. I had a temp probe in one on the bottom rack and one on the top rack and at noon they were both about 180. I pulled them at 3pm@195 and wrapped them in foil to rest. after an hour and a half, I opened them up and pulled them apart, they were absolutely perfect. I can't say enough good things about my UDS, I was skeptical about the performance in harsh temps,but now, I'm more of a believer than ever before.
 
I hope to start my first UDS build this weekend, I have everything collected I believe or will have it all tomorrow when UPS arrives. Just waiting on some expanded steel, I ordered a 48x48 sheet from Amazon for $44 delivered via 2 day service, gotta love Amazon Prime!

I had originally picked up a couple food grade drums that had the dreaded red liner for $20 each. Then thanks to this site I found Orlando Drum & Container (http://www.orlandodrum.com/) and decided to go with a couple refurbished barrels. I sold the other 2 barrels for $25 each and for $40 each I picked up 2 barrels that were spotless inside and made of substantially heavier metal, they feel to be about 10 lbs heavier per barrel than the previous ones. It was well worth the extra money not to have to deal with the liners and to get heavier gauge steel. My new drums are 22.5" diameter so I am going to add a steel ring to one of them to use with a Weber lid.

I am undecided on what to do with the 2nd drum, I may sell it to help pay for the first. I can always go after a couple drums in the future if I need another.

"sleep on it"
I made my first UDS this past Fall. I'm hooked! I'm making my second one as I write... Just keep your second drum until after you've smoke a couple times with your first. You may have the bug too!

Good luck with your build!
 
Thanks all for the replies. I was just at Harbor freight and I wish I knew about the clamp. Will have to snag that on my next visit.

I'm racking my brain about this diffuser thing. I know I could easily drill some more holes, add another grate for a diffuser and figure out something to use if I want to. But what are most people doing?? Does the meat taste that bad with the fat dripped smoke? I have read so many post on so many different forums and I'm indecisive.

My other 2 smokers are an offset and a char broil fat boy water smoker; like a 18.5 WSM and I use the water bowl filled with sand for a heat sink. I'm not a smoking newb but I have never done a UDS direct heat smoke. TIA
Basically the meat taste like it was cooked on an open pit. If you've ever had bbq from a place that uses open pit to smoke on you know what I mean. Its pretty good eats!
Lawdog
 
SawdustguyExactly! It can be the fugliest grill on earth but if you can cook good Que with it said:
lol If you don't like the looks of my pit, don't look at it so much!
 
2012-02-29


2012-02-29


2012-02-29


2012-02-29


Here she is. About done; need to do a couple of things like paint the lid, install thermos & ball valve. Trying to decide if I want to keep the lid red. I forgot the brand of the paint but its caliper red or something. Speaking of ball valves, I was at lowes and they had 3 3/4" valves on their clearance shelf for some reason so I picked up 3 for $18. Perfect as I'm going to build 2 more.
 
Nice build! The 2 exhausts in my opinion work better to prevent the heat escaping too quickly up a shoot. Though your exhaust vent pipe length might still cause it to "suck" out. It'll be great, just will burn more coals than an average UDS.

Regarding something to diffuse with: Don't stress it. Run it like it is first. When you put big cuts that stay for a long time, try putting the FAT side down if doing a brisket to act as a shield from the direct heat. Pork butts I do fat side up because they are just a lot easier to cook.

But the thing I've done multiple times now (meaning multiple smokers I've built) is to put bolts down fairly low to put a cooking grate on. Down at that low I might smoke a whole chicken because it works better at higher temps. But when doing something else, leave that grate down there and just put something on top. Perhaps some AL pan but punch holes in it. It's most important to let those juices drip into the fire. What I do I on top of that grate I lay down some angle iron (or angle AL) pieces close together. It allows the juices to drip into the fire, but the main heat is forced to come up out through the sides. It helps stabilize the temp throughout the drum nicely.
 
Here is a pic of my UDS. Pig Skull and Cross Bones.
IMAG0057.jpg


I made the stencil in MSpaint. Feel free to use it for your own smoker if you like it.

Stencil2.jpg


I cut it out with a razor on a cutting board and used some 3M spray to attach it to the barrel. Then just mask off the rest of the barrel and spray away!
 
fyi Big Lots is doing their 20% sale this Sunday for those who want to pick up their 21.5" kettle grill for parts
 
Hello Everyone!

I was going to buy my brother a smoker for his new house, and was looking at those cheap offsets at Home Depot. After reading some bad reviews and finding this thread I decided to build a couple of UDS's.

I read through this entire thread (which has more pages than any book I've ever read). It's funny how a couple of people were complaining about its size at the 60 page mark.


I bought 2 drums off craigslist and got to work.
qmqeNl.jpg


I followed the basic no-weld charcoal basket plan, using a pizza pan
UQBySl.jpg


GJcgjl.jpg


Finished product
UxPhNl.jpg

They both held temperature stable. But the one on the right has too big of a gap on lid, and the charcoal didn't die after I closed the valve and capped the exhaust. But nothing a little love with a hammer can't fix.

I seasoned it using a spray bottle with canola oil and threw on a fatty. I stuffed it with jalapenos, cheddar and cream cheese.
f9YX0l.jpg

Sorry no cooked pics, it was gone before I even thought about it.

Next time I will definitely buy new barrels to save time.


Thank you everyone!
 
I did my seasoning/test run yesterday and I'm very impressed. Got it up to 400* for a little while just to give it a nice burn then dropped it down to 225* and put on a fatty. Turned out awesome but had to do some tweaks w/ the UDS. The temps kept rising even when I had everything capped. Here were my issues and even though this was my test run and learning I'm loving this unit already.


I didn't have the best conditions for cooking; wind gusts easily over 40mph, a PIA for sure but I wanted to do my seasoning Sunday. I did about half load of charcoal in my square basket (12x12x6) and put about 8 lit coals on top minion method style. Had all the valves open, and I swear I hit 225* in about 10 mins. Very fast. I wanted to get a nice burn so I took it up to about 350ish and it went up to about 400*. At that point I started capping the valves and I wanted to bring the temp down to 225-250*. However the temp would not budge. I had all the valves closed and then with the wind blowing as hard as it was it dawned on my that maybe it was circulating from the exhaust pipes down into the smoker. So I got some aluminum foil and I capped one exhaust pipe completely. That did it; the temp came down fast. So is that possible that my dual exhaust pipes could cause that issue? See my pics above, but the length is about a foot but the opening is on a bias and is wide.

I'm hoping to do another cook this coming up weekend and hopefully it will be in good conditions and I can do another test. I would like to avoid having a tin foil cap on my exhaust as I like the look. Also; my next 2 builds will have to be the same way as the tops have the same holes unless I cap one some how and one stack.

Also I must have some gigantic barrels because I went and bought a 22.5 kettle at big lots to use for parts and its too small to use. I measured about 24ish" in dia.
 
Howdy all,

Thought I'd add my UDS build to this massive and treasure trove thread.

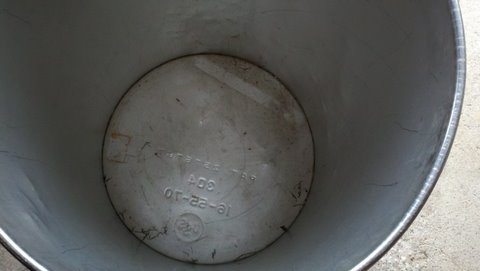
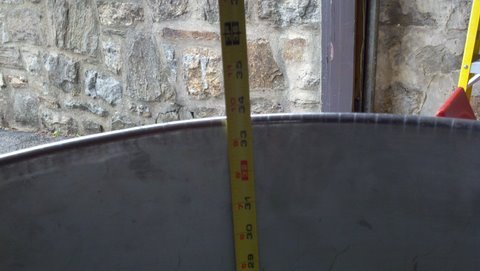
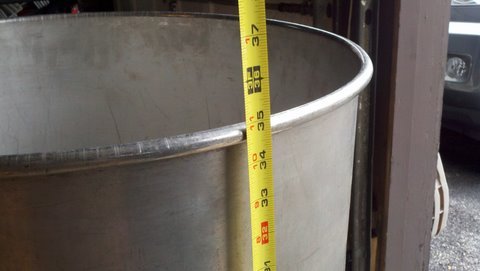
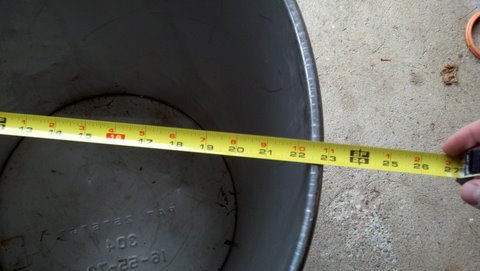
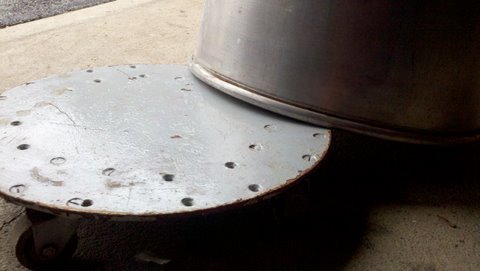
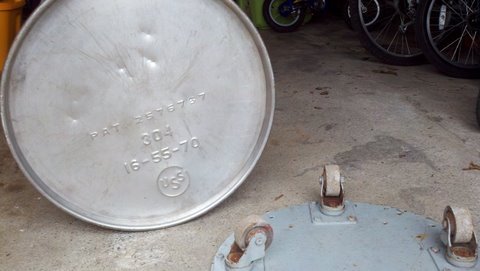
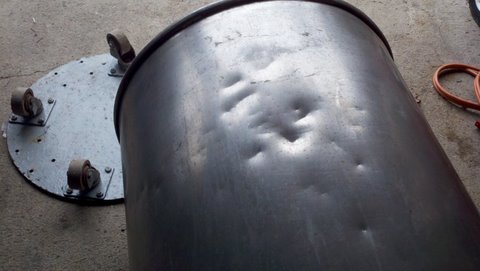
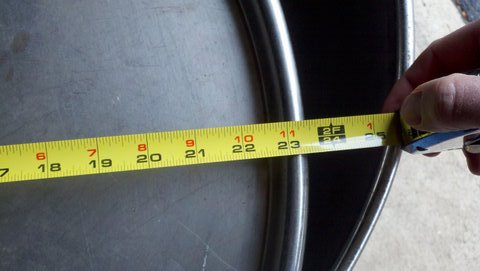
My barrel is stainless and at least 40 years old. Came out of a chicken soup factory originally. It was handed down to me so I have a bit of the history.

Anyway, here are some before pictures. Until I find a donor weber, I'm going to use the flat lid. Since it'll mostly live outside I was thinking of a vent pipe arrangement. Planning a standard layout otherwise so there will be three 3/4 intakes (one with a valve) but here's my first question about the top vent...

Would one 2" OD vent on the lid suffice? There's no bung hole on the lid, it's smooth, so I was thinking of adding a flange then threading on a pipe (8-12" or so) which I can then thread on a cap to keep it weather tight or just shut it down.

Would anyone advise against this? I've read probably 75% of the posts here and searched too but can't find something specific enough.

Thanks a bunch for any advice.
 

Attachments

  • Drum interior.jpg
    Drum interior.jpg
    40.3 KB · Views: 876
  • Drum interior height.jpg
    Drum interior height.jpg
    57.9 KB · Views: 876
  • Drum overall height.jpg
    Drum overall height.jpg
    47.6 KB · Views: 877
  • Drum ID.jpg
    Drum ID.jpg
    56.7 KB · Views: 879
  • Base.jpg
    Base.jpg
    52 KB · Views: 880
  • Drum bottom w. base inverted.jpg
    Drum bottom w. base inverted.jpg
    58.5 KB · Views: 879
  • Drum dings.jpg
    Drum dings.jpg
    57.7 KB · Views: 877
  • Lid OD.jpg
    Lid OD.jpg
    24 KB · Views: 875
  • Thanks
Reactions: pwa
A 2" hole right in the middle would work, with just a small pipe of length about 2" as well. More is not needed because it'll be 1 pipe right at the top.

However I would opt to not do that as the heat will shoot up and you'll burn a little more fuel.

My friend and I both have built ones where we have 2 holes on the side of the barrel, each of those holes big enough to thread 1.5" iron pipes. Then do an elbow to go up with another short nipple on it so that you can use the cap (instead of the plug) to close it. These holes on the side would be 2-3 inches down from the top, and I'm referring to the top of the hole. So that the smoke has to come out by going down a little before going out.

This has worked great at keeping things moist inside and evening the temp and being fuel efficient. Plus, if you make the holes exactly opposite side of each other, you could remove the elbows and insert a rotisserie rod through it. Don't necessarily need to use the elbows.

If it's outside, you should either spray it with oil or paint it or use galvanized. The temps will not get anywhere close to hot enough there to have health issues with the galvanized. Painting would be for the outside. The point is to prevent the iron from rusting.

Shopping list for the side exhausts:
1.5 inch iron nipples x 4
1.5 inch iron 90 elbow x 2
1.5 inch iron cap x 2

To drill hole to fit just right, you typically need about 1/4" to allow for the iron piping, so you'd have to drill like 1.75" hole.
 
Back
Top