Project "HUMPTY" — Kamado/BGE Restoration, Vancouver, Canada

Primo Cradle Question - Ceramic Wedgies

Just identified my freebie egg nest as a PRIMO CRADLE. Can't quite figure out how it's supposed to also fit both Kamado-style (round) and oval Primo's too. Was on the Primo website checking what their side tables look like so I can build my own.
cradle.gif

The neighbour said that the cooker sat on the cradle on top of 4 ceramic wedges (at the dog legs). Maybe I'll have to go and look at a Primo in the store to see what he means.

Anyone Primo owners out there who know what these ceramic wedges are for? Levelling the cooker? Protecting the paint finish on the cradle? TIA.
________________
MayDay
Kamado/BGE, Cobb
 
Bakeout #2

After one-week of air-drying the 9 lbs of furnace cement, Humpty got put back together for Bakeout #2 on the weekend.

Both Swamprb (BGE Rescue) and Jim Beam reported the furnace cement bubbled with heat on their repairs, so I decided to keep the bakeout LOW and SLOW.

For Bakeout #2, Humpty got cured for about 8 hours total (2h at 220F, 1.5h 250F, 1.5h 300F, 1h 330F, 1h 250F 1h, 200F, etc.) till the coals died.

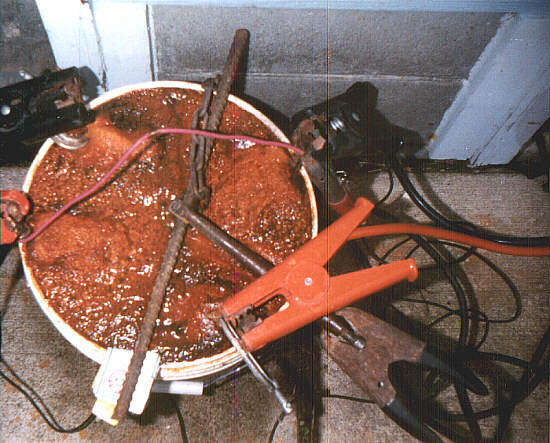
Darn it all, the furnace cement still bubbled!!! Which means I was still too agressive with the heat. :icon_blush:

Even after air-drying for a week, the furnace cement still had residual water. When heated too fast, the water gets trapped as steam in the cement, causing it to bubble.

Most of the bubbles showed up in the firebox.
i40D11895-5CCC-4F8D-8983-D987D99EFBE7.jpg


i9AAC9CCF-A604-4695-88A5-1B216100F410.jpg


iFD53A198-BBD7-4128-8BE4-09D8433AB785.jpg


Thank goodness - no bubbling of the cement in the Dome. But one big bubble inside the base right under the charcoal grate. :icon_sick Will see if I can flatten this one by putting a weight on the base for the next firing.

An interesting FYI... Before the bakeout, I used a heat gun to dry a small patch of cement on the base. Lo and behold, a bubble formed, but it was quickly squished flat with the thumb while still hot. Don't even try this with charcoal!!! :icon_shock1:

Well, Humpty the Copper Cooker seems to be intact again. Will do some low temperature cooks and and see if the furnace cement bubbles some more or if new cracks appear. Keeping my fingers crossed for now!
______________
MayDay
Project Humpty: SLIDESHOW, PHOTO ALBUM
 
Last edited by a moderator:
I never had any bubbling issues with either of my Imperial Kamado fireboxes, and the BGE firebox seems very solid, I broke up a lot ot the large bubbles and I'm thinking I may use the Rutand gasket cement to coat the firebox.

The Hercules Furnace cement did ruin a Harbor Freight step drill bit that I used to clean out the vent holes on the firebox, so it is pretty strong stuff.
 
I'm half tempted to plop mine in our large (48") gas oven and set the temp to something around 150 and leave it there for a while.. I did have my firebox in our #7 Kamado for a little while running around 150 until the piddly amount of koal I had died. I didn't notice any bubbles for the hour or so it was in there but will double-check this morning
 
Lessons Learned on Curing Furnace Cement

Swamprb's idea of using Gasket Cement is interesting. The "Imperial" brand I used dried up harder and stiffer than their furnace cement. So, it might be less prone to bubbling.

However, I think the main thing is to drive off ALL the moisture from the furnace cement (or gasket cement) before it cures permanently. That way it shouldn't be able to bubble anymore.

If I were to do it again, I would prefer to do cure the firebox in the oven because the temperature is easy to control but I'd still have to cure the cement on the cooker. However, my sweetie absolutely said the oven was off limits for this. :icon_frow

So, in hindsight, I ramped up too quickly too fast. To begin with, my starting temperature was too high (too close to the boiling point of water, 212F). Steam was created and got trapped, bubbling the uncured cement. Need to start lower and hold it there longer to drive off most of the trapped water before going higher.

OSX's idea to start at 150F would be a lot safer. Next time, I'd probably stay at 150F for at least 4-6 hours. Then bring the temperature up slowly. The key word is SLOWLY!!! Say 2 hours each at 175F and 200F, 4 hours at 225-250F, 3 hours at 275F, 3 hours at 300F, etc. Probably do this twice before going to higher temperatures.

For my next firing, I'll still keep my temperatures low because I'm pretty sure the cement hasn't fully cured (didn't go above 330F). Will still be careful to ramp up slowly though.

I can live with cement bubbles in the firebox, but would prefer not to have any more in the Kamado itself (especially, big ones). :-o
i8FD64B95-33A8-4D3C-85BB-3AFD243A87CC.jpg

______________
MayDay
Project Humpty: SLIDESHOW, PHOTO ALBUM
 
I'm tending to agree with you on the bubbles, the way I'm looking at it now is its just going to be one of those things I'll have to keep an eye on and perform maintenance when needed.
 
Just to let you know.. I was able to partly cure (haven't finished yet) my re-done firebox (using Rutlands Furnace Cement) in my large 48" oven for 3-4 hours -- at least 100 minutes at 150 one day and some more time a few days later. I've also had it up at 200 for a few hours.. So far so good.. I've got no bubbles but never got above 200 -- I've been side tracked with a REALLY bad case of kitchen ants that have been keeping me REALLY busy cleaning and trying to track them buggers down.. PM me if anyone reading this wants an easy recipe to get rid of the ants in ~8 hours.. It was too easy -- we've been fighting these damned critters for >2 weeks now.. I was able to go from literally thousands of them to "1" in <8 hours.. Sorry for being a little OT -- I've got to get my clay pot back up and running. I may have to jury rig the draft door after I whack it into submission until I can buy a new one. I'll be trying my hand at electrolysis on the grill if I can find a large enough container for the electrolyte solution+grill.. I'll post some more pics when I'm done.. (or further)
 
Just to let you know.. I was able to partly cure (haven't finished yet) my re-done firebox (using Rutlands Furnace Cement) in my large 48" oven for 3-4 hours -- at least 100 minutes at 150 one day and some more time a few days later. I've also had it up at 200 for a few hours.. So far so good.. I've got no bubbles but never got above 200 -- I've been side tracked with a REALLY bad case of kitchen ants that have been keeping me REALLY busy cleaning and trying to track them buggers down.. PM me if anyone reading this wants an easy recipe to get rid of the ants in ~8 hours.. It was too easy -- we've been fighting these damned critters for >2 weeks now.. I was able to go from literally thousands of them to "1" in <8 hours.. Sorry for being a little OT -- I've got to get my clay pot back up and running. I may have to jury rig the draft door after I whack it into submission until I can buy a new one. I'll be trying my hand at electrolysis on the grill if I can find a large enough container for the electrolyte solution+grill.. I'll post some more pics when I'm done.. (or further)

OSX: Great to hear that your cement has not bubbled (yet). Keep it low and slow. You know what happened to the rest of us. :roll: If your draft door is stuck or as rusty as mine was, it'll perform better after de-rusting, whether by hand or electrolysis. Mine was so rusted out that I had to strip the heads and punch out the bolts to remove it from the cooker. And no, penetrating oil didn't help.

My grill is pretty rusty too and I haven't been able to find a 16.5" round grill anywhere, so I give up on finding a new one. I'll also try home electrolysis for de-rusting the grill.

As for a non-conductive container, I'm thinking a large plastic garbage can would work. A kiddie wading pool too if you have one. If my garbage can isn't large enough, I will rig up something shallow and line it with thick plastic.

If you electrolyze your grill before me, please post pics as the shiny clean metal will be sure to spur me to action on mine! :-D
____________
MayDay
Project Humpty: SLIDESHOW, PHOTO ALBUM
 
Mayday..

I haven't derusted the draft door yet but did leave it alone with some Naval Jelly but that didn't really do a whole lot.. Anyway, I did learn something.. For whatever reason, I can't get the electrolysis working on the metal top damper.. It worked for a while on the springy handle but not the main part.. It's not bubbling or anything.. Anyway, I may need to do that by hand or perhaps my sacrificial rebar rod is needing to be cleaned (its pretty gunky at this point) or replaced. Anyway, I need to still clean the hinge mechanism, the grill and draftdoor.. Once that is done I can try firing it up.. I still need to paint it though but thats easy.. I'll post some more before/after pics of the metal items so you can see the electrolysis work..
 
I think BGE either had a 15 or 15.5" replacement grill.. Mine is currently looking really gross in the trashcan based electrolysis bath.. Anyway, the can size is almost too small (I've only got a 1.5" gap between the grill edge and rebar rod) -- as long as the kids don't bump it, it will be fine..
 
I'M GIVING UP... the Mortar is Bubbling, Cracking, Failing

Well, it's been a few weeks since Bakeout #2, which resulted in a fine smattering of small bubbles in the furnace cement of the firebox and one big bubble in the base. Since then, I've done Bakeout #3, also "low and slow." This was followed by 6 cooks where I watched my temperatures and kept things under 500F.

All I can say is that I shouldn't have bothered mortaring the inside of the dome and the bottom. :icon_sad To date, every time I've fired up Humpty, new air (steam) bubbles have appeared in the furnace cement. Currently, there are some the size of my palm inside the base near the firebox (haven't cracked them yet!). I'm sure our West Coast humidity is a big factor in the ongoing development of these new mortar bubbles.

CONCLUSIONS: The furnace cement did not bond very well to the claypot material. Upon curing, the mortar has shrunk and pulled away from the cooker walls. It's only a matter of time before the cement all delaminates and falls off. :cry::cry::cry:

So far, the mortar cracks are mostly in the base. More appear after every cook.
i0BAA6C31-D6CF-4427-93FF-AE581E81E5D0.jpg


I thought the dome was immune, but the mortar has started bubbling there too. Note the sheen of condensation on the surface of the mortar.
i61B6515D-FAA1-4BAF-8375-75C260FBCF8C.jpg


A tiny gap can be seen between the mortar and the cooker wall where the mortar has cracked and flaked off. I expect the mortar to eventually all separate and fall off.
iCF7F02A2-1A78-4FBF-B021-1AFD1A0C8644.jpg


The furnace cement applied over Humpty's newly painted surface is also debonding and flaking off. More so with every cook as the heat weakens the paint-mortar bond. (The cement was used to repair the cracks that developed after the cooker had been painted.)
i674B46B3-1D8C-47EF-B211-B4FD311BE3F9.jpg


SIGHHH.... I'M THROWING IN THE TOWEL!!! :icon_smil
NO MORE REPAIRS!!!
I WILL COOK ON HUMPTY FOR AS LONG AS EVERYTHING HOLDS TOGETHER.
__________________
MayDay
Project Humpty: SLIDESHOW, PHOTO ALBUM
Kamado/BGE, Cobb
 
I know exactly how you feel! I got the same results with my Large Big Green Egg. I just said "No Mas, No Mas" and put it on the cart and wheeled onto my concrete patio away from the deck and table. I've been sick over it and put a down payment on a demo Egg from the PNW Eggfest. I cooked next to a guy, last weekend with 3 LBGE's and a couple of his are patched up with JB-Weld so I'll just roll with it.
That is strange about the paint flaking off too?
 
Thanks Brian. Too bad about your LBGE.

But I'm really surprised not much has been posted about the furnace cement bubbling and not bonding well to the claypots.

The cement flaking off the paint was to be expected. Even though I tried to roughen up the new copper paint, it would never have bonded as well it I had mortared over the original green finish.

Oh well, live and learn. Sure learnt a lot in the process. On to "just cooking" now.
 
Humpty's New Digs

It's official... Humpty's repairs are over and he's a keeper. :icon_clown:icon_clown:icon_clown So what if he's not 100%. :rolleyes:

As part of his new status, Humpty's been moved to new digs and gone up in the world. He's now in a new cradle and has moved from the ground floor backyard up to the back balcony.

Humpty's now sits in a Primo cradle on casters (2 locking) with retractable stainless steel side tables. Originally, the tables sloped a bit, but a couple of tire irons were used to gorilla the handle frames sit just right. The tables come in real handy and the extra height from the cradle is great. I LOVE IT!!! :-D:-D:-D
i3741BF62-E7E6-4459-BA86-B1ABDF71ACD2.jpg


PS: Now that I KNOW I don't have a BGE and can't do super-high cooks :sad:, I've changed my tagline....
__________________

MayDay
Project Humpty: SLIDESHOW, PHOTO ALBUM
Kamado Claypot, Cobb
 
I'm taking my time and letting areas thouroghly air dry before I do any burns. The clay parts that I could heat in the oven have turned out fine, with no bubbling or cracking. I took apart my Large Imperial Kamado to check the repairs I did on the firebox a few years ago and it is still solid.
 
Back
Top