kcbbqfiend
Well-known member
I love My Bandera, but, it is falling apart (literally) from all the rust.
I got it third hand and it never had a cover on it, so, rust has been going rampant on it and after 4 years, it's almost gone
Since I couldn't run without a smoker until I get the Bandera rebuilt, I decided it was time to build a UDS.
From Scott's notes on his build: I followed Norcorednecks build for the most part, plus I got a lot of tips by reading the
UDS Thread
So, went with My buddy swinn to Consolidated Container Company and picked up a reconditioned, unlined and freshly torched, straightened and repainted 55 gallon drum for around $30 with tax and all.
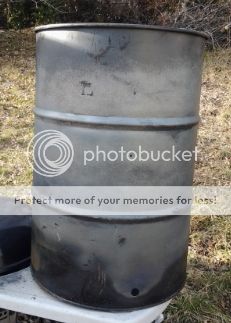
So, here is the drum as I got it (minus the holes, I drilled those prior to taking pics)

Here is another shot with the lid off. You can see My poor Bandera in the background:

It's already in pretty decent condition, but, I had to get that paint off and wanted to burn the inside of it clean since I'm not sure what was in it prior, even though the container company ran them through a high temp blast furnace before reshaping and painting them. Plus, it was a great chance to burn a bunch of wood.
I wound up using three 1" holes around the bottom for air intake:

Drilled the 1/4" holes for the grill mounts at 7" down from the top of the barrel and another 7" down for the second grill and using 1/4-20 1-1/2" bolts to secure the grills:

With all the holes that I wanted in it for now drilled and ready, it was time to start making fire. I had a bunch of brush that KCP&L was kind enough to leave all over My yard from Memorial Day 3 years ago that I wanted to get rid of, so, wood was plentiful for this task.
Loaded up the barrel, got a few sticks burning and tossed them in. Loved watching the smoke floating off the sides when the burn first started:

After 20 minutes, the paint was starting to bubble very slightly, shine was definitely going away:

About an hour in, paint was really starting to fail:

3 hours in, paint is burning off quite nicely:

At 5 hours, I was finally out of brush to feed into the drum and it was looking really good:

Once I finally got the fire to die down, I still had to dump ashes from the barrel into My bandera and My weber kettle, and they burned for another 2 and a half days (told you I had a lot of brush LOL )

So, after I dumped all the ash and coals, let it cool down for a couple of hours, and got it setup on the table from My weber kettle:
Time to hit it with the wire brush to take off what was left of the paint and here is the result:

Once I had all the paint off, it was time to prime it and get it ready for welding the intake pipes. Wiped down the entire drum with mineral spirits to clean any residual nastiness from it and to give the primer a clean surface to attach to.
I picked up some High Temp 2000 degree primer from Lowes
Applied 2 coats, 30 minutes apart and then waited.
Once the paint had dried for about an hour, set some charcoal in the smoker for a few hours to cure the primer, and here is the result:

Had some down time while waiting for My buddy Scott to finish burning out his barrel, so, it got to sit and wait for about 5 weeks.
While I was waiting, I contracted some computer work in exchange for charcoal baskets for Myself and Scott.
1 desktop and 1 laptop reload later, I had Myself and Scott charcoal baskets for the new UDS's we were building.
These are ~ 18.5" across and 10" or so tall, which fits beautifully inside the UDS:

The 4 bars across the top of the basket give it plenty of stability, and made an excellent holding system for the pizza stone I picked up at Lowes as a fire shield/heat diffuser so the food on the lower rack doesn't get turned into a charred brick.
Here is the basket with the pizza stone in place:

Finally! Scott is done burning his barrel, time to get the hardware welded.
Dropped off the drums at a friends house, and 4 days later, here's the UDS with the new hardware welded in (there are 3 pipes, can only see 2 in this pic):

He also made a kickass handle on the lid and 2 chimneys for it.
The left chimney is a 1" pipe with a ball valve at the end of it, the right chimney is a 2" pipe that he made a custom flap for the top of and also have the cap to close it completely off to snuff out the coals and save them:

It was time to re-prime the drum to make sure the new welds and exposed metal would hold paint like they are supposed to.
Two more coats of primer, then cure for 6 hours with 8 lbs of charcoal in the charcoal basket and here she is:

Ok, so, barrel is now primed, it's time to paint!
Here it is with it's base coat of black. Used VHT Flat Black header enamel (it was on sale @ O'Reilly for $5.99 a can) and gave it three coats and cured it.
Ignore the thermostat, I hadn't installed it yet, but, forgot to get a picture of it just black:

So, black paint was on, it was time to do the graphic... Up to this point, I still had not decided on what to go with. After much deliberation, I went with this:

I didn't get a picture of it prior to cutting out the graphic, so, here's what I did.
1) Sprayed a big square of silver header paint and gave it two coats and waited for it to dry.
2) Once it was dry, covered the whole thing with low tack painters tape
3) Found a decepticon logo I liked, blew it up 400% and printed it on 4 pieces of regular paper
4) Taped the stencils over the paint, used an x-acto knife and cut out the pattern, then used the x-acto knife to remove the rest of the blue tape I didn't want
Once I had the pattern the way I wanted it, I covered the whole stencil with one more coat of silver. If you cover your stencil with what you want your base color under it to be, then overlay with your other color, you prevent the top color from bleeding in.
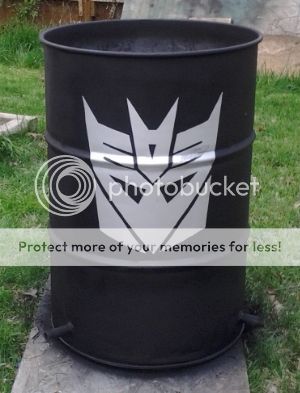
So, once the silver dried, 2 more coats of black, wait for it to get mostly dry (about 45 minutes) then pulled the tape off.
Here it is post tape removal:
Had a bit of an issue with the right side above the eye, so, I re-masked that and repainted it, then put 4 coats of clear on.
Once the paint had cured (did a 10 hour burn on it) I put all the valves back on and was ready to install the hardware
Installed the grill bolts, two thermostats (1 on the lid, one between the grills on the back of the smoker) and here it is ready to go:


Finally, it is ready to cook on!

I seasoned it this weekend, and during the seasoning, I watched the temps pretty closely. After 2 hours it hit 260 on the lid and 255 between the grills, after 3 hours, 280 at the lid and 275 between the grills. First briskets go on it tomorrow, will let you all know how they turn out.
Thanks!
Robert
I got it third hand and it never had a cover on it, so, rust has been going rampant on it and after 4 years, it's almost gone
Since I couldn't run without a smoker until I get the Bandera rebuilt, I decided it was time to build a UDS.
From Scott's notes on his build: I followed Norcorednecks build for the most part, plus I got a lot of tips by reading the
UDS Thread
So, went with My buddy swinn to Consolidated Container Company and picked up a reconditioned, unlined and freshly torched, straightened and repainted 55 gallon drum for around $30 with tax and all.
So, here is the drum as I got it (minus the holes, I drilled those prior to taking pics)

Here is another shot with the lid off. You can see My poor Bandera in the background:

It's already in pretty decent condition, but, I had to get that paint off and wanted to burn the inside of it clean since I'm not sure what was in it prior, even though the container company ran them through a high temp blast furnace before reshaping and painting them. Plus, it was a great chance to burn a bunch of wood.
I wound up using three 1" holes around the bottom for air intake:

Drilled the 1/4" holes for the grill mounts at 7" down from the top of the barrel and another 7" down for the second grill and using 1/4-20 1-1/2" bolts to secure the grills:

With all the holes that I wanted in it for now drilled and ready, it was time to start making fire. I had a bunch of brush that KCP&L was kind enough to leave all over My yard from Memorial Day 3 years ago that I wanted to get rid of, so, wood was plentiful for this task.
Loaded up the barrel, got a few sticks burning and tossed them in. Loved watching the smoke floating off the sides when the burn first started:

After 20 minutes, the paint was starting to bubble very slightly, shine was definitely going away:

About an hour in, paint was really starting to fail:

3 hours in, paint is burning off quite nicely:

At 5 hours, I was finally out of brush to feed into the drum and it was looking really good:

Once I finally got the fire to die down, I still had to dump ashes from the barrel into My bandera and My weber kettle, and they burned for another 2 and a half days (told you I had a lot of brush LOL )

So, after I dumped all the ash and coals, let it cool down for a couple of hours, and got it setup on the table from My weber kettle:

Time to hit it with the wire brush to take off what was left of the paint and here is the result:

Once I had all the paint off, it was time to prime it and get it ready for welding the intake pipes. Wiped down the entire drum with mineral spirits to clean any residual nastiness from it and to give the primer a clean surface to attach to.
I picked up some High Temp 2000 degree primer from Lowes
Applied 2 coats, 30 minutes apart and then waited.
Once the paint had dried for about an hour, set some charcoal in the smoker for a few hours to cure the primer, and here is the result:

Had some down time while waiting for My buddy Scott to finish burning out his barrel, so, it got to sit and wait for about 5 weeks.
While I was waiting, I contracted some computer work in exchange for charcoal baskets for Myself and Scott.
1 desktop and 1 laptop reload later, I had Myself and Scott charcoal baskets for the new UDS's we were building.
These are ~ 18.5" across and 10" or so tall, which fits beautifully inside the UDS:

The 4 bars across the top of the basket give it plenty of stability, and made an excellent holding system for the pizza stone I picked up at Lowes as a fire shield/heat diffuser so the food on the lower rack doesn't get turned into a charred brick.
Here is the basket with the pizza stone in place:

Finally! Scott is done burning his barrel, time to get the hardware welded.
Dropped off the drums at a friends house, and 4 days later, here's the UDS with the new hardware welded in (there are 3 pipes, can only see 2 in this pic):

He also made a kickass handle on the lid and 2 chimneys for it.
The left chimney is a 1" pipe with a ball valve at the end of it, the right chimney is a 2" pipe that he made a custom flap for the top of and also have the cap to close it completely off to snuff out the coals and save them:

It was time to re-prime the drum to make sure the new welds and exposed metal would hold paint like they are supposed to.
Two more coats of primer, then cure for 6 hours with 8 lbs of charcoal in the charcoal basket and here she is:

Ok, so, barrel is now primed, it's time to paint!
Here it is with it's base coat of black. Used VHT Flat Black header enamel (it was on sale @ O'Reilly for $5.99 a can) and gave it three coats and cured it.
Ignore the thermostat, I hadn't installed it yet, but, forgot to get a picture of it just black:

So, black paint was on, it was time to do the graphic... Up to this point, I still had not decided on what to go with. After much deliberation, I went with this:

I didn't get a picture of it prior to cutting out the graphic, so, here's what I did.
1) Sprayed a big square of silver header paint and gave it two coats and waited for it to dry.
2) Once it was dry, covered the whole thing with low tack painters tape
3) Found a decepticon logo I liked, blew it up 400% and printed it on 4 pieces of regular paper
4) Taped the stencils over the paint, used an x-acto knife and cut out the pattern, then used the x-acto knife to remove the rest of the blue tape I didn't want
Once I had the pattern the way I wanted it, I covered the whole stencil with one more coat of silver. If you cover your stencil with what you want your base color under it to be, then overlay with your other color, you prevent the top color from bleeding in.
So, once the silver dried, 2 more coats of black, wait for it to get mostly dry (about 45 minutes) then pulled the tape off.
Here it is post tape removal:

Had a bit of an issue with the right side above the eye, so, I re-masked that and repainted it, then put 4 coats of clear on.
Once the paint had cured (did a 10 hour burn on it) I put all the valves back on and was ready to install the hardware
Installed the grill bolts, two thermostats (1 on the lid, one between the grills on the back of the smoker) and here it is ready to go:


Finally, it is ready to cook on!

I seasoned it this weekend, and during the seasoning, I watched the temps pretty closely. After 2 hours it hit 260 on the lid and 255 between the grills, after 3 hours, 280 at the lid and 275 between the grills. First briskets go on it tomorrow, will let you all know how they turn out.
Thanks!
Robert
