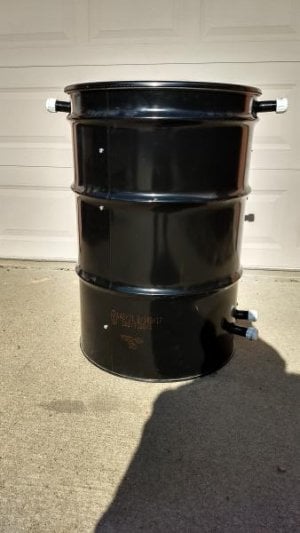
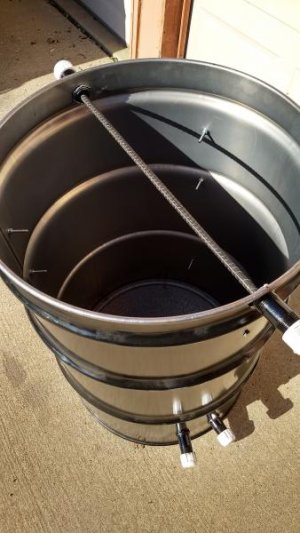
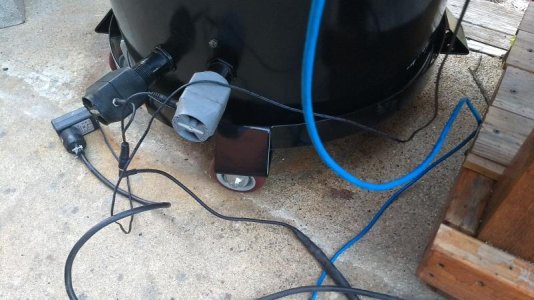
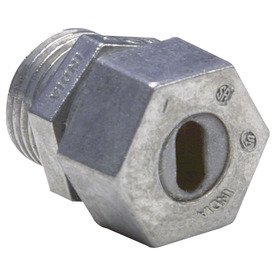
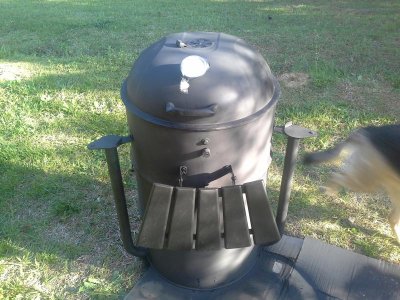
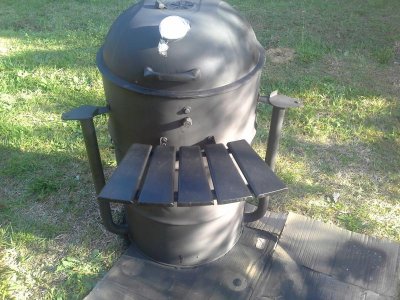
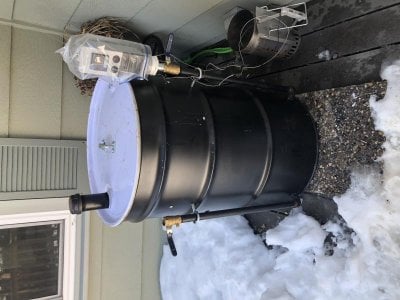
Well the drum was purchased new from grainer a couple of years ago brand new unlined I think it was 125 to 150. Basket was 40 but they upgraded me to the 12x12x12 basket free since they were out of the 40 dollar one. 25 for intakes and 13 for the exhaust. Total would be a little over 200. Mine I'm modifying tomorrow I got the drum for free. Sandblasting was 25 maybe 40 for the basket I built and 80 bucks for the tubes. Also got a Akron side table to mount on it for 25 bucks.
 
Boy that was an adventure. Got the pipes mounted, akorn side table mounted, and installed a probe port for the therm cables. The side table is kinda flimsy, but it will hold a dot and beer. Not going to set a huge pile of meat on it. Was exciting due to a squall line moving through. Will get some pictures later this week after a fresh spray of paint. Under a tornado watch right now but things are quiet so I'm going to grab a shower and run to the store.
 
I gave away my first uds. I had some ideas on how to improve the uds and wanted to try them out

I borrowed the exhaust idea from the pbc.
1. Makes for a better sealed unit
2. Works the same in rain
3. Doubles as the inlet for the probe wires
4. Triples as the holes for the rod for hanging
5. It's also the handles for the drum.

I made it sealable so you can easily kill the charcoals once the cook is over


I used three bolts per grate instead of the standard four. Each one is 24" apart. Makes it a little easier to get grates out, saves on drilling and bolts.

I have the coals sitting on a grate 15" from the bottom cooking grate and 7" from bottom of the drum. Bottom of drum stays cool.
Being so close to the coals makes for a bloody efficient cooker.

I splurged on a drum dolly to keep the bottom of the drum dry when it rains. I could have used cinder blocks but what the hey it wasn't that expensive
 

Attachments

  • IMG_20180415_085309081_HDR.jpg
    IMG_20180415_085309081_HDR.jpg
    27.2 KB · Views: 1,106
  • IMG_20180415_085348414_HDR.jpg
    IMG_20180415_085348414_HDR.jpg
    37.6 KB · Views: 708
  • IMG_20180415_193658764.jpg
    IMG_20180415_193658764.jpg
    70.4 KB · Views: 557
Boy that was an adventure. Got the pipes mounted, akorn side table mounted, and installed a probe port for the therm cables. The side table is kinda flimsy, but it will hold a dot and beer. Not going to set a huge pile of meat on it. Was exciting due to a squall line moving through. Will get some pictures later this week after a fresh spray of paint. Under a tornado watch right now but things are quiet so I'm going to grab a shower and run to the store.

I thought of a shelf but even if it's steady I think it would cause an imbalance to the whole drum.

What kind of probe port did you get?
 
I used a conduit fitting like this one. Burned the coating off with my weed burner. Going to make a plug out of rtv and get rid of the rubber insert it came with. The shelf is really lightweight so it doesn't have any affect on the balance of the drum. I even mashed down on it pretty hard and nothing moved.
 

Attachments

  • 031857490928lg.jpg
    031857490928lg.jpg
    18.8 KB · Views: 543
Well here's old faithful gussied up with her pipe intakes, table, thermometer, and fresh coat of paint. Hopefully I can get it lit tomorrow and see how it runs with the pipes. Got alot to do tomorrow to get ready to leave out for the bash midweek and have to work ot Sunday. The table is nice and will be able to hold a dot and beer. It's not really in the way at all extended.
 

Attachments

  • 20180420_182819.jpg
    20180420_182819.jpg
    100.7 KB · Views: 497
  • 20180420_182724.jpg
    20180420_182724.jpg
    99.2 KB · Views: 496
Well here's old faithful gussied up with her pipe intakes, table, thermometer, and fresh coat of paint. Hopefully I can get it lit tomorrow and see how it runs with the pipes. Got alot to do tomorrow to get ready to leave out for the bash midweek and have to work ot Sunday. The table is nice and will be able to hold a dot and beer. It's not really in the way at all extended.

Looks very cool :thumb:
 
Test run going well. Pipes half open and @275. That is about the same as the old holes half open. They were 1 inch and the pipes are 1.5 inch.
 
rainy day today. the uds was nice and dry on the inside . I do like the exhaust coming out the side

Bw0s7rv.jpg
 
Thanks. I was THIS close to ordering a BBQ guru party Q one day to get the set it and forget it thing, but I'm a bit unsure of drilling a hole in the kettle. It has sentimental value to me even if that sounds sort of nuts also.
Build a UDS and a DIY temperature controller. Set it and forget it.
 

Attachments

  • 2FEAFFC8-DC46-4B3F-9E87-87B8829A3312.jpg
    2FEAFFC8-DC46-4B3F-9E87-87B8829A3312.jpg
    62.9 KB · Views: 762
  • 60F5DB01-BD8E-4AC0-B07C-F6C53A91FCF0.jpg
    60F5DB01-BD8E-4AC0-B07C-F6C53A91FCF0.jpg
    41.1 KB · Views: 767
I cooked an ungraded brisket last night. Came out great! $1.68 per lb.

I also rigged up a humidity sensor and the drum was purring along at 10% humidity at 225 degrees.
 
Well, I got my barrel this weekend from Big R as a brand new drum and there were a few unexpected things. It looks painted on the inside but luckily I believe it is paint as it comes off with very little work with a screwdriver and shows bare metal. I was not planning on burning it but this way I get to play with fire. The second unexpected surprise was that the lid from my ancient Weber kettle which I was planning on using (when needed) damn near falls into the barrel I don't think there is any modification that can be done to fit it except making the lip completely flat which I'm sure will make it have air leaks for days, but also I would like to use it on my grill still. My question is Could it be that the lid comes off a very old kettle and maybe a newer kettle would have a bigger lid? From reading over 557 pages of this post it sounds like the Kingsford 22.5 grill might have a bigger lid. I own a 2 door sports car and it is not as simple as driving the thing around to test fit lids. I'm honestly ok with only having the flat lid but it would be nice to have a domed lid for big cooks. Oh, and I did check to make sure that my kettle is not the 18" variety. I am slowly acquiring parts and don't have a junk pile to grab from unfortunately to make this faster or cheaper. Hope to have everything I need in a month or 2. Will post here when I am done and hopefully provide some worthy pron.
 
Measure the I.D. below the top lip of your drum. Then measure the seal area of your Weber type lid. I'm guessing the lid will fit perfect. The drums I have cut (different types/brands) the lids all fit very well after removing the rolled lip. Different brands of lids also.
Or you can put a piece 2" wide aluminum strip around the inside sticking up enough to support your lid. Lots of those have been done and posted in this thread.
 
I'm not talking negligence here... but how long does a garage kept, 16 gauge drum usually last with general maintenance after cooks?
 
I've heard the bottom Rusts out in 8-10.

Then turn it over and use it upside down and just change lids.

Or I imagine a stainless drum would last a lot longer
 
Back
Top