Zippylip
Full Fledged Farker
I know there are a lot of how-to posts on pizza, but I wanted to add one with a couple different versions depending on how much time you might have. These are pretty much beginner level doughs that anyone can make, and an easy alternative to store bought dough.
A fresh homemade pizza can be made in as little as one hour & up to four or so days without freezing. Here are the two methods:
One: Fast warm-rise dough:
If you want a fresh pizza & you want it now, you can make one in about the time it takes to properly pre-heat the cooker (in this case I’m using an egg). Here’s how I do it:
1 – add 2 teaspoons of sugar to 1.5 cups of warm water (100-115 degrees – you can nuke cold water for 60 seconds to get it there):

2 – stir in 2 teaspoons of bread machine yeast & let it sit:


3 – after about 5 minutes, it’ll look like this:

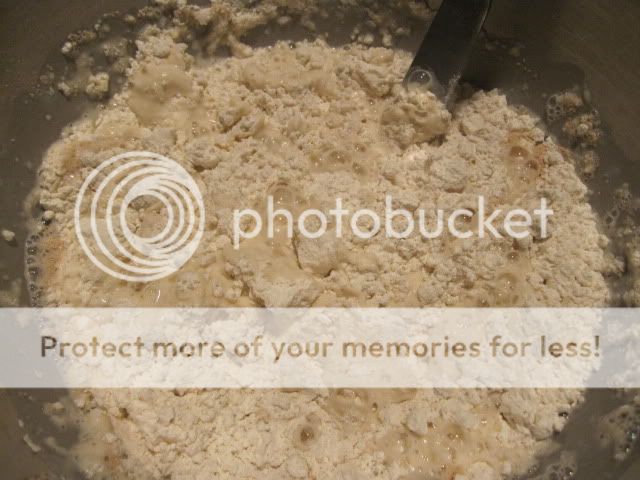
4 – pour this in a mixing bowl with 4 cups of flour & 2 teaspoons of salt, & knead for 15 minutes on low (as soon as you turn this on, go light up the cooker to preheat to 500-550, it should be stable at that temp for about 30 minutes before your first pie goes on):

5 - Remove the ball & cut into 3 pieces for 12 inch pies or 2 pieces for 16 inch pies, put in an airtight container:
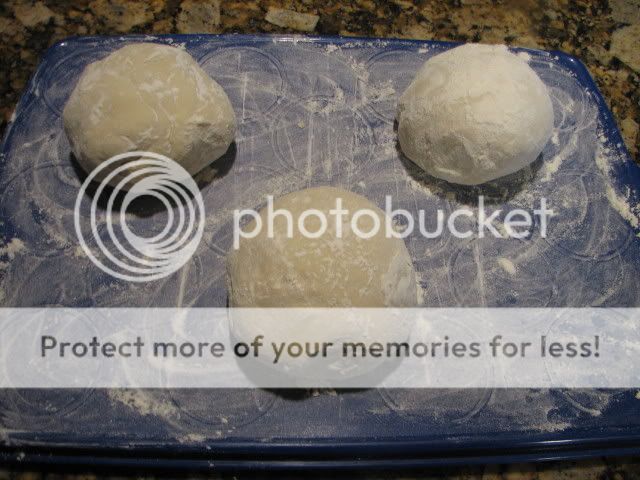


6 – place the container in a warm (100 degree) environment, either a warming drawer or an oven that you have let heat for a few minutes and then shut off. About 30 minutes later, the dough will be double in size:

7 – add some flour to your working surface:

8 – finger flatten the dough:

9 – stretch it out:

10 – add a little coarse ground cornmeal to your peel:

11 – lay on the dough, top & bring to the cooker:


12 – I set up the egg like this, plate setter with spacers then the stone on top:

13 - lay the pie on :

About 10 minutes later, you’re all done:

Crack a beer & enjoy, you just made a pie in about the time it would’ve taken you to pay someone else to deliver one:

Two: Slow cold-rise dough:
If you have more time to plan ahead, you can make a better dough using roughly the same ingredients with a slightly different method. This is loosely based on Verasano’s method, but I couldn’t really follow that & pretty much butchered it, but it still works very well.
First, the step by step instructions:
1) Combine 1.5 cups of cold water, 3 cups of flour, 1 teaspoon of yeast and 1 teaspoon of salt;
2) Mix with a spoon for a few seconds to eliminate any large pools of water;
3) Let stand for 20 minutes;
4) Mix on medium for 20 minutes (it will be very soupy, don’t worry);
5) Turn off, cover, let stand for another 20 minutes;
6) Turn mixer back on & add up to 1 additional cup of flour (about 1 tablespoon at a time) allowing it to incorporate. Repeat this until you get the consistency you are looking for (it should be pulling away from the bowl, yet still be sticky enough so that it is a pain in the ass to get out of the bowl);
7) Remove from bowl, cut into individual pieces (2 for 2-16 inch pies, 3 for 3-12 inch pies, or 4 for 4-12 inch thin-crust pies);
8) Place in separate oiled plastic containers & cover;
9) Refrigerate for a minimum of 24 hours and up to 4 days;
10) Remove about 2 hours before you are ready to use;
11) When removing from the bowl, be patient, it will want to stay in the bowl, this is normal;
12) On a floured surface, gently shape the dough (due to the higher moisture content, this dough will be harder to work with than more typical dough, so be careful not to tear it – tossing will not likely be possible);
13) Bake on egg at a minimum of 650 degrees. This dough benefits from higher temps, I’ve tried it at lower temps and the results were not as good. It will take about 6 minutes at this temp. Go to 750 & the time will be about 4 minutes.
Now some pictures.
The dry ingredients all together with the water added and slightly mixed:
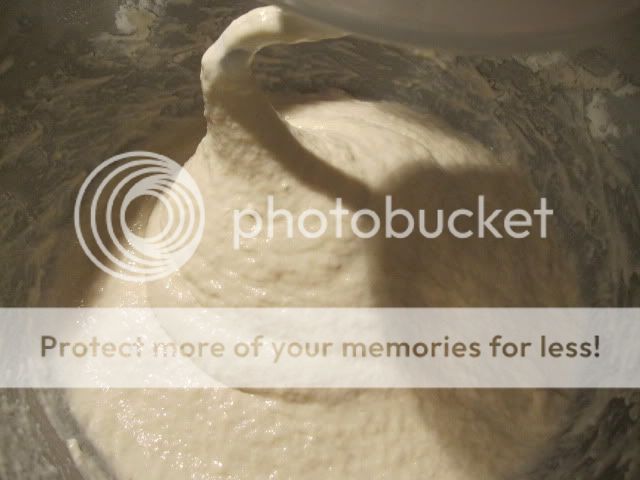
Following the 20 minute rest (autolyzation), wet knead the dough for 20 minutes. It will look soupy like this:
Remove the hook:

Cover tightly:

Following a second 20 minute rest, turn the mixer back on & begin adding flour a little bit at a time until the dough starts pulling away from the bowl. This is the part that will take practice. After you make a few batches, you will begin to get a good idea of the specific wetness you are looking for; when you find the sweet spot, you’ll know it – lock it in. Keep in mind that the air bubbles, spring & texture of the final product will depend on a wetter than usual dough. Based upon my experiments, the wetter the dough going into the egg, the better the pizza was coming out of the egg.
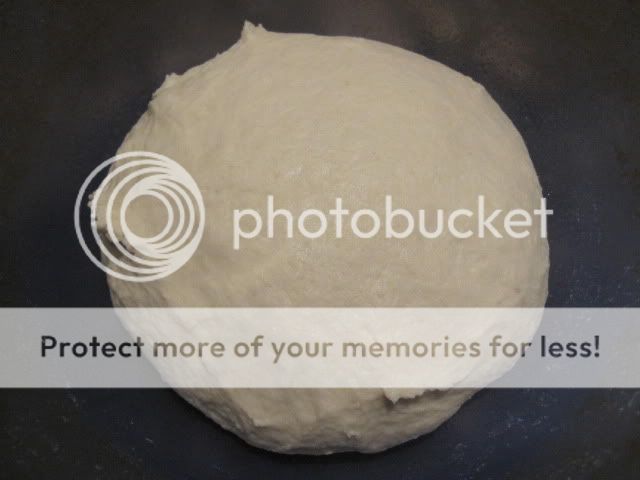
Here is the dough after additional flour added (you can see it’s wet & droopy, that’s what you want):

Remove from the bowl & cut into pieces. This quantity will yield the following:
- 2-16 inch pizzas;
- 3-12 inch pizzas;
- 4-12 inch thin crust pizzas.
Store the dough in plastic containers sprayed with Pam.

Refrigerate for a minimum of 24 hours and up to 4 days. Take it out of the fridge about 2 hours before you are ready to use. This is what it looks like after 2 days:

To remove the dough, sprinkle a little flour on top while it’s still in the bowl and then turn the bowl upside down & wait until it releases itself, then flip back over onto a floured surface. Be patient here, it will not want to leave the container quickly, this is normal.
On the counter:

Finger flatten the dough. There is no need to flip, toss, or even pick it up. This dough is so soft & workable it will spread very easily into the exact size you want:

Sprinkle some corn meal on the peel & place the dough on:

Some simple crushed tomatoes:

Sliced mozzarella, salt, pepper, dried basil & olive oil:

To the egg preheated to at least 650:

This pie was cooked for about 6 minutes at 650:

finished shot, including the undercarriage:


A few minutes later, sliced up & ready to eat:

This is what I am looking for on the interior, nice air pockets. The texture of the final product is definitely a step up from the beginner dough. If you have the time, the stage-two dough will yield better results. This pie is from a different batch, with very similar results:


Tips:
* Removal: I recommend removing the finished pie with a pizza screen & keeping elevated on a cooling rack or other raised surface, this prevents the bottom from steaming & losing its shizzle
* Toppings: Keep in mind that because this is relatively thin crust pie that will cook very fast, it is not a good idea to stack a lot of heavy toppings & sauce on.
* Temperature of ingredients: When you remove the dough from the refrigerator 2 hours before the cook, also remove any toppings, cheese and sauce you will put on the pie. This will help with nice browning of the cheese & finishing of the toppings
* Lump amount: This depends in part on the number of pies you’re making. If you’re making a small batch of pies, say 4 or less, there is no need for the lump to even go above the fire box. I routinely cook 3-4 pies with one chimney full of fresh lump & the equivalent of one chimney full of already used lump in the box (and I still have lump left over afterwards).
Here’s a picture of the above amounts after a roughly 30-40 minute preheat and at the end of the first of 3 pies:

Note the level of the lump responsible for holding the egg at 650 for about 45 minutes at that point (preheat plus first pie cook time), it’s right around the level of the air holes. Add another 6 minutes a pop, the next two pies were on & off within an hour in total.
Cost analysis:
* I know a lot of people purchase dough at the supermarket or at their local pizza shop. These are great alternatives, but if you have the time & the inclination, it is really fun to make dough at home. I am not sure what people are paying for pre-made dough, but for fun and comparison purposes I calculated the cost of homemade dough as follows (ok I was home sick & bored sh!tless when I did this :becky") :
:
- 33 cents per 16 inch pizza;
- 22 cents per 12 inch pizza; &
- 16 cents per 12 inch thin crust pizza.
Best of luck to anyone that gives it a go, Marc
A fresh homemade pizza can be made in as little as one hour & up to four or so days without freezing. Here are the two methods:
One: Fast warm-rise dough:
If you want a fresh pizza & you want it now, you can make one in about the time it takes to properly pre-heat the cooker (in this case I’m using an egg). Here’s how I do it:
1 – add 2 teaspoons of sugar to 1.5 cups of warm water (100-115 degrees – you can nuke cold water for 60 seconds to get it there):
2 – stir in 2 teaspoons of bread machine yeast & let it sit:
3 – after about 5 minutes, it’ll look like this:
4 – pour this in a mixing bowl with 4 cups of flour & 2 teaspoons of salt, & knead for 15 minutes on low (as soon as you turn this on, go light up the cooker to preheat to 500-550, it should be stable at that temp for about 30 minutes before your first pie goes on):
5 - Remove the ball & cut into 3 pieces for 12 inch pies or 2 pieces for 16 inch pies, put in an airtight container:
6 – place the container in a warm (100 degree) environment, either a warming drawer or an oven that you have let heat for a few minutes and then shut off. About 30 minutes later, the dough will be double in size:
7 – add some flour to your working surface:
8 – finger flatten the dough:
9 – stretch it out:
10 – add a little coarse ground cornmeal to your peel:
11 – lay on the dough, top & bring to the cooker:
12 – I set up the egg like this, plate setter with spacers then the stone on top:
13 - lay the pie on :
About 10 minutes later, you’re all done:
Crack a beer & enjoy, you just made a pie in about the time it would’ve taken you to pay someone else to deliver one:
Two: Slow cold-rise dough:
If you have more time to plan ahead, you can make a better dough using roughly the same ingredients with a slightly different method. This is loosely based on Verasano’s method, but I couldn’t really follow that & pretty much butchered it, but it still works very well.
First, the step by step instructions:
1) Combine 1.5 cups of cold water, 3 cups of flour, 1 teaspoon of yeast and 1 teaspoon of salt;
2) Mix with a spoon for a few seconds to eliminate any large pools of water;
3) Let stand for 20 minutes;
4) Mix on medium for 20 minutes (it will be very soupy, don’t worry);
5) Turn off, cover, let stand for another 20 minutes;
6) Turn mixer back on & add up to 1 additional cup of flour (about 1 tablespoon at a time) allowing it to incorporate. Repeat this until you get the consistency you are looking for (it should be pulling away from the bowl, yet still be sticky enough so that it is a pain in the ass to get out of the bowl);
7) Remove from bowl, cut into individual pieces (2 for 2-16 inch pies, 3 for 3-12 inch pies, or 4 for 4-12 inch thin-crust pies);
8) Place in separate oiled plastic containers & cover;
9) Refrigerate for a minimum of 24 hours and up to 4 days;
10) Remove about 2 hours before you are ready to use;
11) When removing from the bowl, be patient, it will want to stay in the bowl, this is normal;
12) On a floured surface, gently shape the dough (due to the higher moisture content, this dough will be harder to work with than more typical dough, so be careful not to tear it – tossing will not likely be possible);
13) Bake on egg at a minimum of 650 degrees. This dough benefits from higher temps, I’ve tried it at lower temps and the results were not as good. It will take about 6 minutes at this temp. Go to 750 & the time will be about 4 minutes.
Now some pictures.
The dry ingredients all together with the water added and slightly mixed:
Following the 20 minute rest (autolyzation), wet knead the dough for 20 minutes. It will look soupy like this:
Remove the hook:
Cover tightly:
Following a second 20 minute rest, turn the mixer back on & begin adding flour a little bit at a time until the dough starts pulling away from the bowl. This is the part that will take practice. After you make a few batches, you will begin to get a good idea of the specific wetness you are looking for; when you find the sweet spot, you’ll know it – lock it in. Keep in mind that the air bubbles, spring & texture of the final product will depend on a wetter than usual dough. Based upon my experiments, the wetter the dough going into the egg, the better the pizza was coming out of the egg.
Here is the dough after additional flour added (you can see it’s wet & droopy, that’s what you want):
Remove from the bowl & cut into pieces. This quantity will yield the following:
- 2-16 inch pizzas;
- 3-12 inch pizzas;
- 4-12 inch thin crust pizzas.
Store the dough in plastic containers sprayed with Pam.
Refrigerate for a minimum of 24 hours and up to 4 days. Take it out of the fridge about 2 hours before you are ready to use. This is what it looks like after 2 days:
To remove the dough, sprinkle a little flour on top while it’s still in the bowl and then turn the bowl upside down & wait until it releases itself, then flip back over onto a floured surface. Be patient here, it will not want to leave the container quickly, this is normal.
On the counter:
Finger flatten the dough. There is no need to flip, toss, or even pick it up. This dough is so soft & workable it will spread very easily into the exact size you want:
Sprinkle some corn meal on the peel & place the dough on:
Some simple crushed tomatoes:
Sliced mozzarella, salt, pepper, dried basil & olive oil:
To the egg preheated to at least 650:
This pie was cooked for about 6 minutes at 650:
finished shot, including the undercarriage:
A few minutes later, sliced up & ready to eat:
This is what I am looking for on the interior, nice air pockets. The texture of the final product is definitely a step up from the beginner dough. If you have the time, the stage-two dough will yield better results. This pie is from a different batch, with very similar results:
Tips:
* Removal: I recommend removing the finished pie with a pizza screen & keeping elevated on a cooling rack or other raised surface, this prevents the bottom from steaming & losing its shizzle
* Toppings: Keep in mind that because this is relatively thin crust pie that will cook very fast, it is not a good idea to stack a lot of heavy toppings & sauce on.
* Temperature of ingredients: When you remove the dough from the refrigerator 2 hours before the cook, also remove any toppings, cheese and sauce you will put on the pie. This will help with nice browning of the cheese & finishing of the toppings
* Lump amount: This depends in part on the number of pies you’re making. If you’re making a small batch of pies, say 4 or less, there is no need for the lump to even go above the fire box. I routinely cook 3-4 pies with one chimney full of fresh lump & the equivalent of one chimney full of already used lump in the box (and I still have lump left over afterwards).
Here’s a picture of the above amounts after a roughly 30-40 minute preheat and at the end of the first of 3 pies:
Note the level of the lump responsible for holding the egg at 650 for about 45 minutes at that point (preheat plus first pie cook time), it’s right around the level of the air holes. Add another 6 minutes a pop, the next two pies were on & off within an hour in total.
Cost analysis:
* I know a lot of people purchase dough at the supermarket or at their local pizza shop. These are great alternatives, but if you have the time & the inclination, it is really fun to make dough at home. I am not sure what people are paying for pre-made dough, but for fun and comparison purposes I calculated the cost of homemade dough as follows (ok I was home sick & bored sh!tless when I did this :becky
:- 33 cents per 16 inch pizza;
- 22 cents per 12 inch pizza; &
- 16 cents per 12 inch thin crust pizza.
Best of luck to anyone that gives it a go, Marc