• working on DNS.. links may break temporarily.

Our In-Progress Trailer-Mount, Reverse Flow Smoker Build

Thanks for all the kind words of encouragement and inspiring ideas everyone!

Got a bit more done today.....

IMAG0162.jpg

We welded a 2" piece of steel on the inside edge of the firebox to keep the airspace around the actual firebox seperate from the firebox (where the wood will be burning) and this also gave us a collar to insert in the smoker and weld around.

IMAG0163.jpg

Scribed around the firebox collar onto the smoker body.

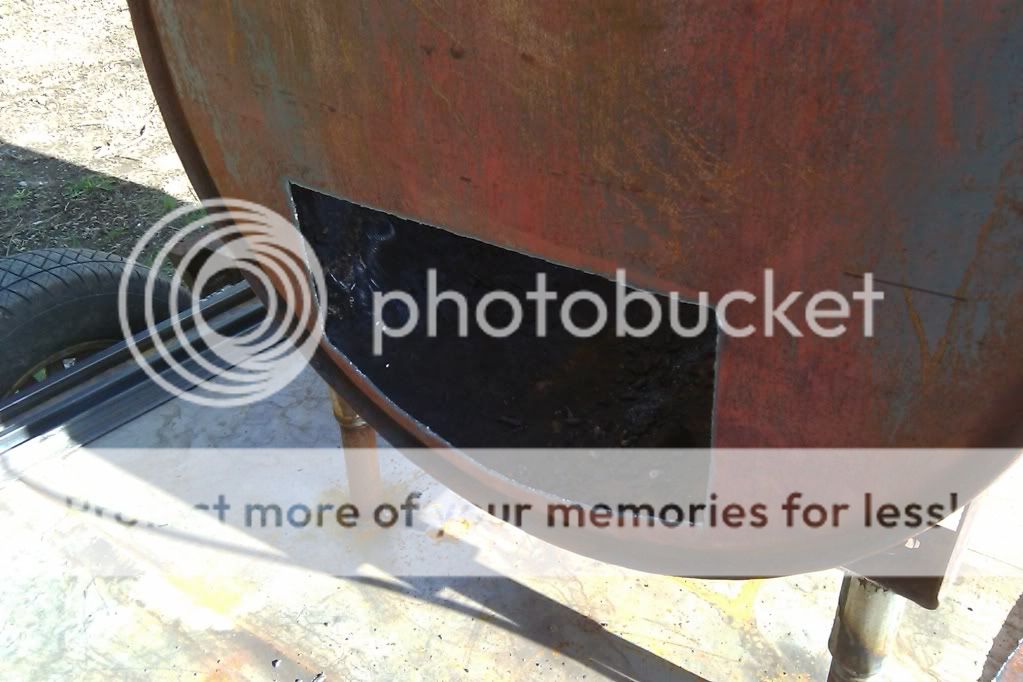
IMAG0165.jpg

Hole cutout of the smoker body...ready for the firebox to be attached!

IMAG0166.jpg

Got a handle welded to our damper rod.

IMAG0167.jpg

It's official! Firebox is now attached to the smoker! Woo Hoo!!:heh:

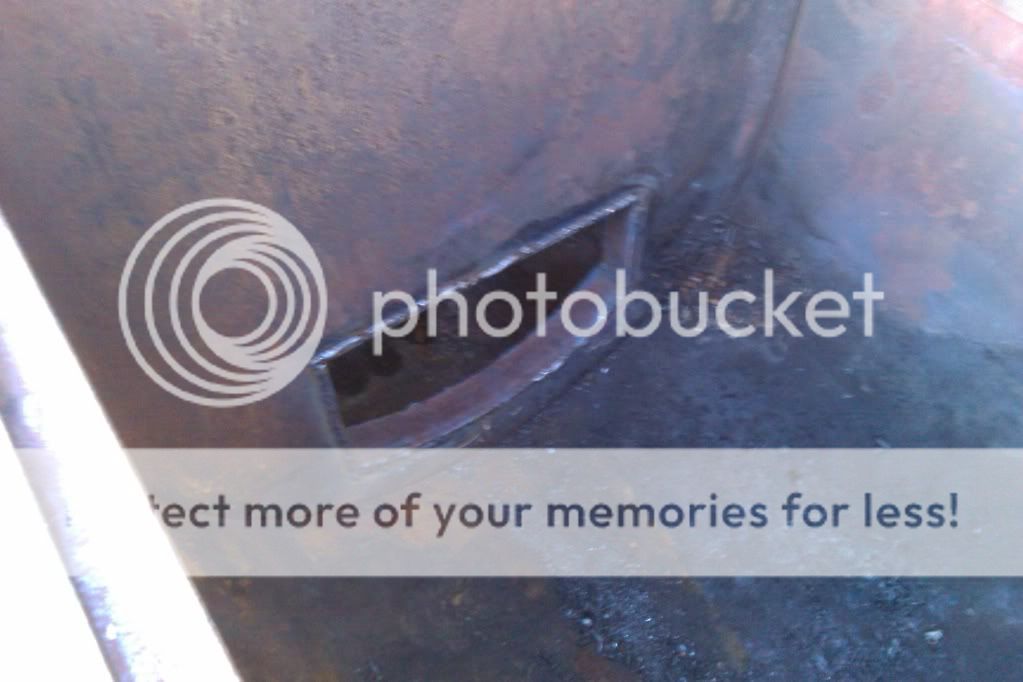
IMAG0168.jpg

View looking from inside the smoker, into the firebox. Sorry if this one is blurry...I think I forgot to focus....these were all taken on my cell phone.

IMAG0169.jpg

View looking from firebox into smoker.

IMAG0170.jpg

Backside of firebox. The hole towards the bottom is where the combustion air enters (it then travels along the bottom of the firebox, through the damper, then comes out in the firebox above the door).

The 6" cap you see at the top is just for temporary. We are planning on building a holding cabinet on top of the firebox (to hold full size insert pans and keep them warm), so I just cut out a piece of steel and tacked it in place on the inside of the collar. I will also be running some high temp silicone around it just to make sure it is airtight for now and able to come apart easily in the future.


We are kind of in a hurry to get the smoker operational at this point because our first competition is May 15th, but we know there are certain things we need to do now, to make life easier (like install the water coil). We should be able to finish the smoker and get it operational next week. Here's what we have left:
  • Fabricate and weld in smoke damper.
  • Put the finishing touches on the door and fabricate a counterweight system.
  • Fabricate and hang hot water coil.
  • Fabricate a 2 halves cooking grate out of 3/4" square tubing & #9 expanded metal.
  • Fabricate a log rack out of 3/4" square tubing & #9 expanded metal
  • Install exhaust stack.
  • Prep for paint.
  • Paint!!!
I also managed to get the angle iron welded in for the cooking grates to sit on and weded up the door latch system for the firebox door. Still have to get some rope gasket material and secure it to the firebox door and possibly around the smoker door. Probably won't get the burner in before the first competition. Sink will come soon.

Thanks for following along everybody!

Oh...and for a little pron.....we also managed to cook a marinated pork roast and 7 moose burgers while building today!!
 
I would cure the cooker before paint.
have you given any thoughts to tuning plates?
Where is the exhaust going to be located?


Looks great BTW!
 
I would cure the cooker before paint.
have you given any thoughts to tuning plates?
Where is the exhaust going to be located?


Looks great BTW!

Thank you, Sir!
I am still considering tuning plates. Saw a nice design on one of the pro smoker builders websites.

Exhaust will be on the left hand side (same side as smoker).

Why cure the cooker before painting? Just curious because we already burned a fire in it for 10-12 hours when we cut the door out of the tank. It won't be getting that hot again!!
 
I could be wrong but I think it needs to get pretty hot to season the inside. As it starts to cool I hit mine with paint so it bakes on but again I like combining jobs. :)
 
how long did it take to get the sheetmetal back straight for the door opening after that fire? i have the same tank, and i was thinkin i better get it built before tweekin the hell out of it like that, but if it pops back, id rather burn first.

also, that pic of you under the thing reminds me of this:heh::

Welding%20under%20vehicle.jpg

LOL!!! Right On! But I should clarify something....I wasn't getting under the trailer, that's my buddy Eric!!! (I figured it was safer taking the picture!)

Well, the fire may have had a little something to do with the ripples at the top and bottom of the door opening, but the real problem was I don't think they rolled the steel when the tank was built. I believe they tacked it and bent it around and tacked it, etc. When I cut the door out it was under quite a bit of pressure and popped about 4" out from the body of the tank (be careful!). I had to make a template of the radius and have the door rolled so that it would fit again.

To straighten out the top and bottom I put about 5 clamps on a piece of 1"x1"x1/4" angle iron on the inside of the opening and tacked it in between, then moved the clamps and tacked until it was straight. Did the same thing at the bottom of the opening, but left the top edge down 3/8" so that my cooking grates (3/4" sq. tubing) would have something to sit on and the door could close against it too.
 
We are so close..............

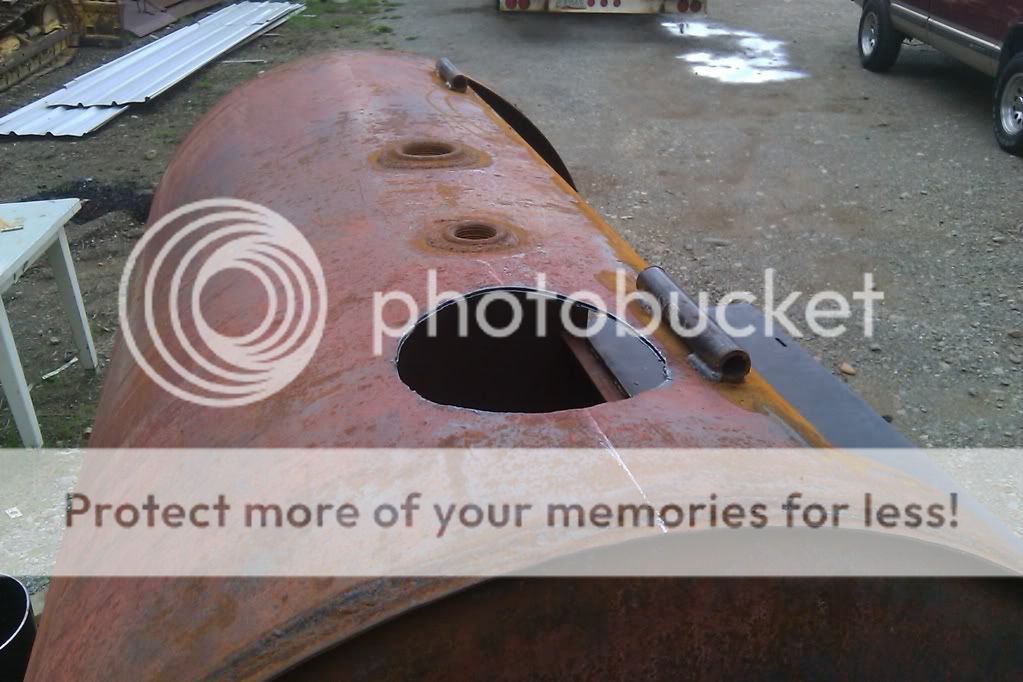
IMAG0181.jpg


Hole cut in top for exhaust.

IMAG0182.jpg


Forming our hot water coil (wrapping it around our exhaust pipe)
IMAG0184.jpg


Fabricated a bracket to hold water coil and welded in place. Wrapped some wire around to keep coils from moving when driving.

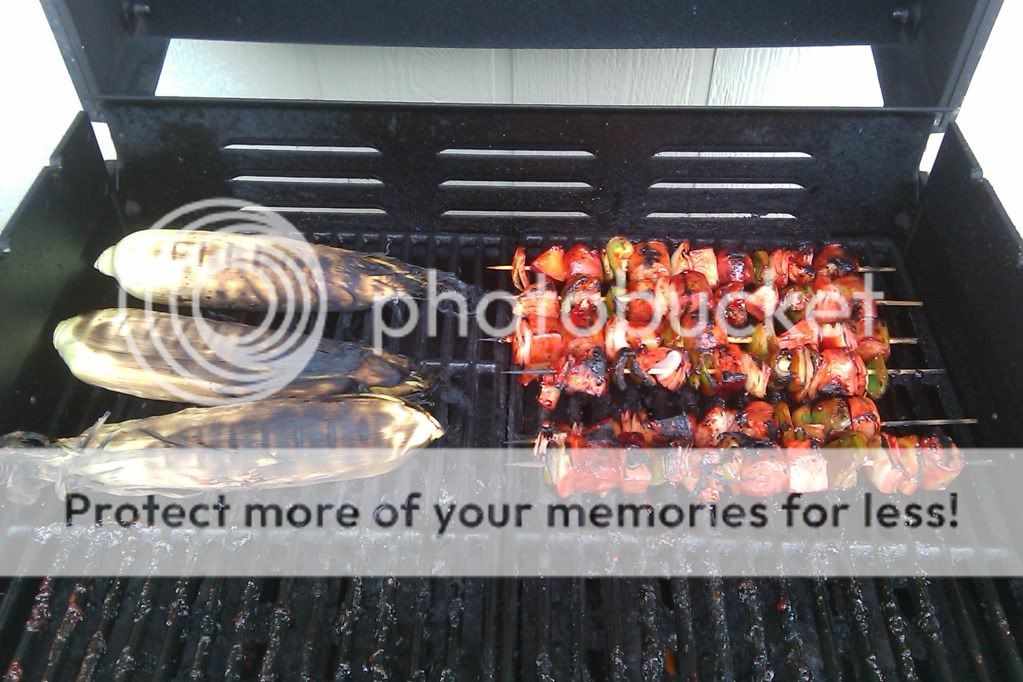
IMAG0183.jpg


Shish kabobs with Cherryaki glaze and some corn on the cob. Boys gotta eat!

IMAG0185.jpg


Karl climbed into the smoker to get some metal welded.

IMAG0186.jpg


Smoke baffle. We pieced it together out of steel we had laying around. The squares are patches to cover up some holes that were in the steel.

IMAG0187.jpg


Smoke gap on the right hand side. We made the gap between the end of the smoke baffle and the side of the smoker 10% less square inches than the opening from the firebox into the smoker, hoping it will stall the smoke just a little.

IMAG0188.jpg


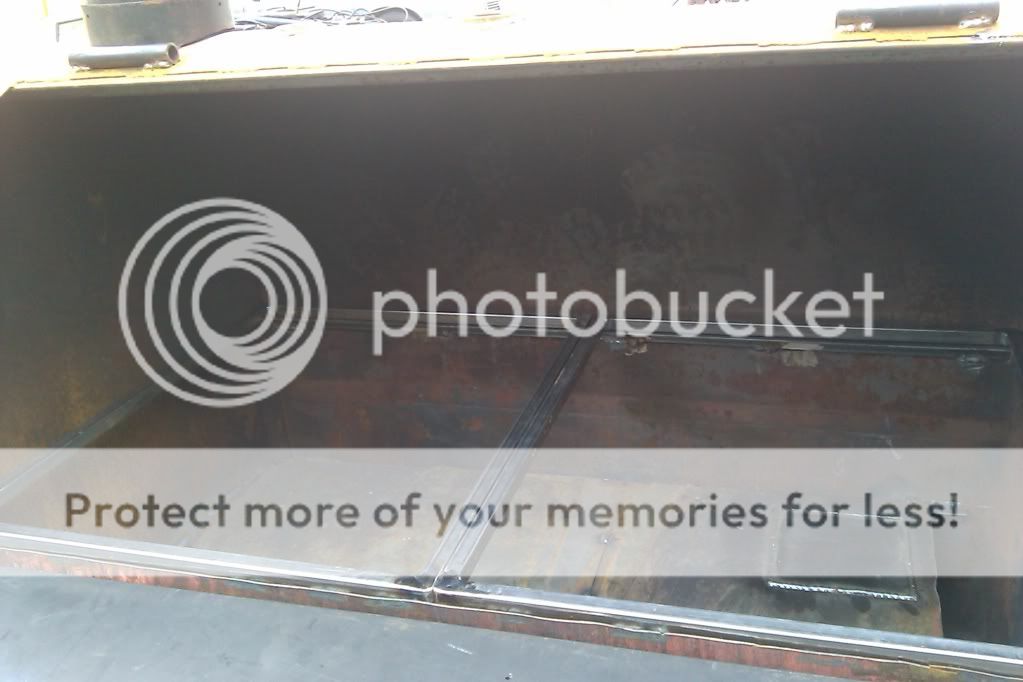
These are the frames we welded up for our cooking grates. Just have them sitting in there.

IMAG0189.jpg


Water inlet & outlet from hot water coil. These will have fittings and a valve & a T&P valve (for safety) in the future.

IMAG0190.jpg


Side shot of the trailer at the end of the day. Note that cowboy hat Karl fabbed up is just sitting on top of exhaust pipe. We are thinking of welding the cowboy hat about 4 or 5" above top of exhaust to keep rain out (don't know if we like the cowboy hat yet).

IMAG0191.jpg


Another shot of the trailer.

IMAG0192.jpg


IMAG0193.jpg


Cooking grates. Expanded metal is just sitting there for now. Will tack in place tomorrow.

IMAG0194.jpg


Karls cowboy hat.

Hopefully we will be done tomorrow. Gonna give it our best.
 
Last edited:
very cool! i'm anxious to see how your water coil works for you as I am designing one to go on the trailer build I am assembling now. Where did you place it?
 
very cool! i'm anxious to see how your water coil works for you as I am designing one to go on the trailer build I am assembling now. Where did you place it?

I actually hung it from the bottom of our smoke baffle. I wrapped the copper around our exhaust pipe (6") to form the coil. It is situated so that the smoke can blow through the "hole" in the middle of the water coil. I plan on putting a ball valve on the inlet side so that I can shutoff the water to the coil if it is not being used for awhile. I also plan on putting a tee on the outlet side with a T&P valve from a water heater in the end of the tee for safety(the T&P would open on either 210 degrees or 30 PSI). The tee side of the tee would go to my hot water side of the faucet. I am very anxious to see how it works as well and will keep you posted! :-D
 
Just to put in my .02 on something that I know almost nothing about, Have you thought about steam?

I once built a home heating system with sort of a coil in the fire place. It blew up the first time I used it.:laugh::laugh::laugh:

Seriously, you can get hurt. My solution was to have the water circulating constantly, and used a 80 gallon storage tank with a relief valve so the water didn't get too hot. Worked perfectly after that mod.

Nice build, good luck.
 
My build for the heat exchanger is actually significantly simpler in that I won't need a blow off valve or expansion tank. It could be installed in any pit with a stack and be installed anytime.

I'll let you know what I come up with.
 
IMAG0192.jpg


Just a thought about this picture - Have you thought about some kind of fold-down piece of steel reinforced with some L bar steel to serve as a platform for you to stand on while you are working the meat on the smoker? It would extend over the side of your trailer, but would make it a little safer for you to work. You could fold it/stand it up for transport.

The only rub would be the wheel in the middle. Just a thought. :)
 
Just thought I would update you guys on the progress...been so busy this year competing & starting a local BBQ Association!

So in our first sanctioned competition (Smokin' The Coeur d'Alenes - June 2010, Coeur d'Alene, ID - PNWBA) we placed 12th overall out of 29 teams. Our best score was Pork Butt (7th place). We didn't walk, but we learned a GREAT DEAL about competing!! We have done about 5 cooks this first year of competition and I believe we will see some major leaps and bounds in our progress this next season.

As for the smoker.....it works better than I could have ever hoped and alot of the credit for some of the design math goes to the Brethren (couldn't have done it without you). The tap handle doesn't get hot enough to worry about (even after smoking for 2 days straight). I ended up building a start assist fueled by propane to get the wood going (Didn't want to use a weed burner like others) and even put an electronic ignition system on it. Wood consumption is average for a stick burner of this size. I am working on a homebrew stoker that will allow me to wirelessly monitor my meat temps and smoker temps and cycle the stoker fan on and off to maintain temperature and all be done wirelessly to my laptop or phone. The stoker controller has a built in webserver and can also send my messages by Twitter or Text. Will let you know how that goes. (just trying to improve efficiency of my smoker).

We DID end up adding a swing out grill behind the pit. It is made of a 35 gallon well expansion tank (to keep up the theme). I put charcoal and wood in it and use it as a pseudo Santa Maria. I am working on the frame for the sink cabinet right now (smoker is in storage for the winter) and will be adding a double sink with faucet and a small (24"x24") countertop area to the right of the sinks (This will also double as the cover for my small refrigerator. I am going to add a water storage tank under the sink and a gray water tank under the trailer (for the drain).

I decided not to use the hot water coil I built into the pit as I would still need a storage tank and a circulating pump on the trailer and space is limited. Eccotemp.com has a tankless water heater (Model L5) that costs $117 on Amazon with free shipping and runs on Propane, comes with hose and regulator, heats water from 80 to 150 degrees and runs up to 18 hours continuously on on BBQ propane tank. The water connections are standard 1/2" Plumbing connectors and it even comes with a hand held shower head. Ignition is taken care of by 2 "D" size batteries and only occurs when there is a demand for hot water. I am going to mount this to the side of my sink cabinet that faces the rear.

I will post some new pics soon as the trailer has been painted several times already (one guy at a comp. said, "Do you paint that rig for every competition?" I just smiled and said, "Why YES I DO!"). We have also painted our logo on the smoker door. I plan on adding frenched tail lights with diamond plate flame cutouts and airbrushing some flames down the sides of the trailer. I am also going to have my logo laser cut out of diamond plate with 1" Standoffs so I can mount it to the rear of the pit (So everyone knows who is in front of them while underway).
We have had many requests to build a pit "exactly" like this one, but so far nobody has come up with the money yet!!

Anyways, thanks again to all the GREAT BRETHREN on this site! Couldn't have done it without you. Hope to see you on the trail......JayBirde
 
I can't wait to see more pics, pretty cool build.
 
In case anyone is interested, I have two of those tanks in very good condition, (they were for new product oil) I'd be willing to sell one if someone in Norcal wants one. I have a 120 gallon and a 240 gallon.
 
Back
Top