New Clone build started

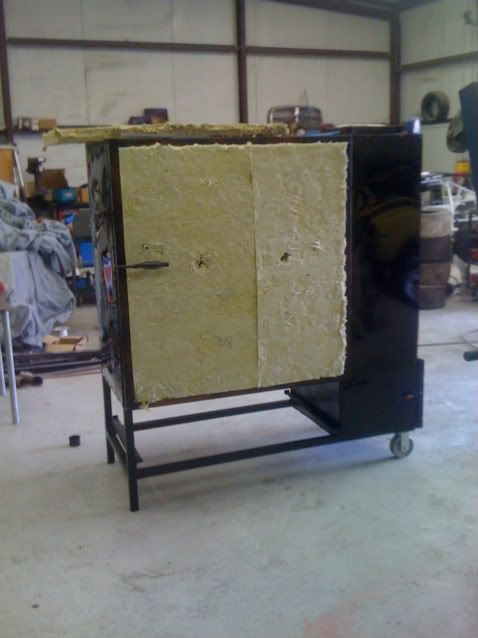
No new pics, but I did make some progress. I got the door frames built and hung. I did the skin for the ash box door. I also finished the racks. I capped the top witrh angle iron. I think it makes it look a little better. It definitely made them more stout. I'm headed back out in the morning to try and get everything close to done. Gotta finish the door skins, put on the gasket, then cut the outer skins. I should have insulation by Wednesday at the latest. Then I can get it insulated and button up teh outer skin. On schedule to cook for Memorial Day!!!
I'll also take some detailed pics tomorro and post them up.
 
We got some more done yesterday. And I took a bunch of detail pics, and then of course I left the camera at the shop. So I just have this one from my phone.
001-1.jpg


You can see we got the therms mounted, and the handle put on. I did some painting on the parts that will be exposed after we skin it. We also got the outside skin cut and broke, so as soon as we get insulation we can have that part buttoned up. We are going today to pick up a couple more peices for the top and bottom and the brushed piece for the door. We did run a test fire to check for leaks and found a couple. But a quick shot with the welder and those are fixed. It came up to about 215-225 at about the hour mark, but we could only get it up to about 250 with the ash box door cracked. Is this normal without insulation? There was a bunch of heat coming off the firebox, and it was heating very evenly. I am hoping that when we get the insulation in that it acts the way I think it is supposed to.
I did add a coupel of things that I have never seen on builds before. We did a little slide baffle iside the top, so if I need to it I can baffle the exhaust down. Dont know if I will ever use it, but it would sure be easier to put it on now rather than later. We also put an extra set of runners under the cooker. Instead of putting a shelf like I have seen some do, we just ran some angel iron so you can put an cooking grate uder there if you dont need it. I think it works better than leaning it up against the side of the house.
 
Almost finished. We got most of the outside skins on. I still have to do the doors and the top, but it is definitely taking shape. I am very happy with the way it is coming along. I am headed back out this morning to try and get it finished up. If everything goes well, she will be home tonight.
001-2.jpg

002-1.jpg
 
I am using mineral wool insulation. It comes in 2x4 sheets in just about whatever thickness you want. I am using the 2 inch stuff. It cost me about 75 cents a square foot at spi. There was a distributor in Austin which isn't far for me so I just went and picked it up.
 
She is finished and home. Here is a final pic and a link to some others. This was a blast to build, and there is now way I could have done it without the help and inspiration from those here. Now, excuse me while I go play with my new toy.
DSCF1289.jpg

And here is s a link to the album with some different pics. And for those out there planning a build, all I can say is get going. That first step is the hardest.
http://s222.photobucket.com/albums/dd89/mwells32/Smoker Build/
 
Looks amazing! Wish i had the time & money & equipment to build like that!

I'm a little confused tho. I've never seen a design like this before- how do you get your coals in? I must be missing something somewhere.
 
Last edited:
Nice job, I still like the fact that you can put whole logs in the bottom of your fire box:p
Look forward to seeing some food pron!
 
Looks amazing! Wish i had the time & money & equipment to build like that!

I'm a little confused tho. I've never seen a design like this before- how do you get your coals in? I must be missing something somewhere.

It's a gravity feed, and a nice one at that. The right side is a coal chute that you fill and as the fuel burns it replenishes itself. Stumps style.

4 stars
 
It's a gravity feed, and a nice one at that. The right side is a coal chute that you fill and as the fuel burns it replenishes itself. Stumps style.

With all that coal piled up, how do you keep it all from burning at once? doesn't the fire just travel all the way up the chute? Also, if there was a door to that inside chamber, I missed it.
 
With all that coal piled up, how do you keep it all from burning at once? doesn't the fire just travel all the way up the chute? Also, if there was a door to that inside chamber, I missed it.

I'm not an expert on Stumps, there is your disclaimer. I believe that the draft or convection keeps the fire in the box, as there is no O2 in the chute.

I may be and probably am wrong.
 
Yes the stumps design is a gravity feed. The top of the chute is sealed so that the coal doesnt burn all the wayup. There is a valve in the lower ash box door that lets air in and is used to control the heat. A transfer tube runs from just above the grate to into the cooking cahmber. You can see it along the bottom. It is a very efficient design. I am using about a pound of coal per hour at 250-260 degrees.
 
Back
Top