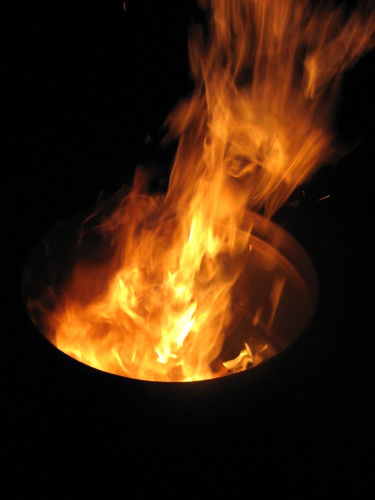
Personally, I'd do a good high heat burn out of the drum, just for my own peace of mind.
I would think 2" would suffice for the depth of your ash catcher.
I use Kingsford, employing the Minion Method, and I haven't had a bad cook from it yet.
On my DrumPit, I use the 2" bunghole for the exhaust, I have it plumbed with an 8" straight pipe topped with a 90* elbow.
DrumPit1.jpg


Hello all. n00b here. Building my first drum smoker, wife thinks I'm crazy (she was doing okay until I walked in with a weedburner):-D

I have most of the bits and bobs gathered, almost ready to start assembly. I have a number of questions which I was hoping the brethren can help me out with ( I promise the pron will come when I start assembling).

1. I bought a reconditioned drum - no liner, no rust inhibitor, painted lid and painted on the outside. The place I bought it from said that all drums had the inside burnt out. The inside has just a bit of rust, and some soot when I run my finger along the inside. I figured that if I washed the inside a few times I should be good to go?

2. I made a charcoal basket about 16" diameter and about 9" high. Found out that bending/shaping expanded metal when its 25F outside is nearly impossible, but much easier when it is 60F! I was going to use an 18" cake pan as the ash pan. Should the pan be 2" deep or 3" to catch the ash generated from a basket of this size? Also, how far above the rim of the pan should the basket be? 1"?

3. A few years ago I got a good deal on bags of Royal Oak hardwood lump charcoal, but it has lots of scraps in it as well as small pieces. I have been to the naked whiz site over the years, but was wondering what most other folks have been using (especially in the Houston area), and where they get it from. I have been tempted by regular Kingsford briquets and the promise of a slow even burn, but I'm worried about the meat tasting funky if the Minion Method is used for the fire during smoking.

4. The lid has the standard large and small bungholes. Do I need to drill extra holes in the lid to get good air flow? The bottom will have 3 intakes (1 of which will have a ball valve).

Thanks. I can start a new thread if that is what is preferred.
 
N8man: thanks for the tips. I like your DrumPit, especially the portability. I was going to use the ball valve to regulate the intake, but your magnet seems to be a cheaper option - maybe I can save a few bucks. Was going to drill intakes in the bottom and use nipples with caps, but I think I'll switch to the magnet/hole combo.

Does adding the stack to the exhaust add anything in particular? i have seen some folks add one, but not all.

I also noticed that you still have the bolt ring on your drummie. Does that help keep it air tight during the cook?

Have a good weekend!
 
The upright stack is very important, as it keeps old/fat/drunk Q'ers from falling over when making adjustments. Besides, it looks cool!
 
I think that having a piped exhaust is just a personal preference but not an end all, be all, requirement, same for having a raised air intake. It was just the direction I took my build. In the beginning of my DrumPit, I used
cheap sheet magnets to manage the air intakes, but over time they
lost their magnetism and I have since switched over to ceramic magnets.
I use the lower Drum Clamp to meld my original DrumPit with the extension I added, the upper Drum Clamp I use for overnight cooks, lock it down and keep the neighbors and critters outta my Pit!!!:biggrin:

N8man: thanks for the tips. I like your DrumPit, especially the portability. I was going to use the ball valve to regulate the intake, but your magnet seems to be a cheaper option - maybe I can save a few bucks. Was going to drill intakes in the bottom and use nipples with caps, but I think I'll switch to the magnet/hole combo.

Does adding the stack to the exhaust add anything in particular? i have seen some folks add one, but not all.

I also noticed that you still have the bolt ring on your drummie. Does that help keep it air tight during the cook?

Have a good weekend!
 
Really, really, reconditioned drum!

Hello all!

Been lurking for days reading, studying, and planning my first UDS build.

I have a question for the veterans . I located a company that reconditions open top drums. I mean, really reconditions!
- wash
- run through an industrial furnace to burn off all coatings inside and out
- bead blast to remove any remaining ash and paint
- wash
- paint ( I talked with them and I can get the drum before paint )

My neighborhood frowns on large fires, so I'm wondering, based on the above treatment, would I be OK with just a high temp seasoning burn or two instead of a full on pallet wood burn?

Thanks for all the wonderful information, advice and photos! can't wait!

Dave
 
If you can guarantee they burned and blasted it then you should be good to go after a quick washing.
 
Excellent! Very good ideas. I tend on using some of them on my next build. Thanks for sharing!
 
Hello all!

Been lurking for days reading, studying, and planning my first UDS build.

I have a question for the veterans . I located a company that reconditions open top drums. I mean, really reconditions!
- wash
- run through an industrial furnace to burn off all coatings inside and out
- bead blast to remove any remaining ash and paint
- wash
- paint ( I talked with them and I can get the drum before paint )

My neighborhood frowns on large fires, so I'm wondering, based on the above treatment, would I be OK with just a high temp seasoning burn or two instead of a full on pallet wood burn?

Thanks for all the wonderful information, advice and photos! can't wait!

Dave

I bought my drum new and they told me that nothing was on the interior so I didn't see the need for a big burn in it.
 
Airbalancer (Mike), your build looks great! One question, is your ash pan a galvanized pan? If so you may want to use something besides the galvanized, especially since the hot ashes will be on it. Also be very careful welding it as I'm sure you know!! Just my .02 worth!
 
One question, is your ash pan a galvanized pan?

It is galvanized but its actually under the expanded metal basket. It's one of the few things I've seen at tractor supply thats made in the USA, and only $2.99. :) I did tack weld it on, but who hasn't done that before :-?
 
It is galvanized but its actually under the expanded metal basket. It's one of the few things I've seen at tractor supply thats made in the USA, and only $2.99. :) I did tack weld it on, but who hasn't done that before :-?

What if a few hot coals drop through? I would swap out the galvanized component. Not worth the risk.
 
I would like toss my UDS on the pile, and thank everyone for all the great info.
Cheers :)
Mike

http://www.youtube.com/watch?v=k_pNTgfrhEI
DON"T Toss that on the pile, it raises near the top all by itself.

Those racks alone are a work of art. Excellent idea there.

I can see using something like that idea on the charcoal basket to get the charcoal basket height to where one could grill at 300C (575F(unny) degrees approximate) or higher
 
Back
Top